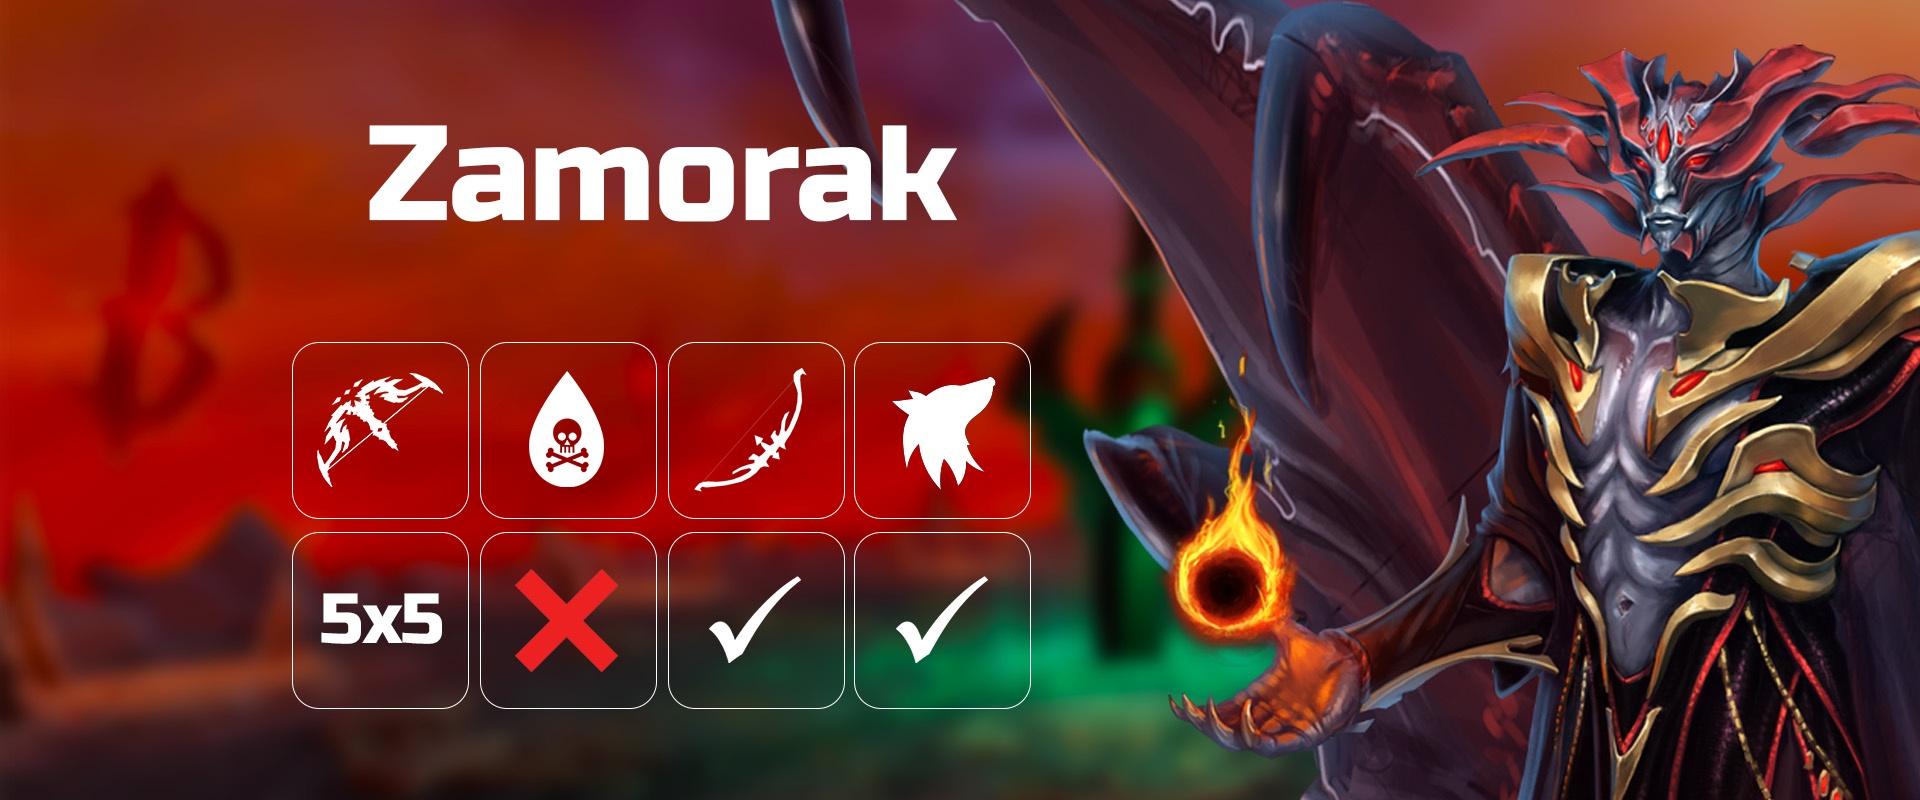
2000% Group Zamorak
Zamorak - Group 2000% Enrage (2-5 man)
Introduction
This guide focuses on obtaining consistent 6 kill hours at 2000% enrage in groups of 2-5 at Zamorak. The strategies in this guide assume a strong knowledge of the Zamorak encounter already from #Zamorak Basic Guide / #unknown-channel, and require near-BiS gear as well as solid execution. In addition, strong improvisational skills are required in case of non-regular spec order.
This guide assumes a STRICT order - any deviation from phasing on these specific specs will invalidate the rest of the guide.
Preset and Relics
 Penance Powder
⬥
Penance Powder
⬥  Spirit cape unlocked
⬥
Spirit cape unlocked
⬥  Demon slayer perk is helpful
•
Demon slayer perk is helpful
•  +
+ 


 •
• 


 •
• 


Role Breakdown
Base
⬥  +
+  +
+  the entire team on P2 Flames of Zamorak spec
⬥  + the entire team on P5 Chaos Blast spec
⬥ apply  +
+  on P1-6
⬥  the team throughout the entire kill
⬥ apply on P7 before lowering runes
⬥ lure the boss close to pad locations
⬥ preventing Zamorak from increasing his max hp on grey hp via well timed DoT abilities ( /
/  /
/  )
)
DPS1
⬥ +  + the base on P2 adrenaline cage spec
⬥ apply  after
after  on P6
on P6
⬥ apply on P7 before lowering runes
⬥ kill witches ASAP on every grey hp transition
DPS2 (only in trio/4man/5man)
⬥ kill witches ASAP on every grey hp transition
DPS3 (only in 4man/5man)
⬥ + + the base on all non-P2 adrenaline cages
⬥ Stay outside and  the boss after it is phased into grey hp on every phase
Additional Role Notes
In general, more than 2 witch killers will not improve killtimes at all. Instead, if doing 4 or 5 man kills the extra players should stay outside and use DoTs to help prevent healing + apply to lower damage taken.
Additionally, any more than 3 people killing runes on P7 tends to not improve killtimes. One of the extra players should  + after
  +
+  to drastically reduce the damage taken during P7.
Edict Order
This guide assumes order of 2-4-1-3-6-5
Witch Killing Rotation
Since the base has a limited amount of DoTs to use, it is imperative to kill the witch ASAP on every phase to prevent grey HP from increasing too much.
Duos (one witch killer)
⬥ Press extra action button → +  +
+  +
+  → tc +
  +
+  →
→  → swap to melee →
  → ( if off cd) +
  →
→  → swap to mage + → improvise
Trios or larger (2 witch killers)
⬥ Press extra action button → + + + → swap to melee → tc + ( if off cd) + + → → swap to mage + → wait 1t → press extra action button →
P3 Witch
⬥ Due to zerking on P3, your melee abilities might be on cooldown. Improvise with strong magic abilities ( /
/ 
 /
/  / ).
/ ).
Handling Mechanics
Flames of Zamorak
Base: stand east + in MD of Zamorak for flames specials on P1 and P2 to force smoke upon yourself
DPS: stand west of Zamorak for flames specials on P1 and P2 to allow the base to stand MD and tank smoke
Note: if there is any smoke on the ground from getting a Flames of Zamorak spec towards the end of P6, use to pick it up off the ground before phasing into P7
Adrenaline Cages (except P2)
P2 adrenaline cage should always be handled by DPS1 + + the base tank
Duo/Trio:
⬥ Very close/already phased → Base tanks the cage on their own (  /
/  /
/  )
)
• This allows the DPSers to go into infernus and kill the witch earlier
⬥ Far from phasing → DPS1 + + the base tank
4man/5man:
⬥ DPS3 + + the base tank
Infernal Tomb
⬥ All players should → ... →  on last tick to instantly proc the large hit. Example clip of proper stun timing here.
• If any stuns were missed, DPS1 should + the entire team prior to leaving Infernus.
⬥ Demons
• (dw) 
 (2h) →
  → thresholds to clear
Chaos Blast
⬥ Phase 4
• Everyone doing pre- → → improv →
  +
+  +
+
⬥ Non-Phase 4
• Base  +
+
Rune of Destruction
As base, be careful where you stand towards the end of the Rune of Destruction spec, as getting an Adrenaline Cage + black smoke from the Rune hitting at the same time can be deadly.
Other Important Information
Spec Timing
Autos carry over between phases. Zamorak naturally has 5 autos between specs on green hp which can carry over from green hp to red hp on next phase.
e.g. boss does infernus spec on P1, followed by 2 autos before phasing into grey hp gives 3 autos on the next red hp before he will do a spec.
This is important as knowing how many autos before a spec will occur on the next red hp phase will change how early you want to charge the pad if you're trying to skip the spec.
After phasing from red hp to green hp, Zamorak will ALWAYS use his next spec after 1 auto.
Grey HP Healing Prevention
If the boss' hp is at it's max grey hp, every tick it will slightly increase it's max grey hp. To prevent this, on every tick the boss must be below its max hp, which can be achieved by having a hitsplat land on every tick. Such methods include using damage over time abilities such as and back to back in order to completely prevent healing. This is one of the most important things that the base tank must do to have smooth and fast kills.
A standard rotation to prevent healing in trios or above looks something like this: → → → 
In duos, the base may have to use DoTs more sparingly due to the witch killer taking longer ( → → → → )
 Prisms of Restoration can be cast at the start of every phase to allow for more ripper demon specs.
⬥ All Tsunamis
Prisms of Restoration can be cast at the start of every phase to allow for more ripper demon specs.
⬥ All Tsunamis The Fight
Note: it is assumed that all are used by base
Pre fight:
⬥ (autocast  to get 5 stacks) →
  on second last witch → (autocast
  ) → build to 100% adren with defensives + autos while killing last witch near pad 2 →
Phase 1
P1 general overview:
The aim of P1 is to lower  as close to phase HP ASAP before infernal tomb occurs, then instantly phase → apply on specific ticks before going in to reduce the amount of healing that is able to do while in Infernus.
Base
⬥ (autocast) → pre near pad 2 → tc + → to pad 2 → → → → (autocast ) 
 (drag into MD of your by moving east then run back into your ) → → →
  → → improvise
  / /
/ / 
 /
/
⬥ + + 
 on Flames of Zamorak spec
Base must be east in MD of to minimize black smoke.
⬥ + after 2 autos post  hit to reduce the explosion damage
Once Zamorak is ~100k off phase HP west towards pad 4 to bring him to the correct location for next phase
DPS
⬥ (autocast) → pre near pad 2 → + → → → (autocast ) → → → → → improvise / / / /
Make sure to not be further east than your base tank + also not be in MD when the flames attack hits as to not accidentally grab smoke
⬥ + + on Flames of Zamorak spec
Do NOT phase Zamorak into grey HP until the Infernal Tomb message occurs
Phase 1 Infernus Setup:
5 autos after Flames of Zamorak, will do the Infernal Tomb spec. The aim of this rotation is to instantly phase into grey hp (making him heal) ASAP after Infernal Tomb message starts in order to spawn the witch + demons simultaneously, making it easy to stack them for massive AOE damage, while also preventing from healing via applying on specific ticks.
All of these rotations start on the tick that says "step into the dark" as yellow text appears above his head.
Base
⬥ (autocast ) + → → →
DPS
⬥ (autocast ) → → stall → release +
This lines up magma hits so that cannot heal while magma is still dealing damage
While in infernus:
Base
Immediately run 1 tile east of the witch spawn location so that demons + witches stack up for big AOE damage
DPS
Stand several tiles west of the witch so as to not prevent demons from aggroing base and stacking up for AOE
In duos: Base should use 
 to help with aoe damage
In 4man/5man: DPS can skip , Base can instead of .
Base
⬥ (pray and be above 6.5k lifepoints) → + east → (target any demon)  → → (target witch) →
  → ( if demons still alive) → / to rune
DPS
⬥ (target any demon) → (target witch) (4t) → → → → ( if demons still alive) → / to rune
Note: Both DPS and base can use defensives to continue building while people are running to runes.
Phase 2
Phase 2 general overview:
The aim of phase 2 is to skip spec during red hp, DPS1 + + the base on Adrenaline cage, then phase the boss instantly after Flames of Zamorak spec occurs. The base should + + the team while being MD to generate as little smoke as possible, dps should stand west of Zamorak + not be in MD in order to avoid accidentally grabbing smoke
Base
⬥ + + + → build to +  → → → → (autocast ) + move to not give teammates AOE damage from adrenaline cage spec → → improvise / / / /
DPS
⬥ → build to → → → → (autocast ) → → improvise / / / /
On Adrenaline Cage spec:
DPS1 + + the base tank
Once is ~100k off phasing, base should + east as far as possible to bring close to pad 1 for the next phase.
On Flames of Zamorak spec:
Base
⬥ stand east of , in MD → + + entire team.
⬥ After smoke comes out, stall 's hp with DoTs
⬥ reapply +
The smoke will hit on different timings depending on how many autos it took after Flames of zamorak spec happened before phasing into grey hp.
⬥ 0/2/4 autos: smoke and auto hit different ticks (can use / / + )
⬥ 1/3/5 autos: smoke and auto hit same tick (use or to reduce the damage taken)
DPS
⬥ stand west of , out of MD
⬥ dump / to phase into grey hp, ideally with 0 autos after spec
⬥ kill witch after hit
Phase 3
Phase 3 General overview:
The aim of phase 3 is to skip spec on red hp, followed by everyone stunning on the correct tick pre-Infernus, ice barraging demons + aoeing them down, then DPSers  after coming out of Infernus to phase instantly after adrenaline cage.
All
⬥ → build to + → → → → (autocast ) → → improvise / / / /
Try to backload damage if possible, you want green hp to be as low as possible while still managing to skip spec during red HP.
Phase 3 - Infernal tomb
(Infernal Tomb message) → → ... → on last tick
⬥ demons → any stacked demon → → → basics to get to 100% adren → + to rune
Base
⬥ + → improvise / / / / 
DPS
⬥ →  → improvise
  / / /basics
Phase 3 - Adrenaline Cage
Phase boss to grey HP ASAP after Adrenaline Cage spec
Base
⬥ (ac ) / / after dealing with adrenaline cage damage
⬥ + onto pad 3 → reapply + +
⬥ northeast from pad towards your teammates after pad is fully charged
DPS
⬥ Kill witch → (ac ) +
Phase 4
Phase 4 General Overview:
Place just west of pad 2 so that on protector spawn everyone is in range to instantly kill it. DO NOT SKIP spec on red HP. While improvising it is important to save → for chaos blast. + + to mitigate the blast. Lower boss' hp during rune, then instantly phase after adrenaline cage.
⬥ + →build to → → → (target protector) → (autocast ) → (target zamorak) → improvise / / → (as chaos blast spec starts) → → + + → improvise again
Base should + as far west as possible slightly after chaos blast to move the boss closer to pad 6 for next phase.
Phase 4 - Rune of Destruction
Avoid smoke hits. The lifeweaver that spawns west can be ignored, unless the boss is already close to being phased and there is still time to kill the lifeweaver.
Lower boss' hp until Adrenaline Cage spec → dump thresholds to phase into grey hp.
Phase 4 - Adrenaline Cage
Base
⬥ (autocast ) / / adrenaline cage damage → + onto pad 6 → reapply + +
DPS
⬥ Kill witch → leave infernus → + towards pad 6 →
Phase 5
Phase 5 General Overview
Everyone should as close to pad as possible to take advantage of pad 4 bonus damage from being near a rune, skip spec on red hp, DO NOT STUN on chaos blast → phase boss to grey hp → base + the team.
At this point your ability cooldowns are quite a bit lower than normal:
⬥ prioritise + as you can use them multiple times per
⬥ make sure to first in in order to have it back for P6 on time
⬥ + → build to + → → → → improvise / / / / /
⬥ if close to phase, again after second to save a couple seconds
Phase 5 - Chaos Blast
Base
⬥ + entire team as chaos blast ends →  → turn /
  back on → / / → / northeast so is slightly northeast of pad 5 → / onto NORTHEAST TILE of pad 5 (this lures so that everyone can be on a safespot tile for P6 rune spec)) → reapply / /
DPS
⬥ Enter Infernus as the chaos blast hits → kill witch → put cryptbloom armour on → 1 tile east of pad 5
Phase 6
Phase 6 General Overview
→ , skip red HP spec, ideally kill before Flames of Zamorak
Assuming the boss is lured correctly and all are standing next to the southeast corner of pad 5, the smoke should only hit each player at MOST once until very late into the rune spec, so there is no reason to move to avoid it until then.
Note: DO NOT unless you have 10s cooldown or less
⬥ + (ac ) + → → → → → → → → → (autocast ) → → → 3t → → → → → → →
If Flames of Zamorak spec:
⬥ +
⬥ to pick up all the smoke right before boss dies to not get damage reduction on P7
Phase 7
 auto from
 Generally any more than 3 people on runes is not going to save any time. In 4mans or above the extra players should at the back/side of and apply so the large hits do much less damage.
Phase 7 locations
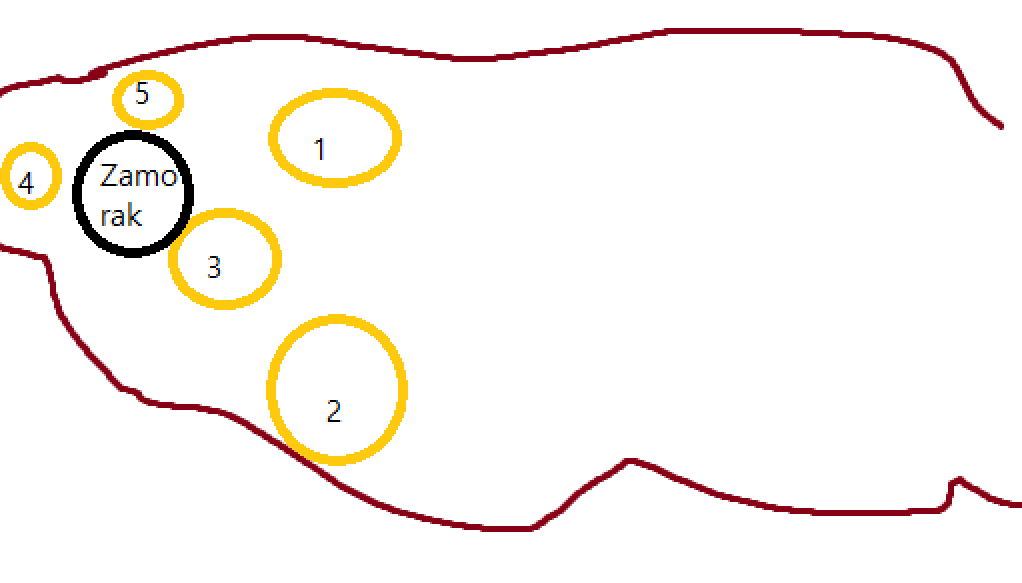
Phase 7 Rotations
On entry: + walk west 2 tiles → (ac ) tc demon + → → basics to kill
Safe Strategy:
For less consistent 1 cycles, easier to execute. While staying high hp during runes:
⬥ → improv / / / to kill runes → + after last rune, ac → improv / / →
⬥ just before large hit → + + →  + ac + → → → melee hit → → any non-ed teammates
2nd cycle:
⬥ wait for cooldown → → → →  → kill last rune → → →
Example Kills