Necromancy ED1
Temple of Aminishi - Necromancy 

Introduction
⬥ Rotations are written for each of the three ED1 bosses and the monsters inbetween. The rotations can be adapted as required.
⬥ Boss rotations assume you have the Invigorating 4  and Impatient 4
  perks on your armour.
⬥ It's recommended to set your anti-spam delay on  to 1 via the Lectern at Anachronia.
⬥ You can or  a tick before each gate unlocks to save a tick on every entry.
⬥ Darkness  can be used and reapplied where required to mitigate the damage taken while learning, however it should be avoided when comfortable with the encounter to avoid losing Divert
  adrenaline and Vengeance
  damage.
Preset and Relics
Preset Notes
⬥ Hand wrap of the First Necromancer  should only be worn when summoning conjures or for Seiryu Crystals. Otherwise, Cinderbane Gloves
  should be used.
⬥ It's possible to bring Lucky Charms  for some extra profit at the cost of Dungeoneering tokens.
⬥ Mobile  perk is a must have on gear.
• Alternatively, use Shadow's Grace  .
.
⬥  Luck of the Dwarves will not improve the number of scales dropped.
⬥ This guide assumes that Kal'gerion Demon Scrolls  are used, which can be set to autofire and will auto-renew as the buff expires.
Dungeon Walkthrough
Pre-Sanctum
 →
→  →
→  →
→  →
→  →
→  + +
+ + 
4 Elite Sotapannas
(tc) (wait 1t)  →
→  + click sotapanna directly north +
  ( → click southeastern sotapanna to
  if not cleared) →
  + + + + + +
9 Elite Sotapannas
(tc) →  →
→ 
3 Elite Sakadagami
 → (walk back to lure) →
  →
→  (target middle) → →
  / /
/ /  until dead →
4 Elite Sakadagami + 1 Elite Sotapanna
 + → →
+ → → 
3 Elite Sakadagami

 + → / / if stragglers until dead, + to next barrier, using ,
  → build with stack basics and to 100% adrenaline on Arhats along the way
3 Elite Sakadagami
+ → → (target middle) → → → →
Sanctum Guardian

Rotation
Pre → if not already active.
+ 
 → (tc)
  +
+  → → → → →
  +
+  → → → → →
  →
→  +
+  → → → → → → → → → →
Post Sanctum to Pre Masuta
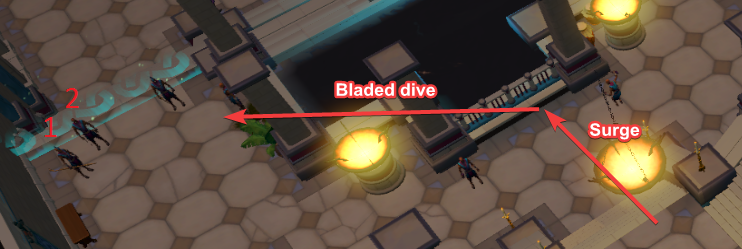
2 Cloaked Zealots
before exiting sanctum door → → → + + → + to the 2 Cloaked Zealots. → →
3 Cloaked Zealots
tc + + → → + to the 3 Cloaked Zealots
+ + +
1 Cloaked Zealot
if 3+ stacks and high adren, else on approach and basics
3 Cloaked Zealots
→ → → (target middle) → → (target left) → (target right) + to middle tile of top platform by railing
6 Cloaked Zealots
→ → tc + + click door
2 Elite Sakadagami
→ (if 5  stacks, else → ) +
4 Renegade Menaphite Soldier + 2 Eastern Mercenary
(tc) (Eastern Mercenary) + → and basics if below 60 adren → + → → → > finish stragglers with / / → tc +
4 Cloaked Zealots
+ on approach → one of the middle 2 → → target furthest from bloated and // stragglers
→ → masuta entry
Masuta, the Ascended
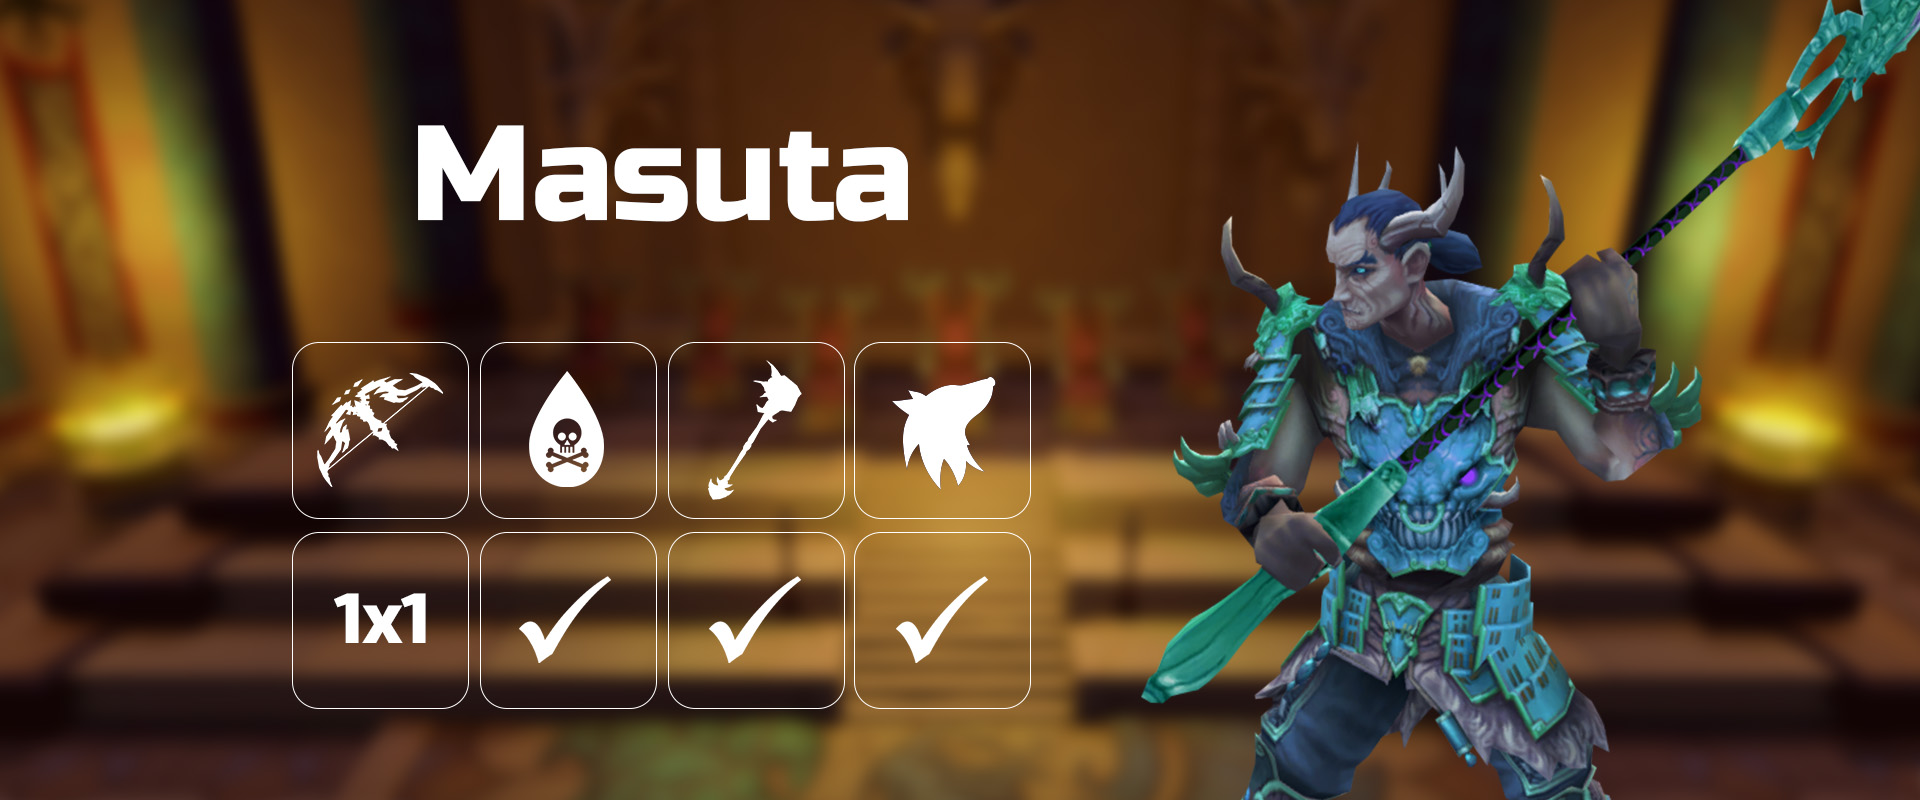
⬥ Phase 1 Notes
• The rotation in this phase depends on whether it is a normal Masuta kill or an advanced Water skip attempt. This section has been broken down for each option respectively. Water skip kills are approximately one minute faster, but are difficult to consistently obtain and require a good understanding of the boss's mechanics.
Masuta (Option 1 - No Skip)
Pre → →
Phase 1
(tc) + → → → → → → → → → → → → → → → 
 → (improvise if not phased)
Phase 2 (Waters)
⬥ Soulsplit  and hit Masuta between water spawns to save food. Use
  if needed.
⬥ Build to 5 + 12  on Waters with + , kill waters upstairs. Build adrenaline with basics.
⬥ Before Phase 3, use → →
Phase 3
1 minute 20 seconds after phase 1:
→ (tc) + → → → → → → → → finish with / /
⬥ Save for Seiryu.
Masuta (Waters Skip) - Advanced
This rotation is advanced and does not guarantee a skip. Where successful, this rotation should save one minute on the Masuta kill.
Explanation:
⬥ Masuta phases to the timelocked Thrashing Waters special at 275k hp, and can no longer phase after 55k hp. The goal of this rotation is therefore to kill Masuta on the 'Persistent Hurricane' spin attack (the long special attack) so it cannot phase into the Thrashing Waters phase.
⬥ Masuta's attack pattern has a random number of auto attacks between specials, but the number of auto attacks follows a normal distribution, meaning you will fgenerally encounter the following pattern:
⬥ 2-4 auto-attacks
⬥ Persistant Hurricane
⬥ 3-5 auto-attacks
⬥ Greater Shadow Tsunami
⬥ 3-5 auto-attacks
⬥ Repeats from Hurricane
⬥ in preparation for his second Hurricane special, you will want to ensure you have full and stacks before his second hurricane, and leave a 10-15k hp buffer (285k-300k Masuta hp) and cease before the Persistent Hurricane due to conjure, reflect, cracking and aftershock damage.
⬥ Utilising 

 is useful for skip consistency. If familiars are swapped just before the skip, this allows for you to benefit from while having a ripper.
⬥ You want to be on high HP just before the spin starts.
⬥ Portent of Death  can be used to add an extra 30,000 damage during the phase on Masuta. This item resurrects the player after death and gives the player 15% of their base life points. Additionally,it removes 15% of the target's base life points, to a maximum of 10,000 damage (or 30,000 using Necromancy).
⬥ Dreadnips  can also be used throughout the rotation.
Phase 1 - Water Skip
Pre → →
Avoid the first hurricane by running out of distance as soon as you see it. Make sure you run out of range as the first Hurricane spin starts, and keep close to the max necro distance while attacking until it finishes, as the attack damage ramps quickly.
(tc)  +
+  + → → (optional depending on entry adren) → → → → → → → → → → → → →
Aim to progress to the Natural Instinct rotation below just before Masuta starts charging the Greater Shadow Tsunami (Indicated by Shadow Energy Wisps spawning around Masuta)
+ dismiss  + summon →
  → → → (move to avoid the Greater Shadow Tsunami - you will have 3-5 Masuta auto attacks after the tsunami before the next Persistent Hurricane) → → + → → → → (just after Shadow Tsunami hits splash down)
Note: Use  if required to stop conjures attacking if the boss will phase past 275k too early.
Phase 2/3 (Water Skip)
Wait for Persistent Hurricane to start/just before start
+  → + → → + (within skull bounce distance) → → → + run melee distance and proc if the boss hasn't phased
Post Masuta to pre-Seiryu
Masuta arena exit/3 pylon approach
→ → → + +
3 Defence Pylon
 (ignore if high food and eat damage) → → (tc) → →
just before + to seriyu face
Seiryu, the Azure Serpent
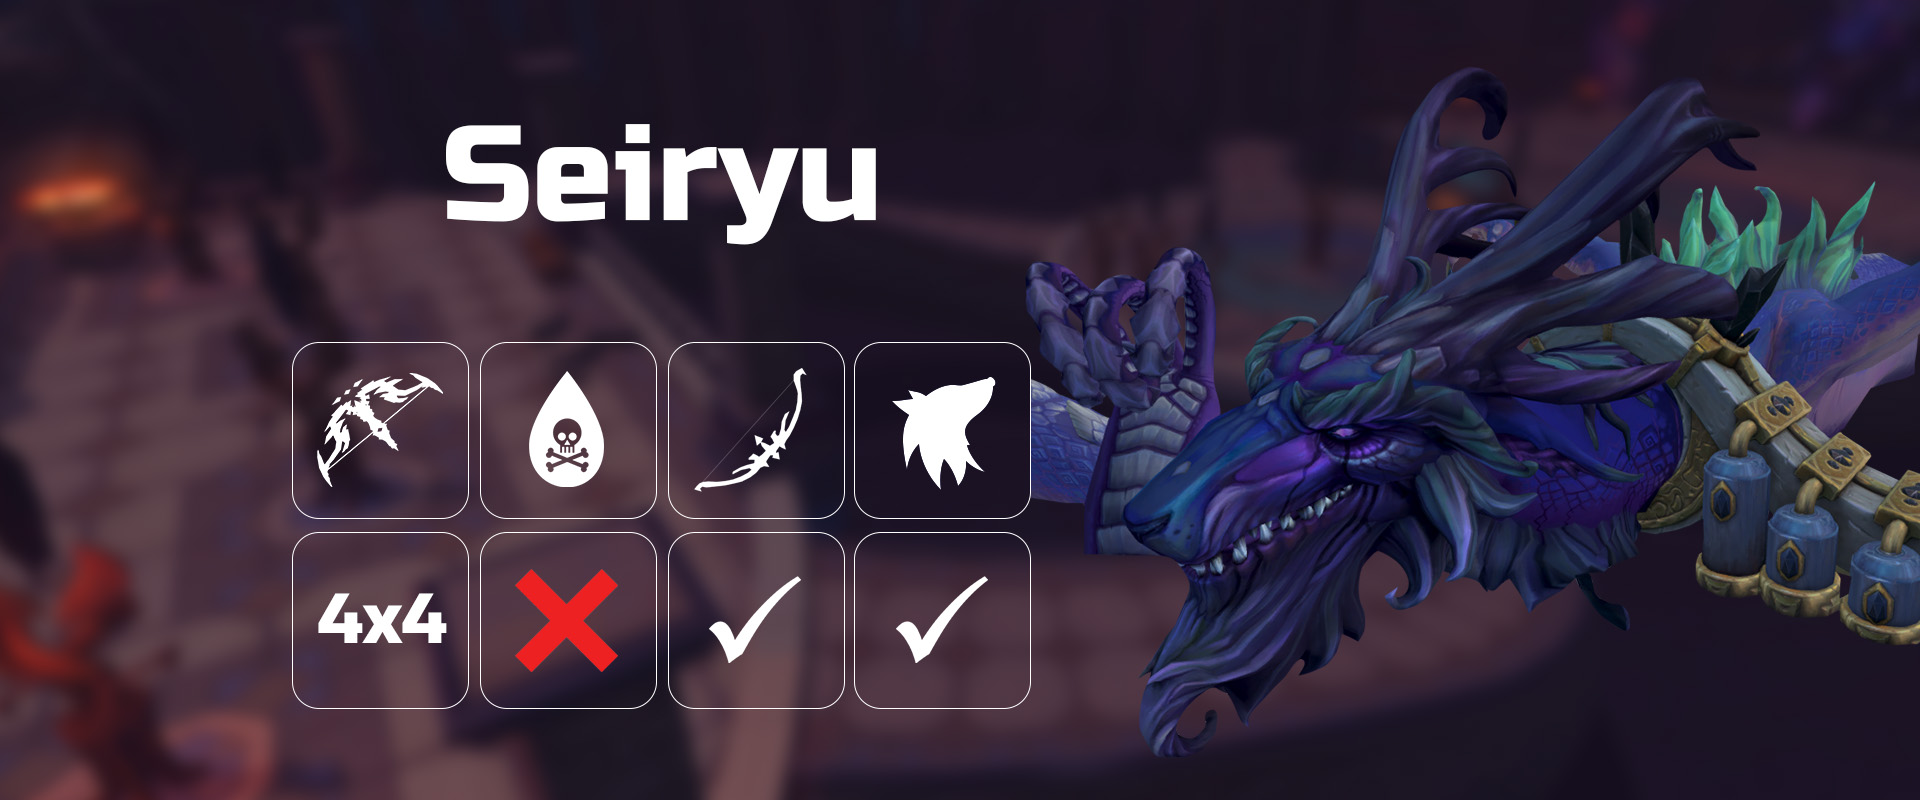
Seiryu's Head
+ should be reconjured directly after Masuta.
→ → → → → → → → → → → → → → improvise if not phased.
Necromancy one cycle rotation
⬥ If using a , use the the spec before going up.
⬥ Use before going up.
⬥ Remove  prior to going up to destroy conjures if required. They will need to be resummoned on Seiryu's back, otherwise they will stay in the main arena.
⬥ Save your adrenaline renewal for usage on the crystals. If a Masuta water skip is completed, adapt the rotation to build without adrenaline renewal . an example rotation is given below the normal one if is on cooldown,
Normal rotation:
Crystal 1:
(tc) + +  → + + → → → → → → →
Crystal 2:
+ → → → → → → → → → → →
Crystal 3:
+ → → → →
Water skip rotation (no ):
avoid reconjuring as ghost should follow you onto crystals and it's all you'll need.
Crystal 1:
(tc) + + + → → → → → → → → → →
Crystal 2:
+ → → → → → → →
Crystal 3:
+ → → → → → → →
Example Runs
Masuta Water Skip - https://www.youtube.com/watch?v=ZYa3X2ULWUY - 6:58
Non Masuta Water Skip - https://www.youtube.com/watch?v=_gbrhXFkMbs - 7:59