AoD Mechanics
Nex: Angel of Death (AoD) 
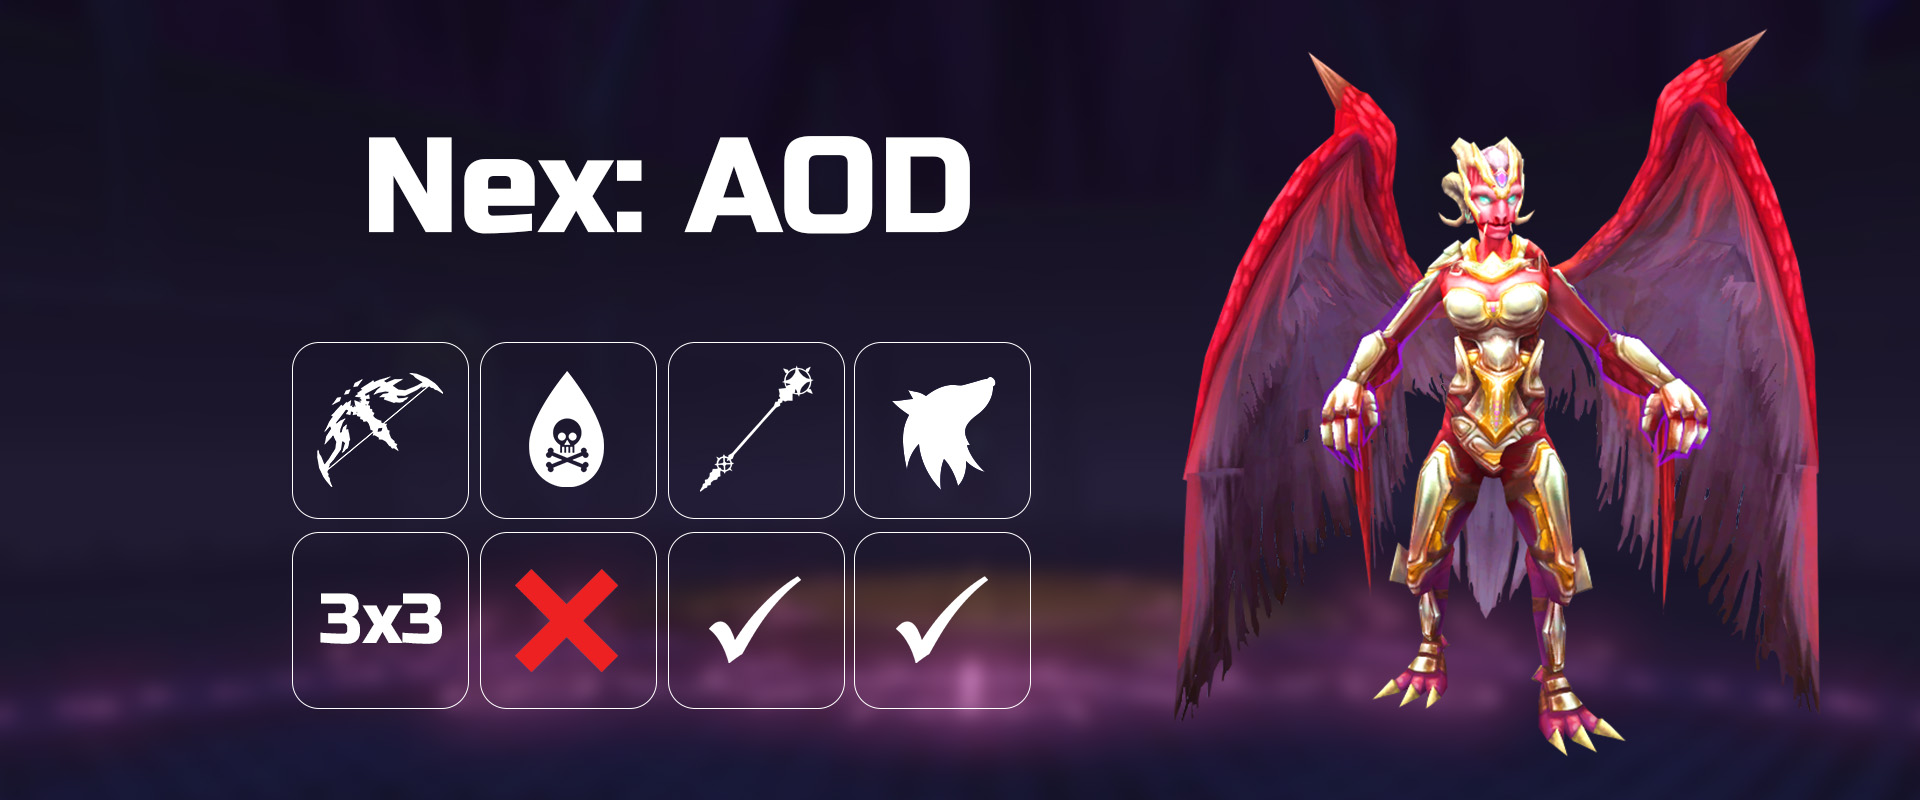
Introduction
Nex Angel of Death has the distinction of being the most damage centric boss in the game. Damage is king at AoD. As such, it is extremely important to have solid knowledge of rotations, as well as understand how to squeeze damage in at every opportunity. An AoD preset will be notably low in solid food, and have a significant amount of Blue Blubber Jellyfishes and Guthix Rests, as you are able to spam them during the kill to heal without losing adrenaline.
At time of writing, it's encouraged to start at AoD 7-10 server, and end up in Nex AoD FC.
Drops
Since this guide is aimed at 7-man teams, the drop rates below correspond to that specific teamsize.
⬥ Praesul Codex 
• 1/252 per person
⬥ Praesul Wand 
• 1/994 per person
⬥ Imperium Core 
• 1/994 per person
⬥ Chest 


• 1/1,024 for any chest, dropping in order with the first being random
⬥ Reeves (AoD Pet) 
• Base drop rate of 1/3,000 with a threshold of 600
Note: Due to a recent update, players will receive any chest they are missing before duplicate chests, unless lootshared.
Presets
General Information
Salves are especially useful at AoD, as they save inventory space and also prevent the poison effect during the last 600k of the boss. An essence of finality is used as you reach very high accuracy at AoD. Bladed Dive is critical to use during the last 600k in order to travel quickly between pillars around the arena. Each kill requires using your style-respective damage boosting ultimate prior to actually starting the kill, which is why the following example presets contain an equipped ring of vigour and a defender with planted feet for range/mage and energizing for melee.
The various roles at AoD will have their presets, responsibilities and individual dps rotations in their own style-specific channels. This channel will mainly be to discuss the machanics of the boss and how to handle them.
Familiars
A ripper demon  with scrolls
  is used by all roles of all styles at AoD, in order to maximise the team's damage output. The sole exception to this is the base, who may use a mammoth.
Mage bases using a Fractured Staff of Armadyl may also use a Kal'gerion Demon familiar with Crit-i-Kal scrolls  to maximise their damage output during the FSOA spec. It is important to remember that Crit-i-Kall scrolls require manual activation.
Prefight
This consists of the team's preparation after entering the arena, before actually starting the boss fight.
Melee
 Meleers should use the natural instinct ability
  on a combat dummy and then use the dragon battle-axe special ability before building up to 100% adrenaline again.
Range
 Rangers should also use the natural instinct ability , and then use Death's swiftness
  . They should then build back to 100% adrenaline and then use the incendiary shot ability
  on a dummy and continue to build to 100% adrenaline again.
Magic
 Mages should also use the natural instinct ability , and then use sunshine
  . They should then build back to 100% adrenaline.
Placing Mines
Players should also mine  the quadrants in preparation for reavers during phase 1, with each minion tank placing 2 dominion mines in their quadrant. Base mines cruor, free melee mines fumus and chinner mines glacies. If team size is 8+, the free dps should mine umbra.
Starting the Fight
In the case of a relentless proc on an ultimate during the prefight, incendiary shot or meteor strike  may be used in order to gain adrenaline from critical hits during p1.
The base should start the fight at around 18-24s timer on their death’s swiftness or sunshine, depending on team speed. The reason for this is that phase 1 generally does not last long enough for the entire ult duration to be useful as well as to ensure that they'll off cooldown for p3.
The entire team except the base should start the fight in flank  position.
(Starting Positions and Setup)

Nex: Angel of Death Attack Pattern

Phase 1 (3,000,000 - 2,100,000hp)
Start
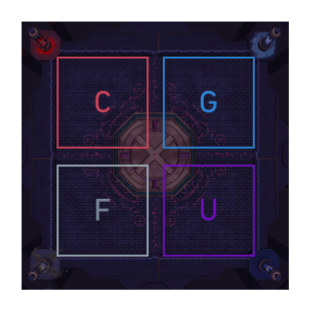
Phase 1 takes place within the octagon of the arena. Players will stand on the eastern side of the quadrant (towards the Umbra/Glacies quadrants). This is because the base tank will keep Nex facing away from the team, allowing for the remaining 6+ players to utilize Flanking abilities.
⬥ After Nex does 5 auto attacks, she will perform her Elements special.
Elements
⬥ Nex teleports to the centre, faces a quadrant and divides the arena into quadrants. Icicles will spawn on the midlines and damage you if you're standing on them.
⬥ Players in the quadrant Nex is facing will take 3 hits of roughly 4000 damage. This damage can be mitigated by various means. Defensives such as reflect  and debilitate
  will halve the incoming damage while resonance
  or the lunar spell Disruption Shield
  will negate one of the 4k hits entirely.
Dealing with Elements
⬥ The optimal means of dealing with this spec is to turn on soulsplit, use disruption shield to mitigate first hit, tank the second hit, and resonance the third. Generally, assuming reaver skip was not obtained, by this point the boss should be phased. If not, switch back to Deflect Mage and finish the phase.
⬥ One player must be present in the quadrant Nex is facing, if not, the Nex will build enrage stacks. More stacks = more damage taken. It is important to note that only the minion tank for that respective quadrant should be tanking elements.
Reavers
⬥ 3 blood reavers will spawn with 50,000 health points. These will be hit by the mines and can be safely ignored except for the umbra quadrant reaver. Since this reaver only gets two mines, the umbra minion tank as well as the free melee and chinner must deal with this reaver after phasing Nex to 2.1m hp. Reaver does not spawn in the quadrant Nex is facing.
Example of the Elements and Reavers Specials
Phase 2 (2,100,000 - 1,800,000hp)
At the start of Phase 2, Nex will begin to summon 4 amalgamations. She will take reduced damage until the amalgamations spawn. A brief overview of Phase 2 will be listed below:
Amalgamations
⬥ Amalgamations will spawn, dealing around 4000 damage to those nearby.
⬥ Minion tanks are tasked with killing the amalgamations, with some assistance from the base tank, quake/free melee and chinner. You can find more details in the style specific channels.
⬥ Minions will spawn with 150,000 health points if the amalgamations are killed before their bar fills up (300,000 if the amalgamations aren't killed). Minions deal magic damage and can stun you.
Nex
⬥ The free melee, base and chinner are mostly responsible for reducing Nex to her hp cap (1,800,000) but everyone on the team should also contribute.
⬥ Once Nex reaches 1.8m hp, minion tanks should then surge across the octagon, luring all 4 minions directly under Nex for the chinner to kill.
⬥ When Nex reaches 1.8m hp, she will say a few voice lines, then Phase 3 will commence.
Shadow Orbs and Other Mechanics
⬥ Nex also has another special called shadow orbs where she will raise her hands and red shadow orbs will fall down onto the spot where the player is standing. This will happen a total of 3 times in quick succession. If the player remains standing on these red orbs, they will take rapid typeless damage. The optimal way of dealing with this mechanic is to remain in one spot until the 3rd orb has landed and then move 1 square away from the orb and continue dpsing. However, if you encounter this mechanic, you are not in a team fast enough to benefit from the strategies listed in the AoD channels.
⬥ If you receive a second elements special, you are not in a team fast enough to benefit from the strategies listed in the AoD channels.
Amalgamation Spawn
Phase 3 (1,800,000 - 600,000hp)
Phase 3 is fairly simple. Nex will lose all of her previous mechanics and gain 3 new mechanics.
Smoke Line
⬥ Nex targets two players, one will receive a message that a smoke from the East is coming. Another player will receive a message that a smoke from the North is coming.
⬥ After two autoattacks the smoke will appear in a line dealing rapid magic damage.
⬥ Devotion  + Devotion perks
  will mitigate this damage. (It is highly unrecommended to actually use the devotion ability to nullify damage, as simply walking out of the smoke after placing it is much better way to handle this mechanic).
⬥ North smoke can be removed by standing on the wall to the West or East when the smoke is supposed to spawn. i.e. if you stand directly next to the east or west walls of the arena when you have north smoke, it will not spawn.
⬥ East smoke can be removed by standing on the wall to the North or South when the smoke is supposed to spawn. i.e. if you stand directly next to the north or south walls of the arena when you have east smoke, it will not spawn.
⬥ You should always call out what type of smoke you have in general chat by typing N or E depending on what type of smoke you have.
⬥ Be intelligent on where you place these smokes. Try not to pk your teammates. Ideal smoke placement if Nex has not been phased to 600k before smoke spawns will be shown below.
North Smoke Example
East Smoke Example
Smoke Pool
⬥ Nex will summon a pool with a crystal in the middle. This is a fairly simple special attack. - The pool will stay there until someone either: activates the crystal or the pool "explodes".
⬥ Clicking the crystal will deal 14,000 damage split evenly to everyone in the pool.
⬥ Not clicking the crystal will split 37,500 damage to everyone in the arena evenly.
• In short, don't click the crystal and eat up. The only time people should take pools is if multiple people on the team have died, in order to prevent team members getting hit for 7k+.
Example of the Smoke Pool Special
Ice
⬥ Nex will target a player, stun them, then create icicles around them.
⬥ Getting "iced" will stun you, make sure to freedom then move away from people. People will take damage if they are in a 5x5 space around the iced player.
⬥ Icicles have 20,000 health points. It is mandatory to kill the icicles as the player inside will take rapid damage if they are not freed.
⬥ If the team does not free the player (they should!), it is recommended to pray deflect melee  , as this will mitigate the rapid damage they receive.
⬥ Most fast teams will skip this mechanic by phasing into pillars before nex stuns a player to ice them.
Example of the Ice Special and How to Deal With It
Phase 4 (600,000 - 0hp) (Crystal Health Points 200,000)
Nex will begin the final phase as soon as she reaches 600,000hp, in addition to all the minions being killed. At this point, Nex will become invulnerable and the team will have to kill the pillars before she becomes damageable again. Nex will only use mage attacks for the remainder of the fight. The base will lure Nex away from the other 6 players shortly before Nex phases, while the rest of the team will surge/bd to the first pillar. Pillar order is determined by the order that minions die during Phase 3. The most optimal order is Umbra, Glacies, Cruor, and lastly Fumus. Pillars will affect players if they are hit by Nex's auto attacks.
Bombs
⬥ Nex will cause a bar to gradually fill up on a player's screen. The player must be in the middle when the bar fills up or they will be instantly killed. After the first bar fills up, a second bar will start to fill up. Once this bar fully fills up, a bomb will be dropped at the players location, dealing typeless damage of around 3,000 to nearby players. Bombs deal no damage if the player is far away from Nex. This means that generally for the first 3 pillars, bomb can be placed next to the team, but at the last pillar it should be placed at a safe distance away from the team.
Pillar Effects
⬥ Shadow crystal places shadow traps under the player that damages them up to 4,800 typeless damage. To deal with this, keep moving and do not place the shadow traps under another player.
⬥ Ice crystal will gradually cause the player's screen to freeze. After a certain time, the player will get stunned and bled. Freedom will clear these effects. Nex's autoattacks will bind if Deflect Magic is not active.
⬥ Blood crystal lets Nex heal from her attacks. As she is usually only attacking the base, this pillar’s mechanic is somewhat irrelevant.
⬥ Smoke crystal allows Nex to infect players with a virus and can drain stats, overload timers and prayer points.
Note: Bladed Dive is incredibly useful for moving efficiently between middle and pillars.
Picking up and Placing Bombs
How to Lure Nex as Base
Lure
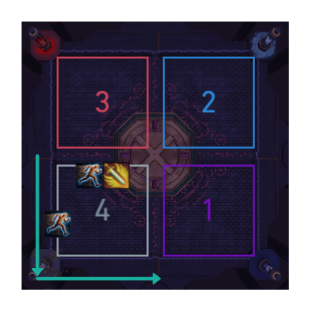
Consider each pillar's quadrant. (see picture below)
The lure should consist of you moving along 3 of the edges of the last pillar's quadrant. This should be a bladed dive and surge along an edge shared with another quadrant to the arena's wall, followed by a second surge towards the final pillar, round the corner, then stepping 2 squares past the center line (first square of brick flooring).
You will have a choice of two starts to the lure. Preferably move along the edge shared with the later pillar. Never move along an edge shared with the 1st pillar.
Worked Example for Normal Case (UGCF)
F is the last pillar.
To start your lure, you can either south (shared with U) or west (shared with C).
Because C comes after U in this order you should choose to start the lure by bladed diving and surging west, then complete the lure by surging and running south towards the F pillar, after you reach the arena wall, then east to two squares past the line between F and U.
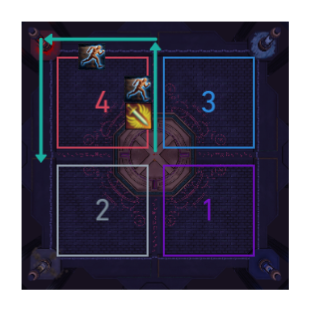
Worked Example (UFGC)
C is the last pillar.
To start your lure, you can either move north (shared with G) or west (shared with F).
Because G comes after F in this order, you should choose to start the lure by bladed diving and surging north, then complete the lure by surging and running west towards the C pillar when you reach the arena wall. Complete you lure by moving south to 2 squares past the line between C and F.
Extensive Lure Guide
This document contains a much more entensive guide on how to lure as base as well as all the correct lures for every possible pillar order.
https://docs.google.com/document/d/17kRtNQsRLPcukH-6Y_PTPK9FutPSvK83a7k0ho6TVeU/edit
How to Re-centre AoD
At AoD, it is incredibly important that Nex stays in the centre until pillars for a variety of reasons. However, sometimes Nex may move from the centre and requires re-centering. In this case follow the steps below:
⬥ You misclick or AoD gets voked (or you die and someone else needs to re-centre)
⬥ Stand in the middle of the arena
⬥ Voke if needed
⬥  or walk directly opposite of where she ends up standing
⬥ or walk back to the base spot
In the example image below, the X tiles represent the tiles where AoD will end up standing on after you voke her while standing in the centre. You should then move to the opposite X (so in the image, if AoD ends up standing on the yellow X, you should move to the blue X to re-centre her).
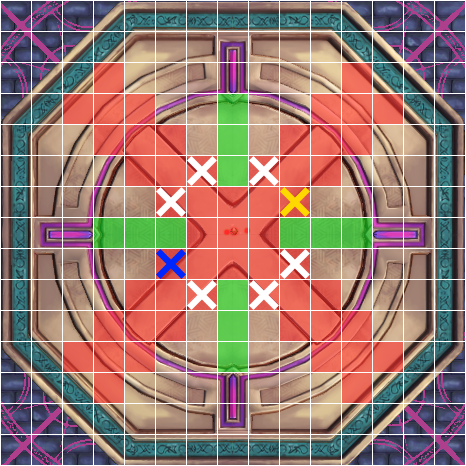
The reason it is important to move back to the original base spot after re-centering is that if you are standing on the red tiles before minions run into mid, you risk blocking them. The green tiles are "safe" tiles, on which you will not block minions when standing on them.
Notes:
⬥ Should AoD move before the Elements special in p1, do not re-centre her as she will re-centre herself when jumping up for the special attack. Instead make sure you have her aggro and that you are in the base spot.
⬥ Do not walk through AoD while re-centering her. This will cause her to move off centre.
Example Video
How to vuln pillars
The Umbra minion ent is responsible for applying vuln to all the pillars, below an example can be seen of how to do this quickly. The base of the pillars can be left clicked near the edges to easily throw a vuln bomb without wasting ticks.