Araxxor Basic Guide
Araxxor Basic Guide
Introduction
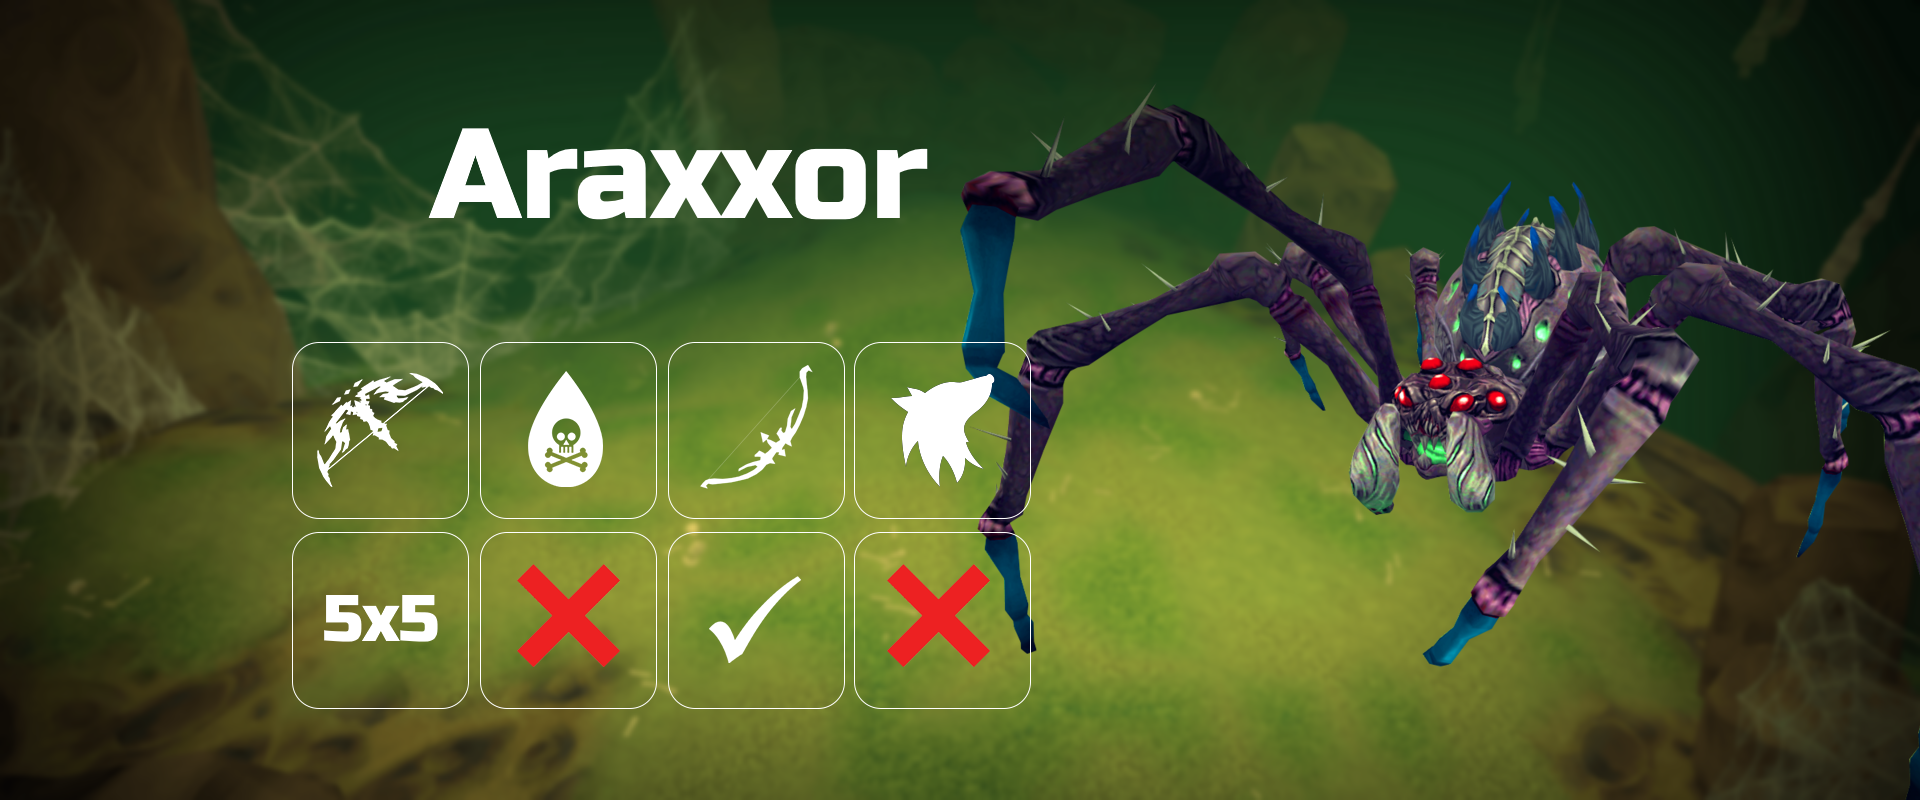
Araxxor is a large araxyte spider who lives in the Araxyte lair. It is a mid-to-high-tier boss that is a commonly used stepping stone on players' PvM journeys.
This guide aims to get you your first few kills at araxxor, with any combat style. For more advanced rotations, check out #Magic Araxxor, #Melee Araxxor, #Ranged Araxxor, and #Necromancy Araxxor.
Preset and Relics
Basic Information
This section covers the basics of what the encounter is, how the boss attacks, and what mechanics it can utilize as well as how to deal with them. Afterwards, we cover how to progress through the fight phase-by-phase in Fight Phases.
Fight Overview
⬥ The fight consists of fighting two monsters back-to-back: Araxxor in phases 1-3, and Araxxi in phase 4.
⬥ It can be fought in both solo and duo modes, however note that while difficulty increases, the droprate of leg pieces decreases in a duo, so it is recommended to solo the fight.
⬥ The starting enrage scales from 0-300%, increasing by 20% per succesful kill. This resets every day at 00:00 GMT.
• This is only the starting enrage - this can increase further during the fight via certain mechanics.
⬥ Araxxor's combat style is random by default.
• Use a paid instance OR carry a pheromone in your inventory. This makes Araxxor's combat style to be weak to your mainhand weapon style.
⬥ There are 3 possible paths in the fight:
• Path 1 / Top path - the minion path.
• Path 2 / Middle path - the acid path.
• Path 3 / Bottom path - the darkness path.
• At any time, only 2 paths are unlocked and 1 path is blocked off.
• Which paths are open determines what special attacks can be encountered during the fight.
• Phase 2 is different for each path.
⬥ To progress the fight, you must defeat phase 1, open a path to reach and defeat phase 2 and 3, then finally kill Araxxi in phase 4.
⬥ The boss can use some special attacks during the fight, typically once every 5 auto attacks.
Auto-attacks
How It Works
⬥ Phase 1-3:
• Outside melee distance: Araxxor's auto attacks are by default the combat style he spawned with - e.g. his range form attacks with range autos, etc.
• In melee distance: Araxxor can also use melee auto attacks.
⬥ Phase 4:
• Outside melee distance: Araxxi uses both magic and range attacks, depending on which one you are not praying against.
• In melee distance: Araxxi attacks with melee and magic.
⬥ Araxxor slightly heals from his auto-attacks if he hits you while you have Soul Split  active, but this is fairly negligible. However, it is still recommended to prayer flick at higher enrages.
Special Attacks
Araxxor has multiple special attacks that can occur at different points during the fight. In this section we cover what they are and how to deal with them. After that, in the The Fight section, we see how they appear during different phases of the fight.
Cleave
 ⬥ How it works:
• The boss bends its front legs and swipes up to 2 tiles in front of itself, dealing heavy hard typeless damage.
• Players are dragged in if not in melee distance.
• The attack damages everything it hits - including players, familiars, and any spider minions the boss has summoned.
⬥ How to deal with it:
• Stay out of the attack range and it will deal no damage.
• If Anticipation  or Freedom
  are active in advance, the player will not be dragged in.
• If dragged in, quickly click away to move.
Cocoon
 ⬥ How it works:
• The player is wrapped in a cocoon that deals constant damage over time (200 damage per tick at 0% enrage, increasing with enrage).
• This attack disables all active defensives.
• During the cocoon, the boss will not use auto attacks.
⬥ How to deal with it:
• Spam-click anywhere on the screen to break the cocoon.
• If Anticipation or Freedom are active in advance, the number of clicks required is reduced.
Web Shield
 ⬥ How it works:
• Araxxor hides under a web, healing 1000 health five times, reducing damage taken by 50%, and reflecting all incoming damage heavily to the player.
⬩ Note: Necromancy conjure damage is not reflected by this mechanic, and will continue to deal damage through it.
• Reflected damage scales with enrage.
⬥ How to deal with it:
• Stop attacking the boss to avoid taking reflected damage.
• Defensives like Debilitate  and Reflect
  will reduce reflected damage taken.
• Resonance  can be used to heal off a reflected attack.
Egg Bomb
 ⬥ How it works:
• Araxxor spawns up to 3 eggs and fires a homing projectile at the player, that explodes dealing up to 3k typeless damage in a 5x5 area.
• If the player is in range of the eggs when it explodes, it destroys the eggs and reduces damage taken.
• If the eggs are not destroyed, they spawn spider minions.
• This attack disables all defensives.
⬥ How to deal with it:
• Stand near/on top of the eggs so that they are destroyed, which also reduces the damage taken per egg destroyed.
• If Anticipation or Freedom are active in advance, the number of eggs spawned is reduced from 3 to 2.
Minion Spawn
 ⬥ How it works:
• Araxxor spawns a wave of 5 minions, one of which can be a special spider - a mirrorback or a pulsing spider.
⬩ Mirrorback spiders reflect all (non-conjure) damage the boss takes back onto the player.
⬩ Pulsing spiders rapidly heal the boss while they are alive.
• Araxxor can summon up to 4 waves of spiders (total of 4 × 5 = 20 spiders summoned) during the fight.
⬥ Special spiders spawn at set times:
• Wave 1: the 3rd spider is either a Mirrorback or Pulsing spider.
• Wave 2: the 2nd spider is either a Mirrorback or Pulsing spider.
• Wave 3: the 1st spider is either a Mirrorback or Pulsing spider.
• Wave 4: no special spiders.
⬥ How to deal with it:
• Stop attacking the boss when it spawns spiders, if it is not the 4th wave.
• If spawned, kill the Mirrorback or Pulsing spiders first. Then either kill or ignore the remaining spiders, depending on your level of experience at the boss.
Acidic Spider
 ⬥ How it works:
• Araxxor spawns an Acidic spider during phase 3 if it has not absorbed all 100% acid if path 2 is open.
• Can be aggroed on the player and lured under Araxxor to heal him for 5k HP and reduce the available acid for Araxxi to absorb on P4 by 25%.
⬥ How to deal with it:
• Ignore it. It is not worth spending time dealing with, and is harmless.
Instakill Spider
 ⬥ How it works:
• Araxxor spits a green blob onto the ground. After a few seconds, a spider spawns and chases the player for a few seconds.
• A bar on the top of the spider shows how long it will chase the player.
• If it touches the player, it deals 32k hard typeless damage (instantly killing the player).
⬥ How to deal with it:
• Run away from it. It will die/despawn after the bar on its head fills up.
• Barricade  will prevent taking damage from this attack.
⬩ This is sometimes used if player is at the top of the ramp on phase 2 when taking the middle path, to avoid having to move.
Darkness / Light Spots
 ⬥ How it works:
• Araxxor turns the entire arena dark for a short time, except one lit up spot. Standing in the darkness deals increasing damage over time.
• Standing in the light prevents taking damage and resets the DoT damage amount.
⬥ How to deal with it:
• Stand in the light. Use Bladed Dive  and Surge
  to get into it faster.
• Double Surge  and Mobile perk
  perk are useful here.
Putrid Wave
 ⬥ How it works:
• When Araxxi drops below 25k HP in P4, it spawns a black blob that bounces around and lands on the player, dealing heavy damage over time.
• The player's adrenaline is also drained by 50% when it spawns.
• Mechanic is exclusive to P4.
⬥ How to deal with it:
• Option 1: Stand still and let it hit you one time, then move. This is the preferred way.
• Option 2: Keep running around and don't let it hit you.
Acid Absorb
 ⬥ How it works:
• When middle path is open, Araxxi's first special attack on phase 4 will always be to absorb any leftover acid from phases 2 and 3.
• Mechanic is exclusive to P4, when middle path is open.
⬥ How to deal with it:
• You cannot prevent it from happening.
• Use this time to quickly bring Araxxi's health to below 50k, preventing any other special attacks from being used.
Fight Phases
In this section we go over the fight phase-by-phase, covering how the phase works, what mechanics (described earlier in the Mechanics section) may be encountered, and basic ability rotations to help you get through the phases easier.
Phase 1
Phase Overview
⬥ Phase 1 occurs in the starting room of the arena after dropping down. Webs cover tunnel entrances that lead to phase 2, and the player must burn one of the webs to progress to the next phase.
⬥ This timegated phase lasts for ~1 minute from the time the player burns the web.
⬥ Araxxor has 100k HP, which is not required to be depleted, but it is recommended to do so to make the fight easier (see Phase 3 for more info).
⬥ Araxxor uses special attacks every 5 auto attacks. Having Anticipate or Freedom active will make them easier to deal with, try to use them on the 4th auto attack.
⬥ Possible special attacks this phase:
• Cleave
• Cocoon
• Web Shield
Strategy
⬥ Burn the web to your chosen path immediately when the fight starts.
⬥ Reduce Araxxor's health to < 5K HP.
• If the web burns before you reach 5k HP, you can run ahead to the next phase early, but generally it's quite easy to do the required damage in time.
⬥ Remember to use strong abilities to make it easy to deplete Araxxor's health down to 5k:
• Magic: Wild Magic  / Asphyxiate
  / Guthix Staff
 / Igneous Omnipower
  if
if  is owned.
• Melee: Assault  / Hurricane
  / Quake
  / Tendrils
  / Igneous Overpower
  if
if  is owned.
• Range: Snapshot  / Rapid Fire
  / Dark Bow EoF
  / Shadow Tendrils
• Necromancy: Finger of Death  / Soul Volley
  / Bloat
  / Death Guard
 / Death Skulls
  if
if  is owned.
⬥ Do not use ultimate abilities at the start of the phase, as it is too short and timegated to make use of it.
• Ultimates refer to Berserk  / Death's Swiftness
  / Sunshine
  / Living Death
Phase 2
Phase Overview
⬥ Phase 2 begins after crossing the burnt web into the chosen path.
⬥ The phase is different, depending on the path chosen.
⬥ Araxxor's health resets to 100k at the start of the phase.
⬥ Phase 2 ends when you reach the part of the arena designated for phase 3, regardless of Araxxor's remaining health.
Top Path Strategy
⬥ Araxxor will now be able to spawn minions during his special attacks, which is the primary mechanic in the top path.
⬥ If any minions spawn, prioritise killing Mirrorback/Pulsing spiders.
⬥ Burst Araxxor's health down to <5k, then quickly go down the path into phase 3:
• With Range  : Use Death's Swiftness before the web burns and build adrenaline, then use → → and follow up with strong basics.
• With Melee  : Use Berserk as the web burns and build adrenaline, then use → →
  and follow up with strong basics. Alternatively, if Igneous Kal Ket is owned, you can skip and just use instead.
• With Magic: Use Sunshine before the web burns and build adrenaline, then use → → etc. and follow up with strong basics. If Igneous Kal-Mej is owned, you can use as well.
• With Necromancy: Use Living Death before the web burns and build adrenaline and necrosis stacks, then use → with  as needed. If Igneous Kal-Mor is owned, you can use as well.
⬥ Possible special attacks this phase:
• Cleave
• Cocoon
• Web Shield
• Minion Spawn (new)
• Egg Bomb (new) - this will always be the first special attack when taking the top path.
Middle Path Strategy
⬥ Araxxor will now be able to use acid-based mechanics during this timegated phase.
⬥ Araxxor will always try to stay within 3 tiles of the player during this phase.
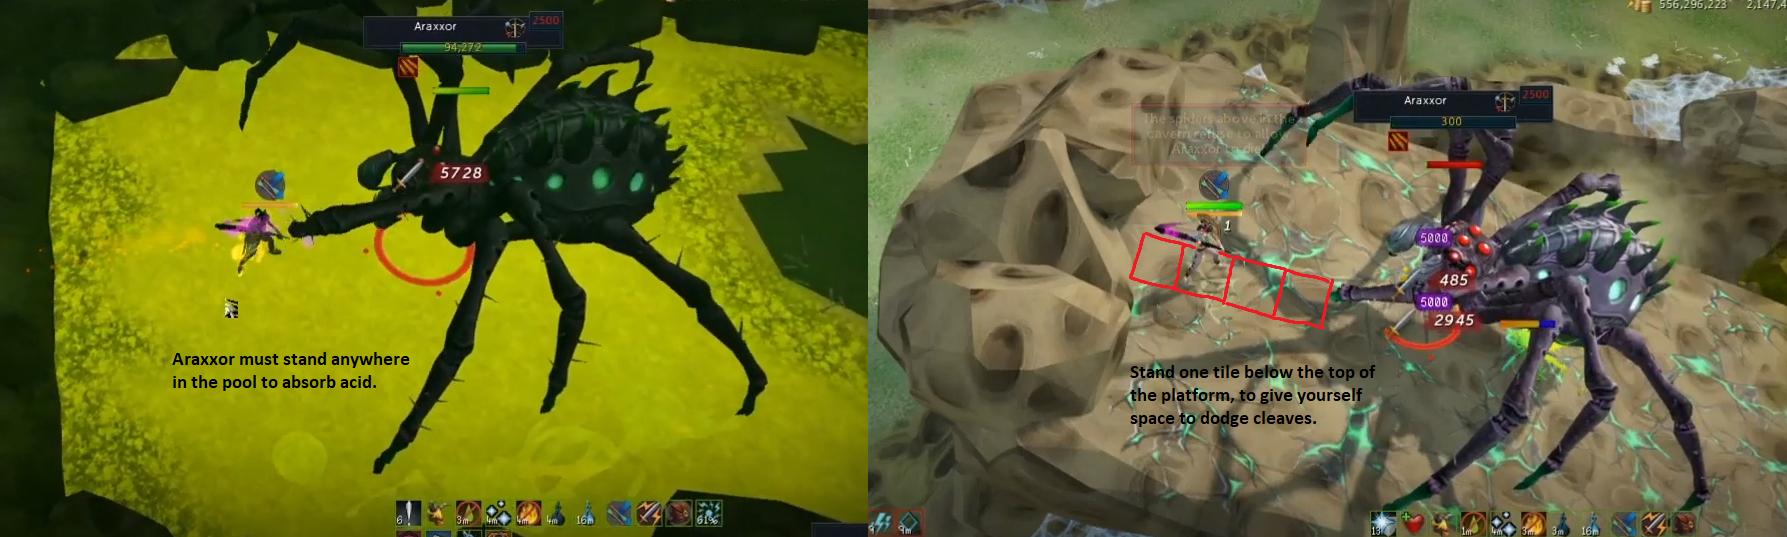
⬥ Lure Araxxor anywhere over the acid pit to absorb acid, then walk him up the ramp near the top to drop the acid on the ramp. Once the ramp breaks, climb over it to reach phase 3.
⬥ At least 50% acid must be dropped on the ramp - have Araxxor absorb at least 60-65% acid before going up.
⬥ If you run out of acid, you must lure him over the pool again.
⬥ When going up the ramp, the ideal spot to stand is to go all the way up, then 1 tile down.
• This is so that if Araxxor uses Cleave on the ramp, you can move back 1 tile to dodge it.
• Use and to get up the ramp faster.
 ⬥ Try to bring Araxxor's health down to <5K using your thresholds/specs. There is plenty of time to do damage.
• i.e. use + + + / + + + / + + + + / + + +
⬥ Do not use ultimate abilities as you have to move around a lot.
⬥ Possible special attacks this phase:
• Cleave
• Cocoon
• Web Shield
• Instakill Spider (new)
• Egg Bomb (new)
Bottom Path Strategy
⬥ This is a timegated phase where you do not have to actively attack Araxxor.
⬥ Araxxor will occasionally use range and mage auto attacks.
⬥ Stay in the light spots when they spawn, and avoid the darkness. Standing in the dark will deal increasing damage over time.
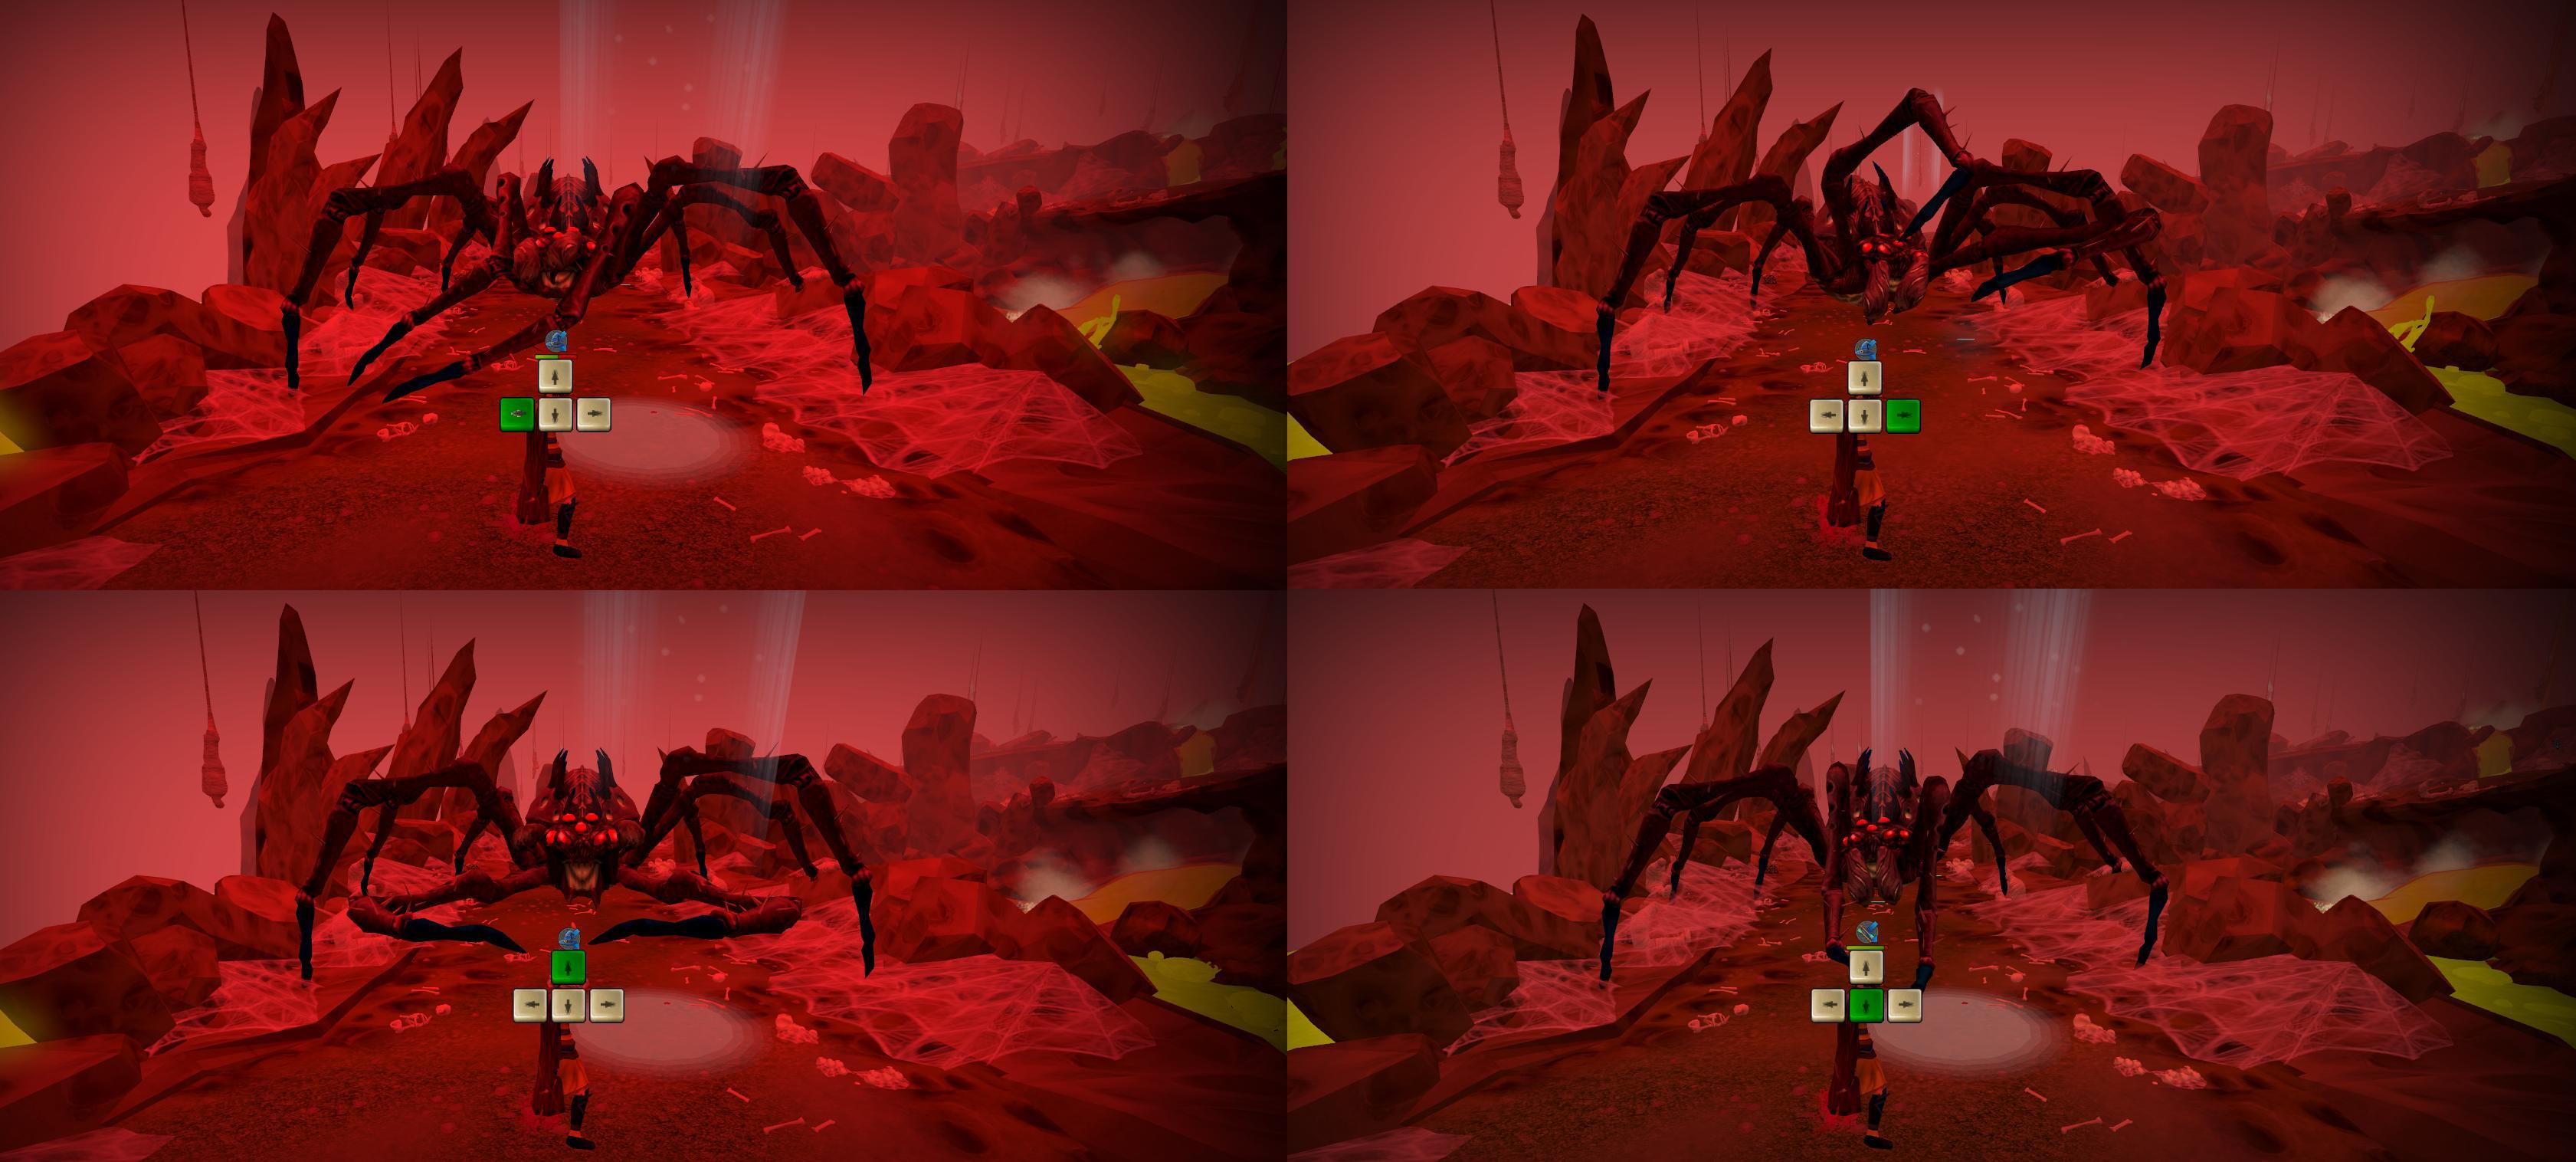
⬥ When Araxxor charges at you, dodge in the correct direction to damage the wall to phase 3.
• Dodging correctly will deal 100% damage to the wall.
• Dodging incorrectly will deal 50% and deal 2500 damage to the player.
• Not dodging at all will deal no damage to the wall, and deal 5000 damage to the player.
⬥ As soon as the wall breaks, move to phase 3.
⬥ Having the Mobile perk and using  +
+  makes it easier to reach the light spots. Double Surge can be helpful as well.
⬥ This is a good time to heal with an Enhanced Excalibur  .
.
⬥ See the following image for which directions to dodge the charge, based on how Araxxor swings his legs:
 ⬥ Possible special attacks this phase:
• Egg Bomb (new) - at higher enrages, you may ignore this since moving to the eggs will cause you to take more damage from the darkness.
Phase 3
Phase Overview
⬥ Araxxor's health resets to 100k, but he will also heal all health that was not depleted in phase 1 and 2.
⬥ Phase 3 ends when Araxxor's health is brought to 0.
⬥ Araxxor attacks with increased speed during p3.
⬥ This phase is similar to phase 1, but Araxxor will have access to additional special attacks depending on the path rotation.
⬥ Possible special attacks this phase:
• Cleave
• Cocoon
• Web Shield
• Egg Bomb
• Minions (if path 1 is not closed)
• Acid Spider + Instakill Spider (if path 2 is not closed)
• Darkness (if path 3 is not closed)
Strategy
⬥ Prioritise dealing damage and bringing Araxxor's health to zero quickly.
• If Mirrorback/Pulsing spiders spawn (when top path is open) prioritise killing them first.
⬥ If you did not use your damage-boosting ultimates / / +  in phase 2, you may choose to use them here.
⬥ If top path was taken: Use strong thresholds/special attacks/etc. to kill Araxxor.
• i.e. use + + + / + + + / + + + + / + + +
⬥ If middle/bottom path was taken: Use a damage-boosting ultimate ( / / / ) and strong thresholds/etc. and finish Araxxor off.
Phase 4
Phase Overview
⬥ Araxxor drags the player to phase 4, then dies and Araxxi spawns. Araxxi has 100k health and must be killed to finish the fight.
⬥ Araxxi will use auto-attacks depending on where you are standing:
• Outside melee distance: Araxxi uses both magic and range attacks, depending on which one you are not praying against.
• In melee distance: Araxxi attacks with melee and magic.
⬥ When Araxxi has 100k to 50k health:
• Has access to all the special attacks used in phase 3.
• If acid path is open: first special attack in phase 4 will always be replaced with absorbing remaining acid from phase 2 and 3. This is a good time to DPS hard.
• If top path is open: if all 20 spiders were not killed in phase 3, Araxxi can summon Mirrorback/Pulsing spiders. during the minion spawn special attack.
⬥ When Araxxi reaches 50k health:
• Stops using special attacks.
• Attacks faster, and deals increased damage.
⬥ When Araxxi reaches 25k health:
• Drains 50% adrenaline from the player, and uses the Putrid Wave special attack.
Strategy
⬥ Prioritise prayer flicking as it is your single biggest source of damage reduction during the phase.
⬥ When Araxxi has 100k to 50k health:
• Focus on bringing Araxxi down to 50k quickly to stop her using special attacks.
⬥ When Araxxi reaches 50k health:
• Start building adrenaline in preparation for when Araxxi reaches 25k HP left.
⬥ When Araxxi has 27-30k health left:
• Use your strongest thresholds/modified ultimate abilities before your adrenaline gets drained to make the rest of the fight as quick as possible.
• These include: / / / / /  / /
/ /
⬥ You may choose to use Debilitate or Devotion  before to reduce damage taken during the last part of the fight.
⬥ If the Acid Core spawns, do not panic - panicking is a quick way to die.
• Eat up and and focus on your prayer flicks.
• If it hits you, simply move a tile afterwards, and continue to do damage.
⬥ If you did not use your damage-boosting ultimates / / / + in phase 3 (or not on cooldown at the start of phase 4) you can use them during phase 4 to help make it go quicker.
• If using range, Ful arrows  are great for P4.
Example Kills
