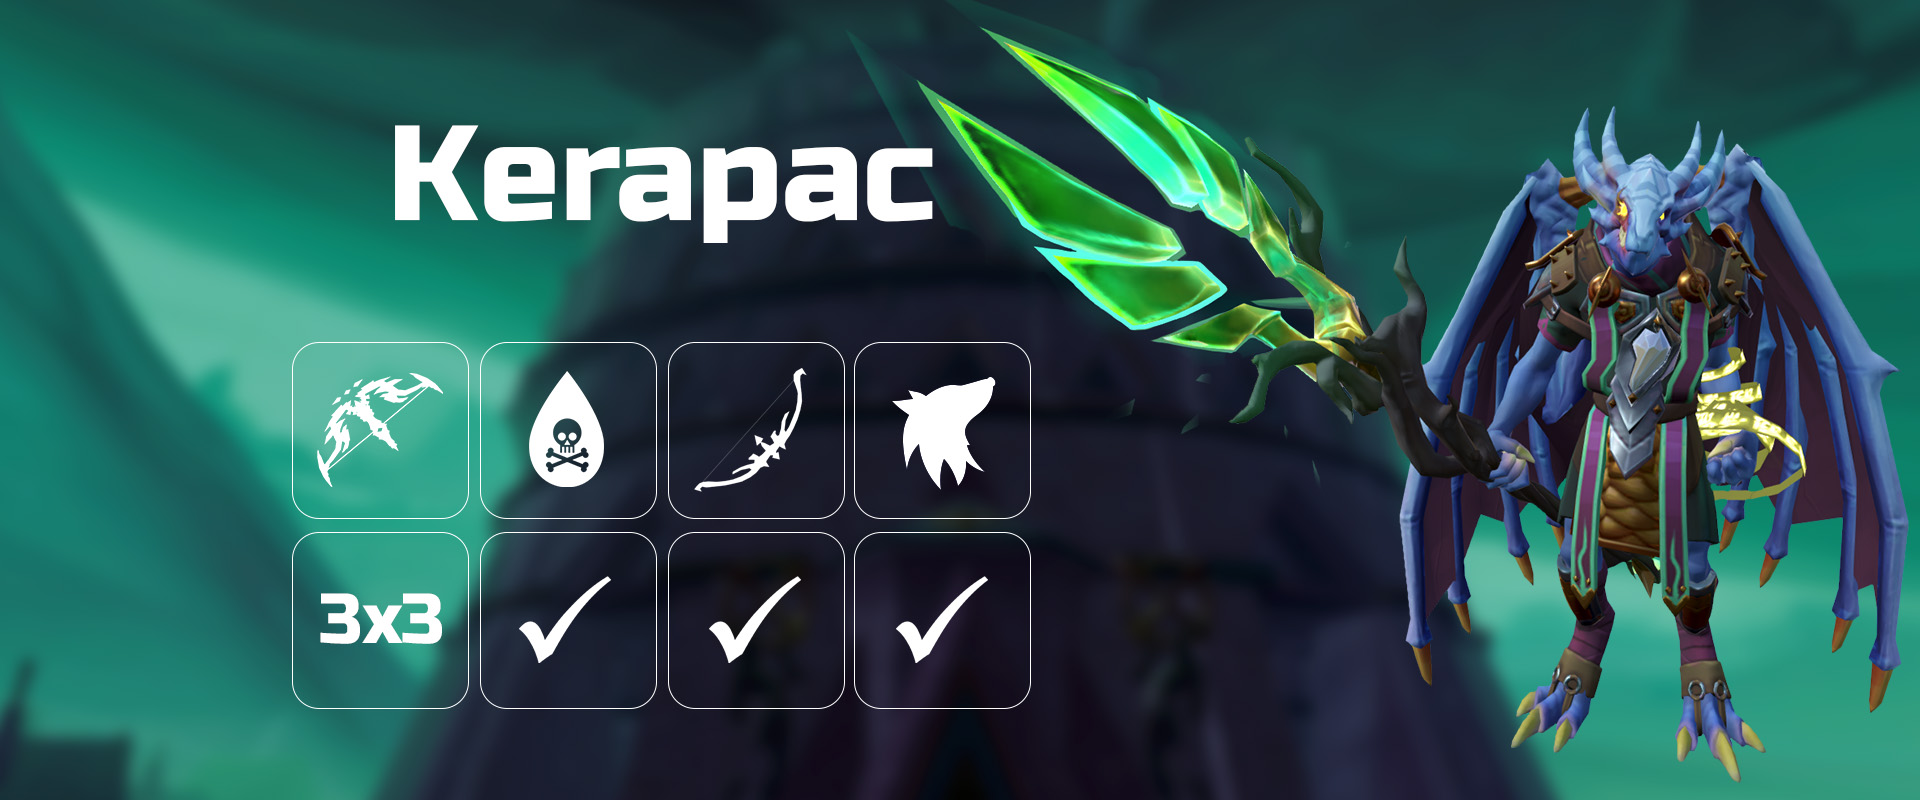
Solo Hard Mode Kerapac
Kerapac, the Bound Solo (BIS gear)
Introduction
This guide assumes you are already familiar with the basic mechanics of Kerapac which can be seen here #kerapac-hm-basic and own BIS gear in the respective style.
It is highly recommended to have a Nodon dragonkin slayer task  as the helmet boost does work. You may also use the Premier Artefact
  to have a 10% chance to not decrease the slayer task count with each kill.
Magic
Preface
These rotations cater to a max mage setup. Due to the randomness of critical strikes affecting your rotation when under 
 and the mechanic of
  , it is difficult to have a definitive rotation which means that improvisation will be necessary.
 can be used instead of
  as you will not be having any hitchance issues during the fight and it lowers Kerapac's magic level and applies a 1-minute accuracy debuff making it less likely for him to hit you. It also does the same damage and has the same adrenaline cost along with a cheap cost to purchase.
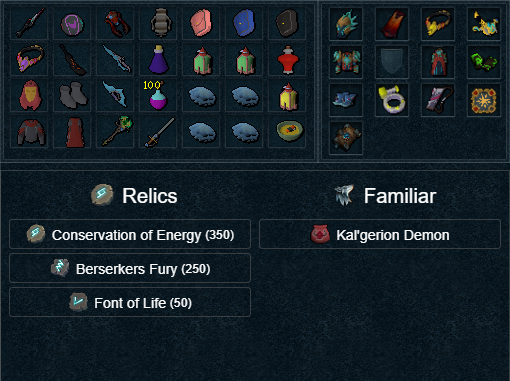
Preset and Relics
Additional Considerations/Info
⬥ An  can be used alongside an
  for phases 1 through 3, switching to only for special attacks and for phase 4. This should be around a 1% damage increase in exchange for extra effort.
• Ensure you use the Leech Magic and Leech Magic Strength curses when using until P4, where you switch to 
⬥  may also be used in exchange for an inventory slot and time gathering them although be wary when using them on echoes as they can sometimes run too far thus making them disappear, they will also continue attacking echoes even after death disallowing you to use another until you move far enough away.
⬥ Headhunter's thrill bracelets may be used as a switch to prolong slayer tasks. The Trophy-Taker's perk also does the same.
Phase 1
⬥ IMPORTANT: The following rotations have not been updated to account for changes on 5 June 2023.
Overview
⬥ Use  on floor the tick after
  's voiceline appears in chat box. If playing with audio, this is the tick after he says
 "No..."
⬥ It's assumed that is equipped as much as possible while its spec is active. For more information, type !fsoa in #bot-commands
Phase 1
(Autocast  ) →
) →  +
+  →
→ 
 →
→  /
/  →
→  → →
→ →  / → Stand under +
  →
→  (move out from underneath) → → (2H)
  → →
→ →  →
→  → → → basic / (move from the jump) → → / → basic / (
 from the second jump) → → Improvise with basics or depending on hp.
Sunshine Cooldown Issues on P1 → P2 Transition
If pushing faster times, cooldown will be an issue as it delays your ability to use early in P2. If this scenario is encountered, using early is the solution.
⬥ Option A - more time in P1 sun, slower warp
Use the above rotation, and simply swap and
⬥ Option B - less time in P1 sun, faster warp
the tick after spawns on the balcony →  → floor → (tc) → continue as per above
Phase 2
Depending on where Kerapac phased during P1 you’ll have to somewhat loosely use one of these rotations:
⬥ Before/After jump 1:
 → (as he raises staff) →
  → → →
→ → →  → → → Walk under + → 4 hit → → → ( end) → 4 hit (switch to
  ) → → → →
  → → → → (Move from the jump) → Filler ability → → → Improvise
⬥ After jump 2:
→ → → → → + → 2 hit → → → Walk under + → ( end) → → → → (switch to ) → → 3 hit → → → → → → + move from jump → → → Filler ability → → Improvise
⬥ After jump 3:
→ → → → → + → → → Walk under + → (go back to spot + switch to ) → → → → → 2 hit → → → → → → + move from jump → → → Improvise
Phase 3
→ 1t after warp →  →
→  → → / filler basic (if not phased into p3) → → →
  → Improvise
(Try to use and before the 2nd hit after shatter to avoid cooldown issues during p4, refer to the video below if you're struggling)
Phase 4
⬥ Echo 1
→ → between two echoes → → → → (DW) → (if needed, use on 2nd echo if unneeded)
⬥ Echo 2
→ → (if tsunami is on cooldown then use it once off cooldown/skip) → → →
⬥ Echo 3
to third echo → → + between echo and Kerapac → → → →  → → → (if needed, the echo dies by the quite often so use on kerapac if so)
⬥ Kerapac
→ (skip till here if 60%+ adren) → → → ( end) → Improvise
(Try to save for the next kill)
Example Kills
https://youtu.be/5A0fss_MMT8 15 KPH (Magic)
Ranged
Introduction
This strategy aims to keep HP below max from P1 to P3 to continually heal with  and
and  , thus maximising hitsplats with
  passive to maximise
  damage which has excellent synergy with
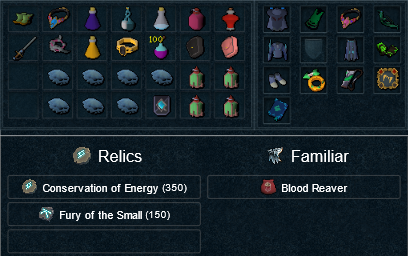
Preset and Relics
Overview
⬥ Use  + with
  + autofire set to 0
⬥ Rotations assume slayer task and  on anachronia stand.
⬥ P1 rotation assumes stalled  on War's dummy.
• For more information see !preincend
⬥ Do not and  on the same tick.
• Only after seeing the icon on buff bar (at least 1t apart).
⬥ Manually spam whenever you need health.
⬥ Have  active for a smoother P4.
⬥ For 
 you can equip
  back immediately after casting .
⬥ Use  to lower your hp at the start and whenever you reach max HP P1-3.
⬥ Tank Kerapac slams if <70k HP left.
Phase 1
⬥ Use 1 tick after yellow text appears above Kerapac.
⬥ If <50% for  improvise and try to end the phase at 2
  stacks.
+ →  →
→  → (
→ ( if <50% adren) → →
  →
→  → + walk under →
  → → → →
  → → → →
  → →
→ →  → →
→ →
Phase 2
+  → →
→ →  → → → + → walk under after ends → → → → → → → → → +
  to south clone spot → → → →
Phase 3
→ → → → → + → walk under after ends → → → → → → → finish with /basics if needed
Phase 4
⬥ Keep high hp by spamming food and throughout P4.
⬥ After killing south echo Kerapac is tagged with basic to extend the bik arrow duration.
⬥ Camp for the 1st clone. Afterwards swap to  and only flick if you're careful.
⬥ Equip  if getting to dangerously low HP.
⬥ South echo
 → + enter clone → basics until 3 stacks → →
  → → basics until echo is dead → tag with a basic + towards NE between remaining echoes
⬥ North and west echoes
→ + + equip → → / → → + → target north echo + → → → → finish off north and east echoes with and basics → east and target
⬥ Kerapac
basic → → → → → → finish with / /basics
Example Kills
https://youtu.be/ebuANMI5RuU 2:42
Melee
Preset and relics
Additional Info
⬥ You have to be on a slayer task
⬥ Challenging parts:
• Learning to walk under to avoid rift without cancelling  takes precision.
• Players' damage taken in Phase 4 can snowball if clones are not killed fast.
⬩ Learners may find it hard to use  in the last phase.
⬩ Learners can consider using  instead of
  to heal more.
⬩ However, brewing down too fast can lead to slower echo kills and thus taking much more damage.
⬩ Improvising rotations with  or
or  (with a
  ) might be better than following the rotation below and brewing if the kill is not going well.
⬥ The rotations listed below assume the following:
• All are used 1 tick before ability they are listed with.
⬩ Using both on the same tick will cause players to warp to their state post ability cast.
• Players swap to  for
for  and back to
  immediately after.
• All bleeds ( , ,
, ,  ,
,  ) are cast with
  unless specified otherwise.
• All channelled abilities ( , ,
, ,  ) are 4-hit unless specified otherwise.
• Players run under before using 
Prefight
 and then
  at War's Retreat.
Phase 1
+ +  →
→  + →
+ →  → bleed →
→  + walk under to avoid Rift → → → →
  → →
→ →  → equip
  + → → → +
  → →
→ →  + 2t → → switch to → (basics until phased) → → equip
  +
+
Phase 1 notes
⬥ Optimally release bled with
⬥ before if >50% adren.
⬥ If you phase immediately on , wait 2 ticks after the GCD and immediately for phase 2 (8-tick method).
Phase 2
→ → → → + 2h auto → + → 3-hit (walk under on tick 2 to avoid Rift) → → → → → 2-hit →  → → → (+ → continue with basics if not phased immediately after first jump) → → equip +
Phase 2 notes
⬥ Optimally stall and release the second along with using to have boost also apply to the first hit of
⬥ If you phased immediately on the last , wait 2 ticks after GCD and immediately for P3 (8-tick method).
Phase 3
→ → → → s → r + → + 3-hit (walk under on tick 2 to avoid Rift) → → → → → 2-hit → → → → + → →  → equip + → wait 1 tick
Phase 3 notes
⬥ Optimally stall and release the (using with ) and then cast on the same tick to have boost also apply to the first hit of
⬥ There is little benefit to skipping 2 jumps on P3.
⬥ Optimally you can pre- → going into P4 if you do skip 2 jumps the same way you close out P1 and P2.
Phase 4
Echo 1: → → → + 3-hit →
Echo 2: 3-hit → →
Echo 3: → → →  → + → → → + 2h-auto →
: → + + → + 2h auto → → → → →
Phase 4 notes
⬥ on is only used if echoes are cleared perfectly as won't be up 1 tick before otherwise.
Example Kills
https://youtu.be/ZBS_sdANqAI 15 KPH (Melee)
https://www.youtube.com/watch?v=T_74UQhwH_w 3:15
https://www.youtube.com/watch?v=BkbUKcGQL-8 2:58
Necromancy
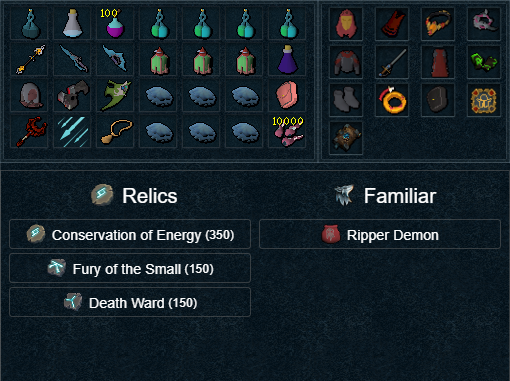
Preset and relics
Additional Info
⬥ The below rotations require prebuilt 8  and 5
and 5  stacks in order to work. See pre-fight section.
⬥  should only be equipped when summoning conjures, otherwise camp
⬥ This rotation assumes use of 5%+ Genocidal  on a Nodon Dragonkin slayer task. If not using , further abilities may be required in each phase.
Pre-fight (Wars Retreat)
 →
→  →
→  →
→  → → → → →
Pre-fight (Boss Arena)
 →
→  →
→  + (wait 1t) →
  →
→  →
→  + equip
Phase 1
TC + +  →
→  →
→  →
→  → → + walk under → → →
  → → → → → → →
  → → basics as needed if any jumps →
During phase transition: → → →
Phase 2
If the boss phased after jumps will be available to use pre
+  + → → → → → + walk under → → → → → → → → → → → → → basics as needed if any jumps
During phase transition: → → →
Phase 3
+ → → → → → + walk under → → → → → → → → → → → → → basics as needed if any jumps
During phase transition: →
Phase 4
Echo 1: → → → + → → → → → + to next Echo
Echo 2: → → → → → between final Echo and
Echo 3: → → → → → +
Kerapac: → → → → + → → → →
Phase 4 Notes
⬥ The speed of this phase relies on bouncing between echoes, manipulated via "Skull Juggling":
• Cast at max distance (6 tiles) away from the initial target.
• Wait an odd number of global cooldown cycles.
• towards your next target during the last global cooldown cycle.
⬥ The third echo must be killed with a fast hitting ability ( / / ) otherwise the first juggled skull will null on
Example Kills
https://youtu.be/nODJpGMQ4t8?si=5jSa9cKMstU5WhVe 2:46
Mage/Melee Hybrid
Preface
Hybrid strategies at Kerapac can result in fast kills and are able to circumvent cooldown issues that generally affect style-camp rotations.
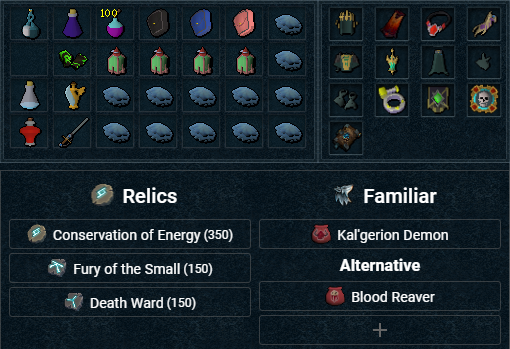
Preset and Relics
Preset Notes
⬥ Powder of Penance  is used before loading the preset.
⬥ Melee gear must not have 
Pre-fight
 + → → → → equip
  to stop autos →
Phase 1
You will need to determine if you can  and have enough adrenaline for P2 start.
→ → → (2 hit) → → (autocast ) → →
⬥ Depending on Kerapac's HP:
• High HP: → → → finish with basics
• Low HP: → → → → finish with basics
Note: If Kerapac jumps, use for chance of crit buff.
Phase 2
Ensure that  is re-applied during your . Ideally, try to delay usage of
  so as to maintain crit buff into P3.
→  → ( if needed) → → → 2H auto → → → →
  → → → → → build to 100% adrenaline → → finish with
  and re-apply when possible
Note: If was not used in P1, then an  proc will be needed to reach 100% adrenaline after . You can wear vestments on your last ability in P1 to reach > 100% adrenaline to avoid this issue.
Phase 3
The first suggested rotation has higher damage potential, however it depends on receiving high adrenaline from
→ → → → s / → r → improvise with / / / etc
Or,
→ → → → → → / → → improvise with / / / etc
Note: don't use / too late in the phase - you will need them for the first clone.
Phase 4
⬥ Echo 1
+ →  N/S clone → hop to opposite clone →
  → → (autocast ) → → W clone →
  → →
→ →
⬥ Echo 2
→ → → → finish clone
⬥ Echo 3
→ → → / → / improvise and
⬥ Kerapac
Improvise with / /
Example Kills
https://youtu.be/mH28QAslosQ 16 KPH (Hybrid)