Vorago Tips & Tricks
Miscellaneous Vorago Mechanics, Interactions and Glitches
This is a collection of various miscellaneous mechanics and glitches that can occur during the Vorago encounter for both normal mode and hard mode. These tips can range from very helpful (to the point where dps strategies rely on them) to just knowing them for the sake of trivia. These are generally organized by phase. Some of this information is already listed on the RS Wiki but for the sake of completion I will reiterate them here. This is not an extensive list of all glitches and misc. tips as I’m sure there are more to be discovered. Unless stated otherwise, all of these apply to both normal mode and hard mode.
Pre-Fight
Challenge Timer
⬥ Vorago’s fight challenge operates on a timer of 20 seconds. If you teleport away after you’ve accepted Vorago’s challenge to fight, and you travel back to the Face area within the 20 seconds, Vorago will still start the encounter and bring everyone into P1.
• Potential application: If you teleport away, do not return to the Face area within 20 seconds unless you wish to join the fight.
Fake Dropdown
⬥ There are some methods wherein you can take the dropdown damage but not enter the fight. One method of doing so is to open the “change username” interface, though you do not need to change your username – just have the interface open. The dropdown damage will still calculate as if you will join the fight (eg. In a team of five, the dropdown damage will be 10k even though only four people enter the kill).
• Potential application: This could be used to lessen dropdown damage without having to enter p1 and lobby thereafter, in the event you need to get someone with low HP into the fight.
Rest Animation
⬥ If you are in a rest animation when someone initiates the fight challenge prompt, you will not receive the challenge prompt until you have left the rest animation.
• Potential application: Don’t accidentally not accept the challenge prompt by resting at Face.
Lucky and Dropdown Damage
⬥ The Lucky perk can proc on the dropdown damage. Defenders and Armour set effects such as the Saradomin Warpriest effect can also proc on the dropdown damage nulling it to 1.
• Potential applications: Get lucky and take 1 damage instead of 12500. This is unlikely to be useful for regular kills however.
Powerburst of Vitality
⬥ Dropdown is 20 seconds after challenge, so you can time using the powerburst of vitality by using a defensive ability like Preparation. Then right when it has some time before it comes back, you can use the powerburst right then to start the fight with more health than if you just used a phoenix necklace. You can also bring only one dose if you don't need it for the rest of the kill so you can equip your 2H weapons without needing to eat something else.
Tutorial on 14k Entry Hits
Order to Maximize HP
-
Bonfire with all of your HP-boosting gear; if you have a thermal flask, use it prior to bonfiring
-
Load your preset with your shield equipped
-
Activate Fortitude
-
Eat a rocktail/sailfish soup
-
Lobby
-
You should be 14k+ hp without needing to keep prayer activated, just don't take off any hp boosting items (e.g. shield) or load another preset, else your hp disappears
Phase 1
Less Bombs on P1
⬥ Once the TL5 reaches the top rock and vokes Vorago, Vorago will throw less auto attacks and often have a longer delay between auto attacks, provided no one else is standing in MD (ie. Base should not voke and stand MD until around 30k hp).
• Potential application: In trios, this lessens the number of blues and red bombs the Bomb Tank has to take during P1
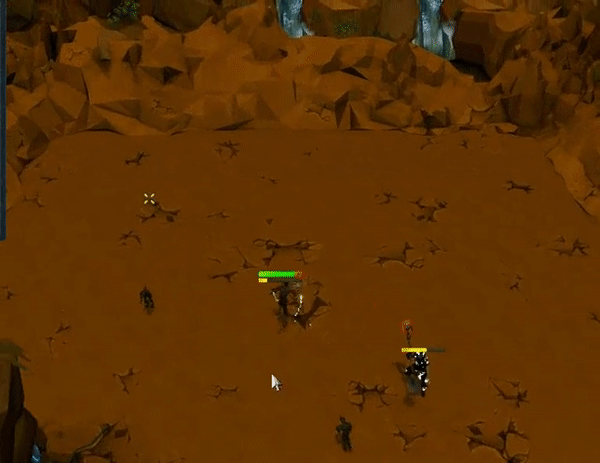
TL5 Corner and Attack Range
⬥ Assuming the Base lures Vorago to the North West quadrant so that the TL5 takes bombs as he climbs to the voke spot, the far North West corner of the TL5 path is often too far away from Vorago’s attack range. Thus, if the TL5 spends too long in the corner of the North West section, Vorago will start throwing bombs to the next furthest person which is usually the Bomb Tank.
• Potential application: The TL5 should run past the North West corner as fast as possible to avoid sending bombs to the Bomb Tank in trios.
How to Lobby P1
⬥ If the TL5 is standing on the top platform and vokes Vorago, the rest of the team can run to the South wall and exit combat to lobby. Vorago may throw occasionally throw blue bombs to the people running Southward, though, he will do it so infrequently that you should still be able to lobby in between blue bombs.
• Potential application: Lobby p1 if someone dies and you don’t want to invest more to further the kill.
Jump Damage Null
⬥ Upon the TL5 clicking to jump on Vorago, all incoming damage will be nulled on the tick when the TL5 clicks to jump.
• Potential application: If Vorago is close to HP reset and the TL5 sees someone doing a wild magic that will reset the HP, the TL5 can click to jump and immediately null any incoming damage, preventing an HP reset.
TL5 Staying in Combat
⬥ The jump animation is exactly 17 seconds. As the TL5, it is possible to stay in combat during the jump animation. This requires the TL5 to do an ability on the tick you click to jump. If you do an ability and wait a couple ticks before jump, you will have exited combat and lost adren during the jump animation.
• Potential application: This is a way for the TL5 to keep adren during jump and threshold after jump to end p1 faster.
Movement After Jump
⬥ If the Base moves away from MD during the jump animation, Vorago will follow the Base as if Vorago is still in MD. However, Vorago will not visibly move as he is stuck in the jump animation. After the jump animation is over and the TL5 reaches the ground, Vorago’s character will “teleport” to be MD of where-ever the Base has walked to.
• Potential application: In duos, the Base can escape during the jump animation. If the Bomb/TL5 happens to have a red bomb on them, the red bomb won’t deal 3k damage as the Base is far enough away. Be sure to walk one step north after you’ve escaped to prevent Vorago from moonwalking around the Base.
⬥ After Vorago has moved to the Base’s MD post-jump, Vorago will not move from that location unless the Base steps under him.
• Potential application: If no one is standing MD, Vorago will continue to throw blue bombs to the Bomb Tank. The Base can step away from Vorago’s MD and devo-cept the Bomb Tank.
1 HP Glitch
⬥ Vorago will regenerate HP on phase 1 at 1:09 (also 2:09, 3:09, etc.), if Vorago regenerates HP while jumping around before the phase transition, Vorago can have random aggro at the start of p2 meaning the first bleed on p2 will also be to a random person. Vorago can also start throwing blues and potentially reds. The blue and red bombs can follow you through the phase transition damage you upon p2 dropdown.
• Potential applications: The Base should Target Cycle as soon as possible on p2 to ensure that Base has aggro on p2.
Top Lure
Lure to TL5 Spot in Small Teams
https://www.youtube.com/watch?v=OmYO-xwpxjo&feature=youtu.be
Proper Climbing as TL5
https://www.youtube.com/watch?v=Mzyfjey6IwQ&feature=youtu.be
Stalling Wild Magic as Top Lure
https://www.youtube.com/watch?v=sgnThNnO9W8&feature=youtu.be
Solo Luring Vorago (No TL5 Voke Required)
Solo Luring in Hard Mode from the East Wall
https://www.youtube.com/watch?v=Mu_EvH4Y_Xg
Solo Luring in Normal Mode from the West Wall
https://www.youtube.com/watch?v=1mgdsTZGMuY
Crack Healing
Mechanics
During a phase transition at Vorago, your character is immune for 1 tick. You can take advantage of this by using the spell Heal Other from the Lunar Spellbook and cast the heal at the same time as a phase transition.
Normally, Heal Other will take hp from your character and transfer it to your target player; this results in a large 3-7k typeless "hit" on your character that is unavoidable. However, as your character is immune during a phase transition, the Heal Other will not damage your character. Thus, your target player will gain hp at no cost to you.
This works on any phase transition at Vorago in both normal mode and hard mode (with the exception of p10 -> p11 at hard mode).
How to Perform a Crack Heal
⬥ Be on the Lunar Spellbook and select the spell Heal Other.
⬥ Click your target player when the floor shows cracks, right before it collapses.
⬥ Important Notes
• Your target player must have Accept Aid turned ON in their settings.
• If you mess up and perform the Heal Other too early/late, the spell will take hp from your character and transfer it to your target.
• Heal Group can be used as well, though it requires your target player(s) to be within 1 square of you. Easiest way to achieve this is to ask your partner to follow you, or vice versa.
See video for examples: https://youtu.be/3bMTu1YJIbQ
Phase 2
Invisible First Bleed
⬥ The first bleed of P2 does not have a character animation as Vorago is still in his dropdown animation.
• Potential application: Clear the first bleed by using freedom first, then tag and voke if you are the Base.
1 Tick Bleed Clear
⬥ It is possible to clear the bleed in 1 tick by first escaping, then bladed diving back onto Vorago within the same tick. You must target Vorago with the bladed dive, targeting the ground for MD will not work and will make Vorago walk towards you. You must avoid standing on the corner of Vorago’s MD as this will also make Vorago walk toward you after you’ve escaped.
• Potential application: This is another way to keep Vorago in Base spot while clearing bleeds without freedom.
Instant Bleed Clear
⬥ After a bleed is applied, there is a couple ticks delay between when the bleed is applied to when the dismember icon appears on the debuff bar. It is possible to clear a bleed before the dismember bleed icon appears on your debuff bar.
• Potential application: You can clear bleeds faster than you think.
Voke Splash
⬥ It is possible to have a voke splash on P2, and (likely) all other phases of the boss too. If a player vokes Vorago and another player is standing within the path of Vorago and the voker, Vorago will aggro onto the person standing in-between instead.
• Potential applications: Avoid voking Vorago while standing behind another player. See clip: https://clips.twitch.tv/FrigidDeafMooseThisIsSparta
Clearing All Bleeds Solo
⬥ It is possible to clear all five bleeds solo. The order is escape/surge, bladed dive, freedom, escape/surge, bladed dive. Note a mobile perk is needed.
• Potential application: Clear all five bleeds solo in case of dead teammates.
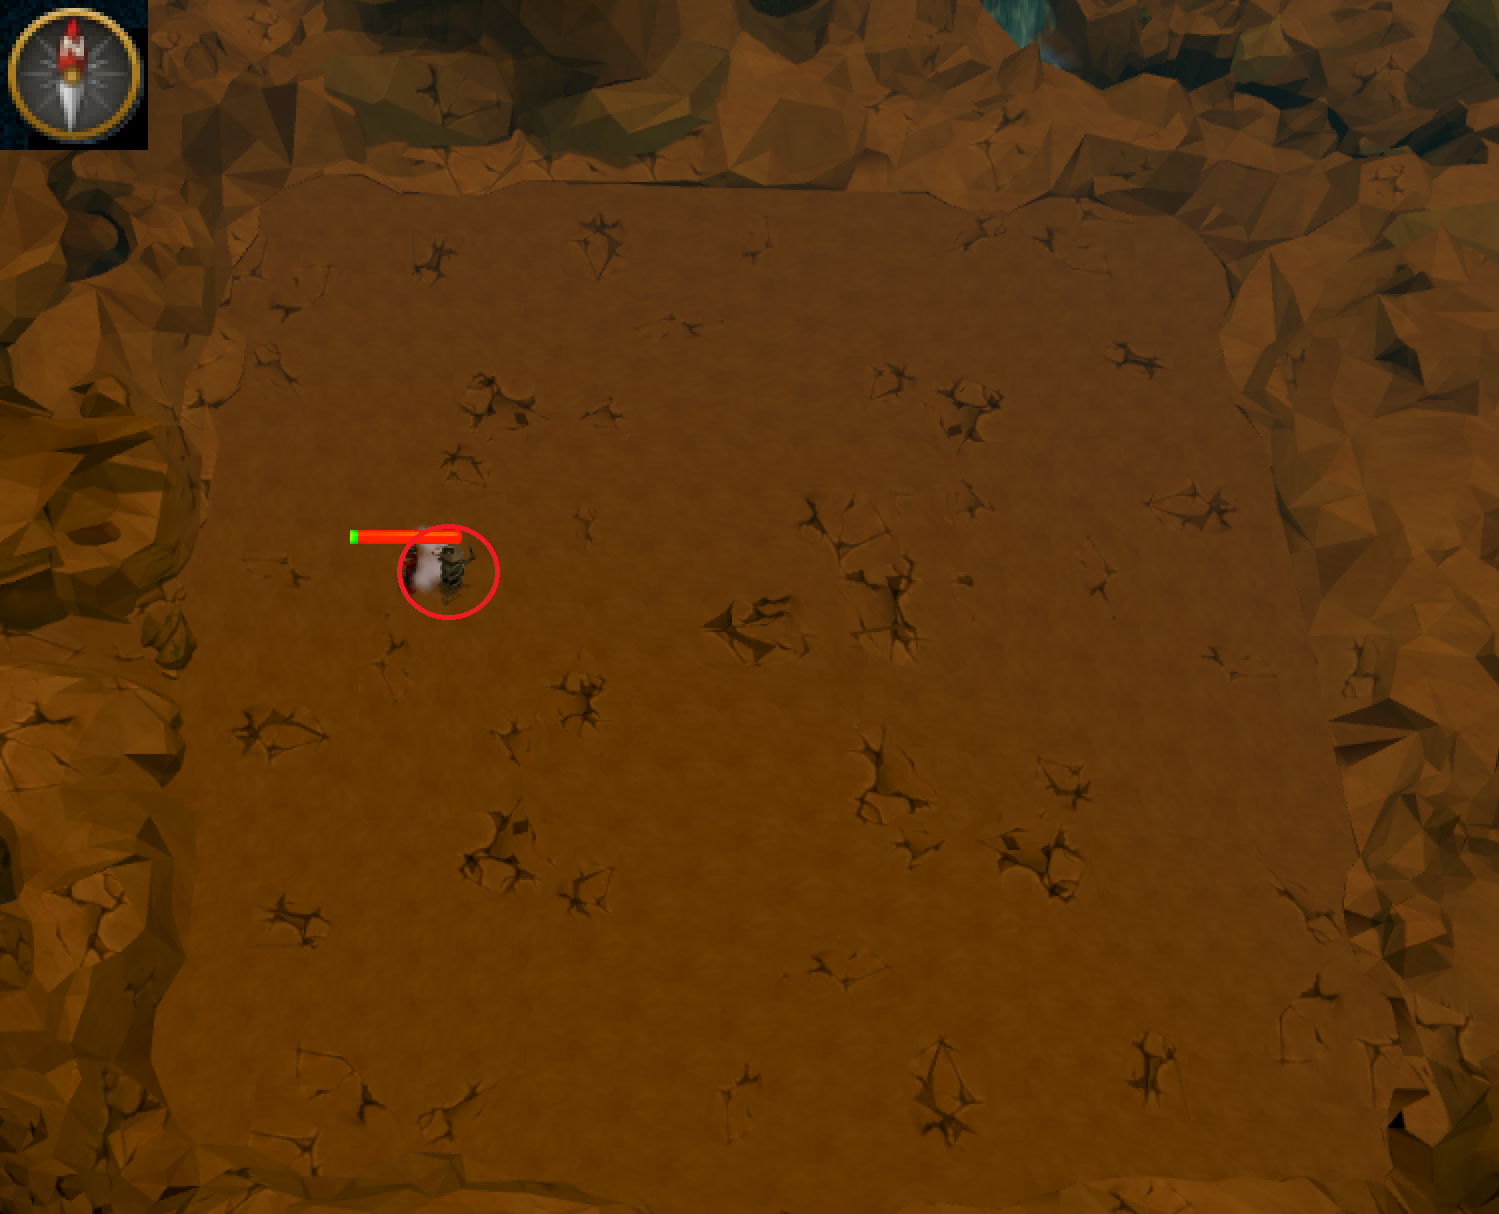
2k Typeless Damage
⬥ Sometimes, after Bring Him Down, all players in the arena will take a 2k typeless hit immediately after the spam click mechanic. It is unclear what triggers this though it is believe to be an “anti-afk” where if players ignore Vorago for too long, Vorago will perform the 2k typeless hit (similar to how you must stay in combat in Yaka). This 2k typeless hit can also be encountered during P1 if the TL5 vokes Vorago and everyone else lobbies, but the TL5 stays in the kill and exits combat. The TL5 will proceed to take 2k typeless hits. It seems the entire team must exit combat for this bleed to occur, though confirmation on this is needed.
• Potential applications: Keep above 2k HP after Bring Him Down just in case.
Stuck Under Vorago
⬥ During Bring Him Down, it is possible to get stuck under Vorago after the spam click mechanic. This is usually triggered by standing under Vorago during the Bring Him Down mechanic.
• Potential applications: Avoid standing under Vorago during Bring Him Down.
Bring Him Down – DPS Check
⬥ The Bring Him Down DPS check to make Vorago stumble is 50k Hp no matter the team size. This is rather trivial to do in a team size of 3+ but becomes harder in Duos.
• Potential applications: Do approx. 50k worth of damage during Bring Him Down to get past the mechanic.
Bring Him Down – Staying in Combat
⬥ Occasionally, it is possible to exit combat and drop adren during the Bring Him Down spam click mechanic. This usually occurs when players have refreshed their combat state before the last Gravity Orb is tagged.
• Potential applications: To avoid dropping combat and losing adren during Bring Him Down, do a defensive ability during the spam click mechanic, such as anticipate.
Centring Vorago
Knowing how to walk Vorago is useful for moving him on phase 2.
First determine his walking direction. Step one tile under Vorago and immediately cast an ability to walk him one tile in his walking direction.
Note: If you do not cast an ability he may walk on top of you and around to the other side.
Once you determine Vorago's walking direction, it is easiest to manipulate his position from the opposite side, i.e. if Vorago is walking west, stand on the east side of him.
In order to move Vorago, he must be following you. During phase 2, Vorago does not follow between the red bomb and start of bleeds. This means if you step out of melee distance expecting Vorago to follow you after the red, he will stand there until bleeds begin. However, he can be walked under which will cause him to move in the direction he is walking.
If Vorago is walking south, go west and bladed dive onto the square marked with the blue blubber jellyfish
<
To bring Vorago back to base spot when vorago is lured south during bleeds, step 2 squares north of the square west of L rock and provoke
<
If Vorago is north, step 2 squares south instead.
<
How to Tick Shatter After Bring Him Down
https://www.youtube.com/watch?v=CXqNT7XOOHk&feature=youtu.be
Phase 3
Scopulus – Aggro
⬥ The Scopulus aggro seem to be random though there are a couple ways to trigger a reaggro. 1) If a player is constantly in motion, the Scopulus tend to aggro them more. 2) A player with an Ice Nihil will tend to draw more aggro, due to the Ice Nihil’s special effect acting on the Scops.
• Potential applications: Bring a Smoke Nihil on Scop rotations to avoid drawing aggro.
Vitalis – Base Spot and Vitalis Spawn
⬥ If Vorago is not moved from the initial dropdown spot, the Vitalis Orb will always be sent North, North East, or East. If Vorago is moved from the initial dropdown spot, the Vitalis Orb can be send in any direction.
• Potential application: Avoid moving Vorago to have a predictable Vitalis Orb spawn.
Vitalis – Max Vitalis
⬥ The maximum number of Vitalis that can fill the room in Normal Mode is 15, the max in Hard Mode is 25. In Normal Mode, the number of Vitalis spawning per Orb is 5 on p3 and p4, and 2-4 on p5. In Hard Mode, there are 7 Vitalis on p5 and p9, and between 3 to 5 on p10 and p11.
• Potential applications: If you want to block all Vitalis spawns, have the appropriate number of people standing in the spawn Orb.
Vitalis – Death Animation
⬥ A Vitalis minion is still treated as a physical object while in its death animation.
• Potential application: If surrounded by Vitali, be vary of their death animations still counting as a physical object. Same applies to Waterfall on P4, your character will attempt to path around the dying Vitalis which may lead to exiting the waterfall prematurely. See clip: https://youtu.be/-HOB3kLpHgI
Teamsplit – Auto Attacks
⬥ During the teamsplit mechanic, if you attempt to cast an auto attack on Vorago while outside the max cast distance, your character will run into the max cast distance in an attempt to cast your spell. Often times this results in a player leaving the teamsplit box early and taking 8k damage.
• Potential application: Do not attempt to auto cast while in teamsplit unless you are certain you are within 7 squares to Vorago.
Teamsplit – Hard Mode
⬥ The teamsplit boxes in hardmode, although appearing to be only 1x1, are actually 1x2. The square directly east of the 1x1 square is also safe to stand on. The same applies to the teamsplit boxes on p10 and p11.
• Potential application: Another safe square to stand on for team split.
The End – Glitch Out of Arms
⬥ It is possible to glitch out of the arms during the mechanic by standing directly on the South line, or East line, in the respective quadrants. When Vorago’s arm crosses said line, your character is free to move out into the open arena. Note that if you do not move after “glitching out” and stay standing on the South or East line, you will be forced back into the arms mechanic.
• Potential applications: DPS can glitch out of arms and set up their Sun with ample space.
The End – Bombs after Phase
⬥ Vorago only allows bombs to be interacted with when it is pointed to in their respective quadrant. If Vorago happens to phase while looking at a specific quadrant, the bombs in that quadrant can still be activated while the phase transition is happening.
• Potential applications: Tag the red bombs during a phase transition and ask for a group hug.
How to DD Scops on Spawn Using Backwards Target Cycle
Getting Flank on Scops as Base
Stand on the tile shown in the video, and take one step north east after luring scops.
Phase 4
Waterfall – First Spawn
⬥ The first spawn of the waterfall will never be on the North East corner of the arena.
• Potential applications: That is one less corner you have to consider for waterfall upon dropdown.
Waterfall – Auto Attacks
⬥ Initiating an auto attack while standing in waterfall will force your character to run into max cast distance and often outside of the waterfall.
• Potential applications: Avoid using auto attacks on Vorago while standing in waterfall.
Waterfall – Corners of the Waterfall
⬥ The corners of the waterfall (excluding the NE, SE, NW, SW corner) are not considered part of the waterfall.
• Potential application: Avoid standing on the edge/corners of the waterfall or else be ready to take a 9800 hit.
Stone Clone – Vorago Melee Animation
⬥ Upon summoning a stone clone, Vorago will perform a melee swipe animation. This melee swipe animation is non-damaging and is only cosmetic.
• Potential applications: Do not try to res this attack as it won’t hit anything.
Stone Clone – No Target
⬥ If the stone clone target dies on the same tick, or shortly after the stone clone spawns, the stone clone will stand idle for a couple seconds before reaggroing to another person. However, the new player cannot attack the stone clone back as they are not the stone clones’ original target. The stone clone will eventually despawn.
Teamsplit – Third Waterfall
⬥ The teamsplit mechanic after the third waterfall is currently glitched. Vorago is still attackable during the teamsplit and if attacked, Vorago will proceed with his rotation and throw three blues, followed by bleeds. This means the team will have to tank 3 blues without any defensives and be ready to immediately deal with bleeds out of team split.
• Potential applications: DO NOT ATTACK Vorago as teamsplit is about to spawn. This prevents Vorago from sending blues during the teamsplit.
Stone Clone Skip
Introduction
A Stone Clone in Phase 4 / 9 always targets a person that Vorago does not hold aggression towards (the Base Tank). In other words, the Base Tank never receives a Stone Clone. It has been discovered in scenarios where you end in a Solo Phase 4, that Vorago will bug for a few ticks and then proceed with the weekly special, skipping the Stone Clone and its following 7 auto attacks completely. In place of creating the Stone Clone, Vorago bugs for 12 ticks and skips all 7 auto attacks which equates to a total of 56 ticks (33.6s) saved.
Overview
⬥ One player vokes  , underwalks Vorago
  and lures him to whatever wall he's walking towards.
⬥ All other players quickly position at the opposite side of the arena, so that they leave the visibility range to Vorago.
⬥ Due to the Base Tank being the only visible player in the arena, Vorago will skip the Stone Clone and its following 7 auto attacks.
⬥ Vorago will continue his attack order with the weekly special mechanic.
Strategy
⬥ Toggle off running once you enter the Waterfall.
⬥ Post-Waterfall: Either use Barge  as your first ability or Surge
  within your first ability's GCD
Note: On Team Split, use the Mobile perk  with gBarge if you plan on breaking the TS.
⬥ Walk towards Vorago's walking direction (do not run).
⬥ Toggle on running as Vorago reaches the wall.
⬥ The moment that Vorago starts moving, all other players should immediately position at the opposite side of Vorago's walking direction (utilise Surge and Bladed Dive  ).
).
⬥ Once the Stone Clone special mechanic is skipped, move back to the Base Tank
Video Example
https://www.youtube.com/watch?v=maGhYnPa92w
Important Notes
Due to the incredible amount of time gained by a Clone Skip, Barricade  will mostly no longer be available for each weekly special mechanic. Due to this it is required to alternate Barricades between the Base and Bomb Tank. Preferably the Bomb Tank barricades the first cycle so that it will be ready in case of a Phase 5 / 10 Barricade.
Breaking Teamsplits
“Breaking” a teamsplit involves Vorago continuing his attack rotation during a teamsplit. This is beneficial during phase 4, as it can speed up the phase. However, this is harmful on phases 3 and 5, as it gives you less time to attack the boss.
When the teamsplit is broken, Vorago can still use both melee attacks and blue bombs, so keep in mind to eat up if necessary to not die to this.
How to Break TS
⬥ You need to use mutated barge and then apply one of your melee channeled abilities as a bleed directly before the teamsplit.
• It does not matter which ability you use (flurry, assault, or destroy), however the tick that you apply the bleed on DOES effect how quickly the teamsplit is broken.
• Some ticks result in attacks starting slower during the teamsplit, meaning the phases lasts longer, where others result in the attacks starting sooner in teamsplit, meaning the phase doesn’t last as long. A consistent way break the teamsplit on a fast tick is to barge immediately after the 6th blue bomb is released after the clone and then bleed destroy exactly one global cooldown later.
• Keep in mind to stop attacking before your barge to get the buff.
If done correctly, bleeds will come immediately after a phase 4 teamsplit. The first bleed received is somewhat invisible, similar to the first bleed on phase 2, so make sure to watch out for that. In addition, you can sometimes lose aggro, so make sure to voke.
Both barge and the bleed following can splash and you will still break the teamsplit.
Video example of a slow vs fast broken teamsplit (left side is the correct timing):
Phase 5
Walking MD – Revo Friendly
⬥ A player can spam click the ground behind Vorago to make their character stand MD while also stopping revo from attacking.
• Potential application: Good for revo users to MD and be ready to clear bleeds on tick.
P5 Voke
⬥ Due to how P5 is set up, a player cannot voke Vorago during p5. The ability will simply not activate when pressed.
• Potential application: None.
Melee Dismember on Reflects
⬥ If a player applies the dismember melee ability on reflects to another player, and the victim player receives the first bleed, the first bleed damage will immediately apply the 4500 damage as if the player was taking a second bleed from Vorago without clearing the first bleed. This is most likely an oversight. It is unknown if this works on p2, p3, and p4.
• Potential applications: Prank your teammates by putting a dismember on them during reflects.
P5 Pushback
Damaged Required to Push
Pushing Vorago one tile entails dealing 20k damage to him. As soon as this 20k threshold is hit, the damage counter resets to 0 for the next tile.
⬥ Example A:
• If you deal one hit of damage that deals 30k damage to Vorago, 30k damage is added to the damage counter, then the game performs a check to see if that total value is at least 20k.
• It finds that 30,000 >= 20,000 holds true, so Vorago pushes a tile and then the counter is reset to 0, effectively losing 10,000 damage. This 10,000 damage is referred to as “overkill”.
⬥ Example B:
• Presume you deal three individual hits of 10,000 damage on the same tick. The first one is added to the damage counter, it checks if 10,000 >= 20,000 and finds that is false, so that hit doesn’t cause it to push.
• The next hit is then added to the damage counter, which is now at 20,000 damage. It checks if 20,000 >= 20,000 and finds that is true, so the boss pushes and resets the damage counter to 0.
• Finally, the last hit of 10,000 is added to the damage counter, and it performs the same check, but finds that 10,000 >= 20,000 does not hold true. This 10,000 damage stays in the damage counter until the next tick, and this damage is referred to as “overflow”. So the result of these hits is pushing one tile with 10,000 overflow.
⬥ Example C:
• Suppose there is one last hit of 10,000 damage on that tick. Again, this 10,000 is added to the damage counter as before, for a total of 20,000 damage.
• The game performs the same check and finds that 20,000 is in fact at least 20,000, so the damage counter resets.
• Vorago cannot be pushed twice on the same tick, so hitting this 40,000 damage mark in one tick may actively be detrimental to a kill, as you will end up losing 20,000 damage.
Skipping Debilitate on P5
Debilitate should be skipped after bleeds because while it does have a chance of blocking push back, it can negatively impact stall. This is most notable on the TeamSplit rotation because the person who suns relies heavily on stall to use their threshes before TeamSplit.
While this is not as harmful on other rotations, it may still prevent players from using the full duration of their sunshine. The dps of two or three players is typically greater than Vorago's push back. Thus, it is better to skip debilitate in favor of higher damage abilities to both induce stall from taking damage and dealing more damage overall.
1st blue sent out
2nd blue sent out
1st blue hits and creates stall
2nd blue hits and creates stall
3rd blue sent out
Teamsplit
3rd blue hits and creates stall (while he is no longer attackable)
In the above scenario Vorago pushes back 3 times and you can only take advantage of 2 times he stalls, 2 of which are 3 ticks apart.
Now lets look at what Debilitating does.
1st blue sent out
2nd blue sent out
1st blue hits
3rd blue sent out
2nd blue hits and creates stall
Teamsplit
3rd blue hits and creates stall (while he is no longer attackable)
Debilitating prevents the first blue from stalling vorago which means that the third blue gets sent out, allowing his teamsplit attack to happen much earlier.
If you have disruption shield, it is best to use it on the second blue and to asphyxiate instead of debilitating. If you push Vorago after he sends out the third blue, you have a chance to take advantage of the stall from the last blue rather than getting pushed while he TeamSplits.
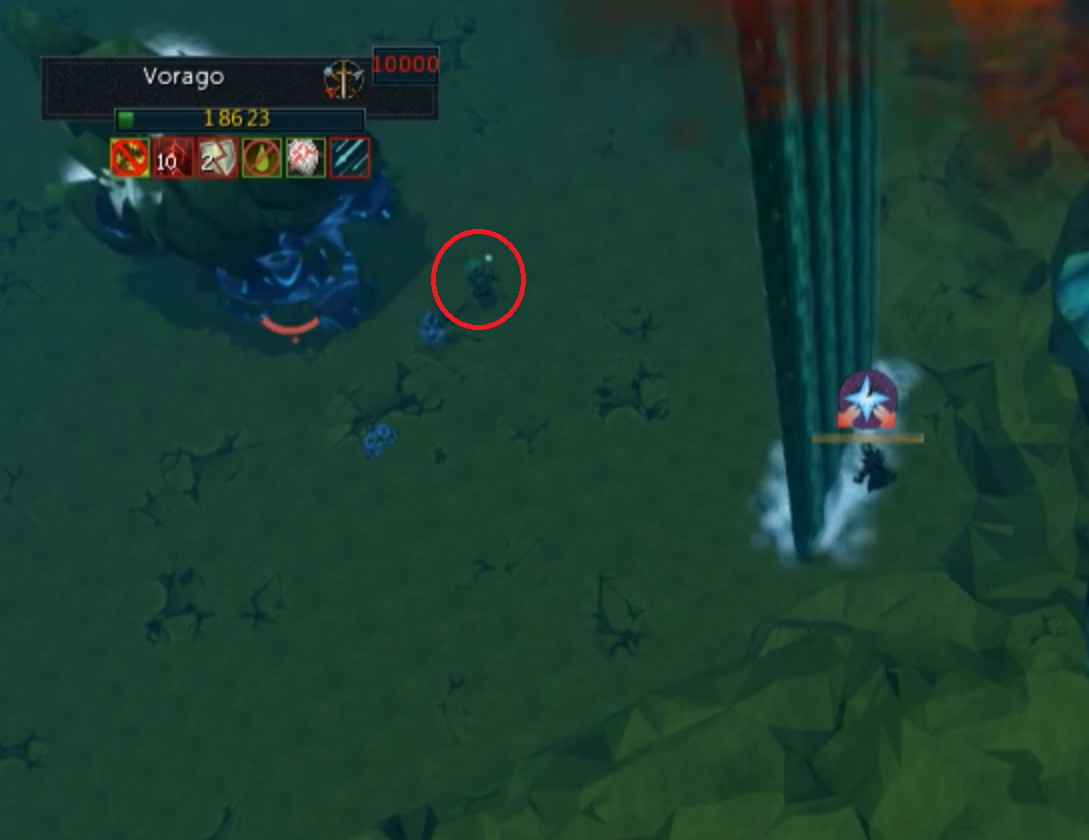
Target Cycling at Vorago
Target cycling is extremely useful at Vorago for multiple reasons. It allows you to attack both scopulus on spawn, luring them extremely easily without issue. It can also let you attack Vorago before he becomes immune to a dropdown special attack, like the first waterfall, TeamSplit, or Purple Bomb. On the final phase, you can push forward Vorago before he does a dropdown special attack, which creates push stall, allowing you to do an additional ability.
In order to Target Cycle Vorago on tick properly, you must know 2 important timings.
Timing 1: Phase Transition 'Crack'
⬥ This timing is very easy, as the crack animation is 3 ticks long, and you just need to use movement ability like Surge, Escape, or Bladed Dive on the third tick. Alternatively, you can use Provoke on a training dummy/Vitalis, or learn the timing with any other ability such as anticipate, although the easiest and most beneficial one is to use Escape, as that let's you easily cast Heal Other while staying in range of your partner.
⬥ The first tick is when the crack first appears, and the third tick is when you use surge.
To help, set a metronome to 100 bpm, count to 2 when the crack appears, then use surge.
Once you get the timing down in your head it is hard to mess up during the kill.
Timing 2: Mobile Cooldown
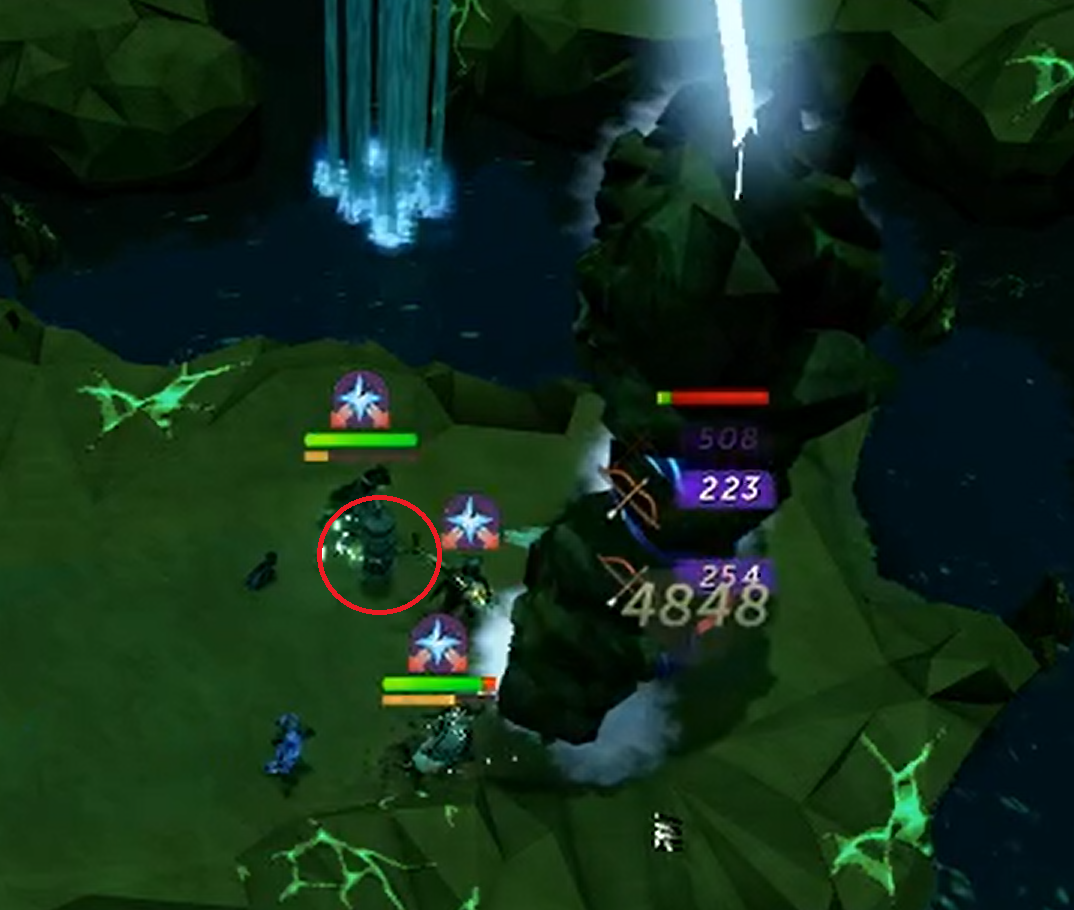
Cooldowns go around 360 degrees on your abilities clockwise, and keeping clocks in mind, we can use this to help make learning the Target Cycle timing much easier. 9 seconds after your surge/escape with mobile perk, your ability will be at 10 o' clock on 1 tick and 11 o'clock on another tick. On 11 o'clock you need to press target cycling and an instant hitting ability to follow (like dragon breath) (See image below)
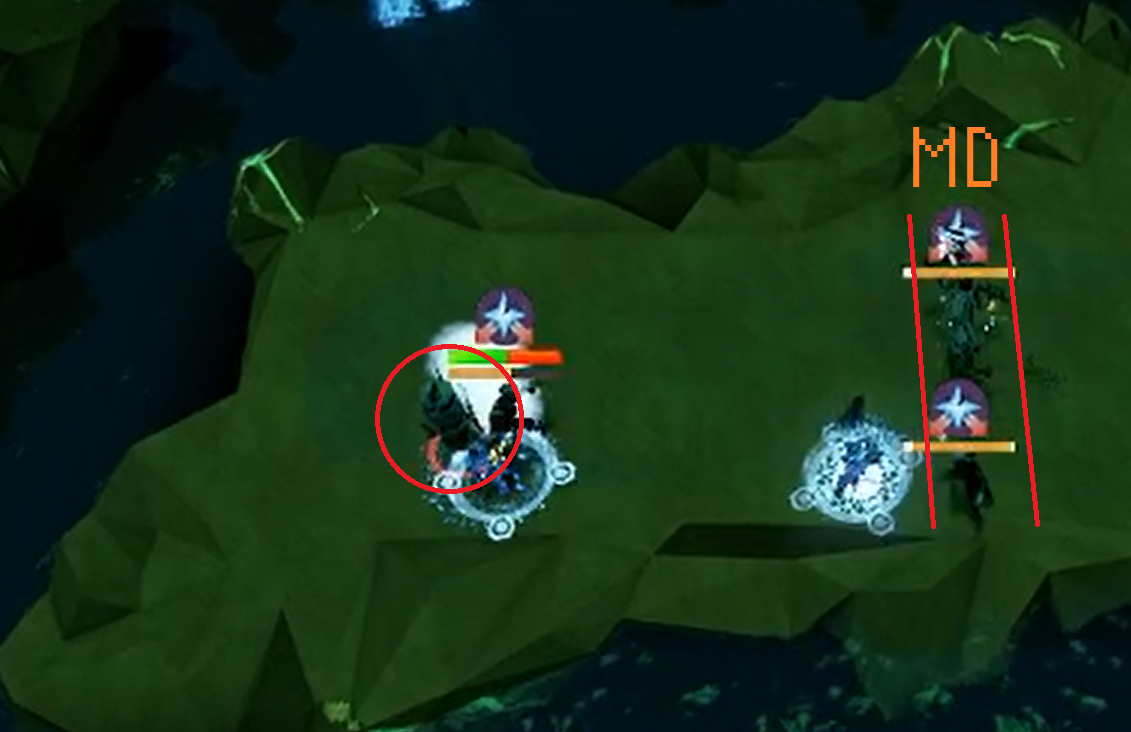
Dummy Placement
Introduction

⬥ Proper placement of dummies is necessary in kills to ensure that the dummy does not harm the phase
• An improper dummy can cause difficulties when it comes to properly targetting rago, or with getting enough distance to stall off of the dummy.
⬥ As a general reference: On a phase transition, one player at random will drop southwest (called the "default" drop), and all others will fall to roughly the same location they were in from the previous phase
• We can use this to our advantage to allow for an easier time dropping dummies on the following phases, and also allow for an easier time 9-tile stalling.
⬩ For example, if you drop the P2 dummy north and both stay near the dummy, one person will drop southwest, and the other will drop north.
⬥ Typically, if someone has to place their ult on a phase (whether it be Death's Swiftness, Sunshine, or a ZGS spec) then they should not be placing that phase's dummy.
• Each dummy in this guide has been labeled as either the Bomb Tank's dummy or the Base Tank's dummy, keeping this in mind.
Normal Mode
⬥ Face: Base Tank
⬥ P1: START OF PHASE - Bomb Tank
• Drop ASAP (West)
• Make sure to take the TL drop, and you will spawn in a good spot to drop the dummy
⬥ P2: END OF PHASE - Bomb Tank
• Scopulus: Mid
• The End: NW, SW if no 9 tile stall on P3
• All other weeks: North, SW if no 9 tile stall on P3
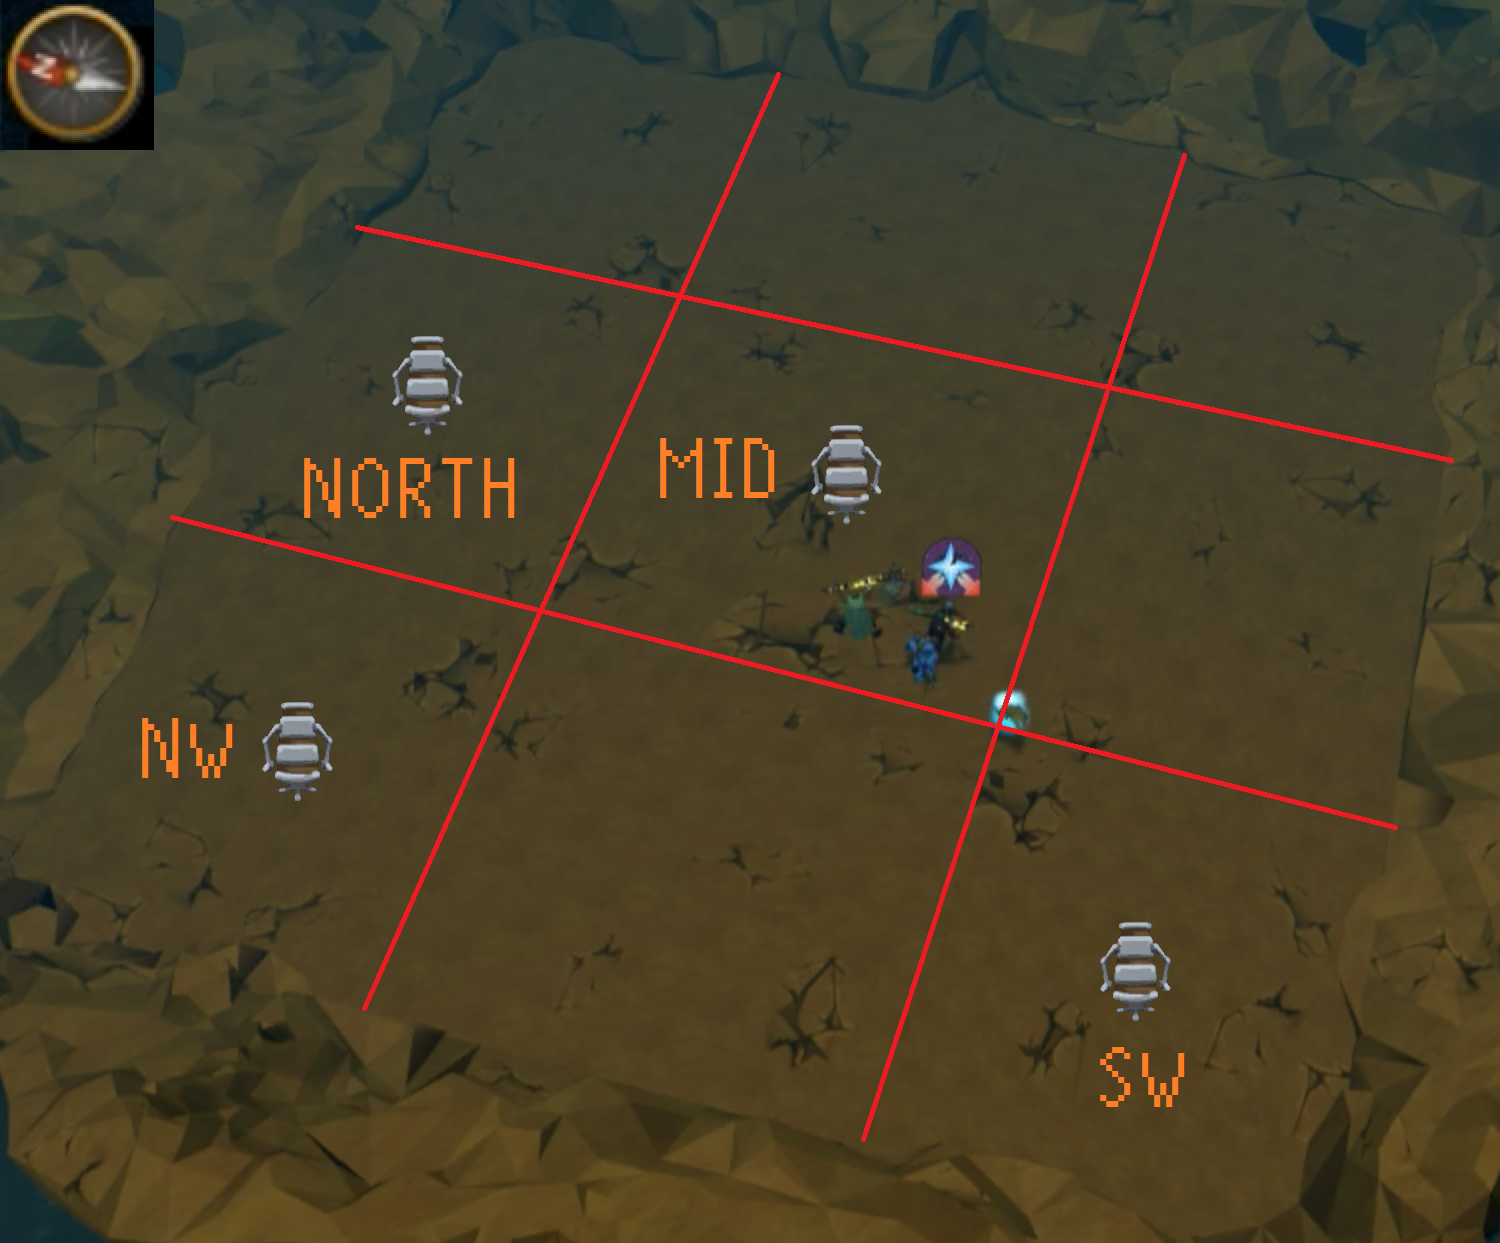
⬥ P3: START OF PHASE - Base
• Scopulus: Mid
⬩ Prevents re-targetting the dummy after the Target Cycle tick
• All other weeks: Drop asap (SW/North)
⬥ P4: END OF PHASE - Bomb Tank
• Drop in the middle section as the last waterfall spawns, nearest to the waterfall

• Here is an example of a proper dummy:
⬥ P5: START OF PHASE - Base Tank
• Drop ASAP (Out of MD)
Hard Mode
⬥ Hard mode dummies follow roughly the same idea as normal mode dummies
• However, you will want to be making use of SW dummies much more frequently
⬩ This is mostly because you will (generally) have more than two people, so even if you needed to 9 tile stall, you cannot guarantee that the person dropping the dummy will be separated from everyone who is 9 tile stalling, so it is better to just have consistent dummy placement.
⬥ It is not currently standard to use face or P1 dummies, except in the case of Duo HM, in which case it is up to the discretion of the team who places those.
⬥ P2: END OF PHASE - Bomb Tank
• Drop SW during Bring Him Down
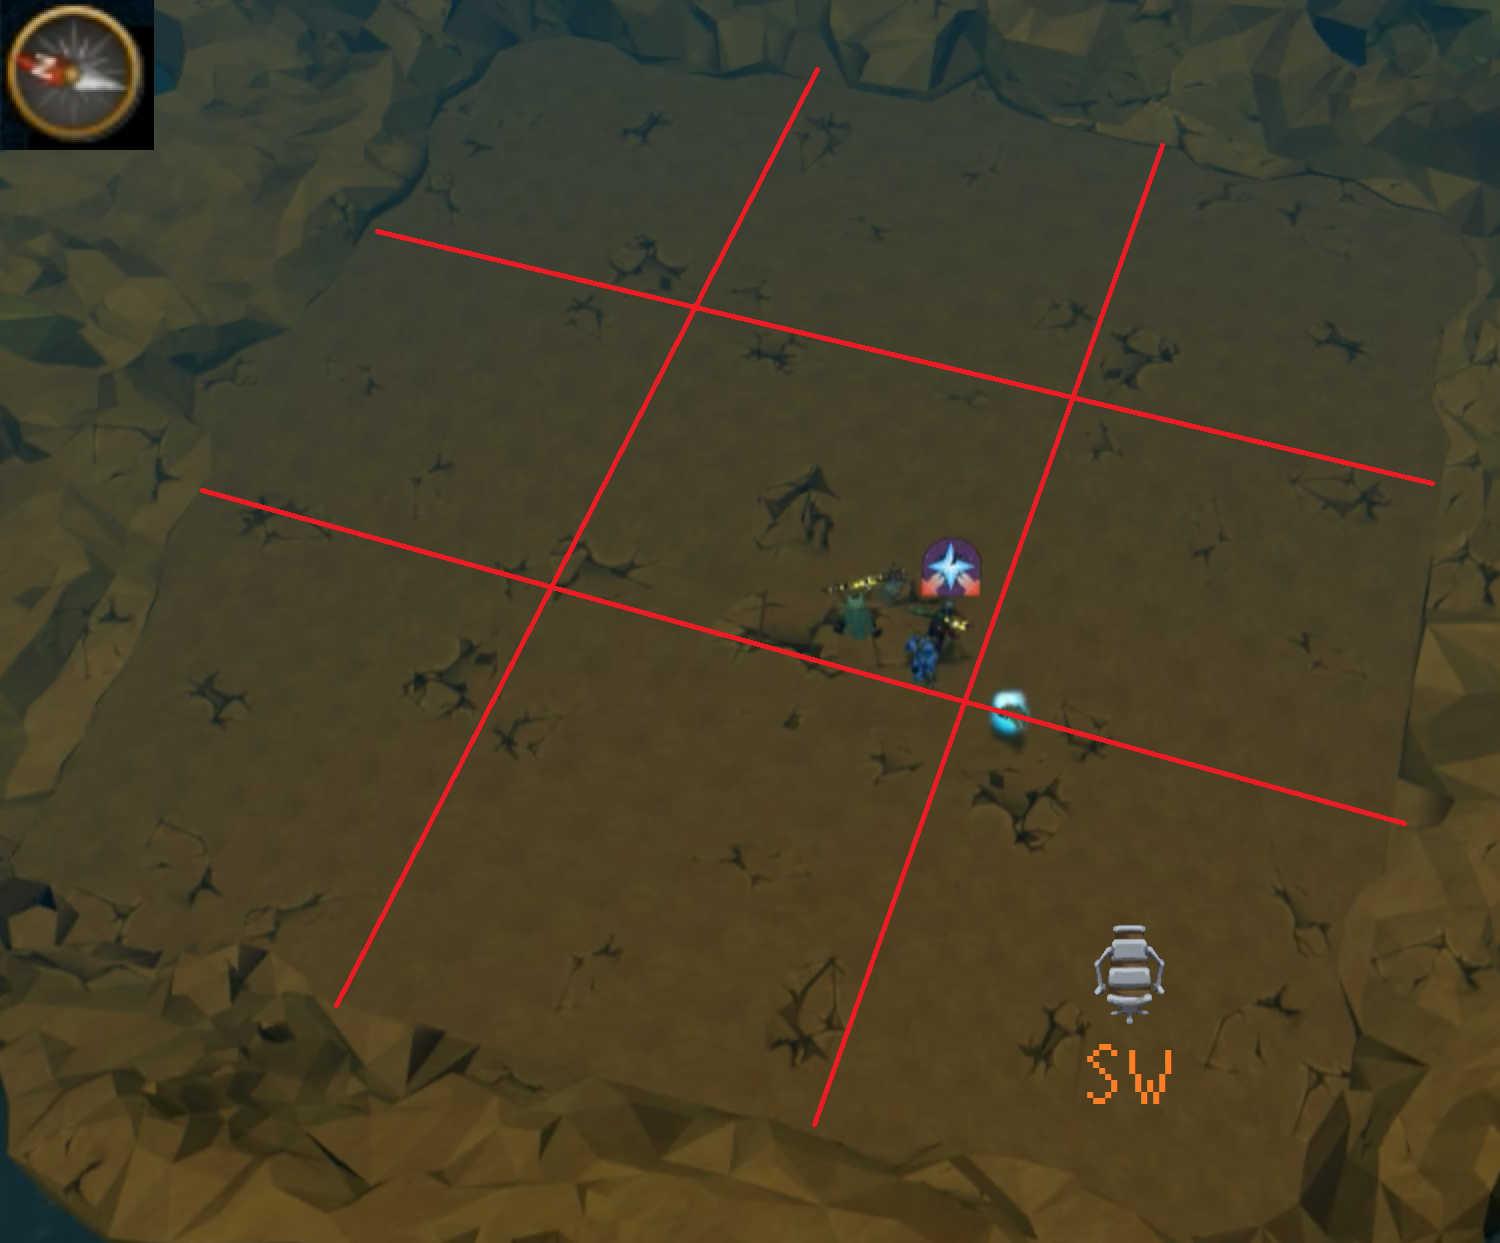
⬥ P3: START OF PHASE - Base Tank
• Drop ASAP (SW)
⬥ P4: END OF PHASE - Bomb Tank
• Drop SW, end of phase
⬥ P5: START OF PHASE - Base Tank
• Drop ASAP (SW)
⬥ P6: START OF PHASE - Bomb Tank
• Drop ASAP (SW)
⬥ P7: START OF PHASE - Non-Ulting Bomb Tank
• Drop ASAP (SW)
⬥ P8: START OF PHASE - Base Tank
• Drop ASAP (SW)
⬥ P9: END OF PHASE - Bomb Tank
• Drop in the middle section as the last waterfall spawns, nearest to the waterfall
Note: This is the same as P4 normal mode
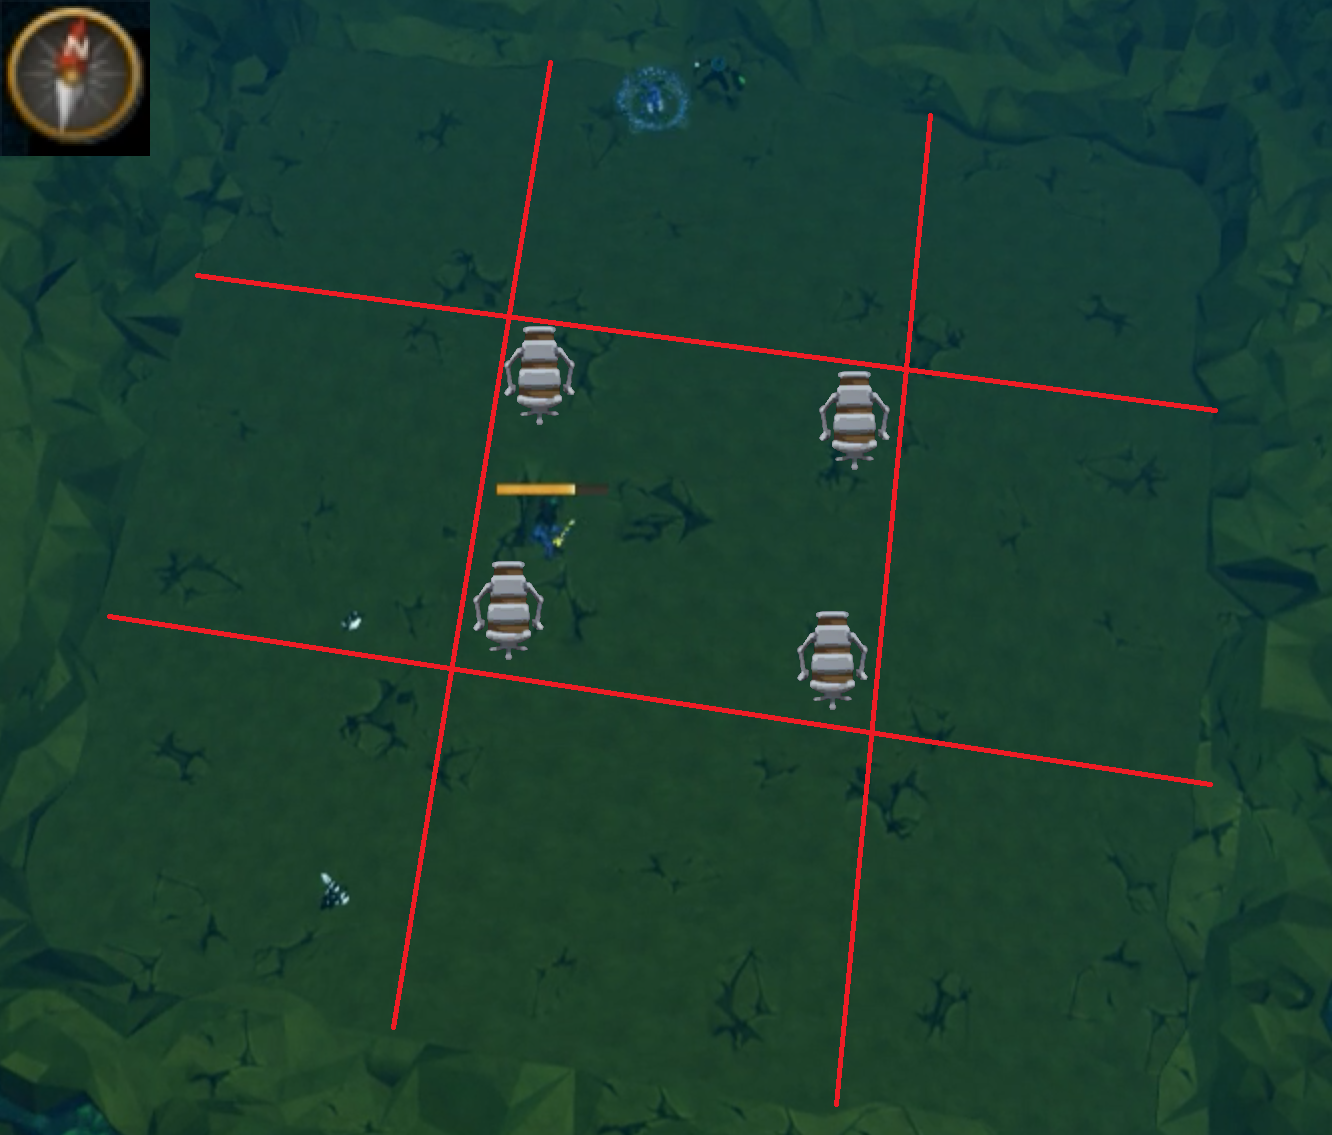
• Here is an example of a proper dummy:

⬥ P10: START OF PHASE - Base Tank
• Drop ASAP (Out of MD)
Note: This is the same as P5 normal mode

⬥ P11: END OF P10 - NORTH BOMB TANK
• Drop as directly before mauling, in MD
• Surge before placing the dummy if necessary
⬩ If you are too far back, the dummy will be unreachable at the start of P11
X-Logging
Xlogging may be used at the end of the kill to forfeit drop piles to other teammates. This is done mostly to give pet chances (both bombi and vitalis) to teammates.
How to Xlog
Shield Dome prior to mauling on p5 (normal mode) or p11 (hard mode). Once the mauling animation begins, quick hop worlds through friends list, your piles will be rerolled to remaining members.