Ranged Camp Solak
Solak Range Camp (DPS)

Introduction
With the powerful ECB  and Dbow
 special attacks, alongside Greater Ricochet
  , Ranged has the potential for extremely high damage output at Solak, as his weak attacks and plentiful opportunities for healing allow for easy sustain. However, due to the nature of the Ranged combat style, no two kills will ever be the same, and as such, this channel will go over guidelines for Ranged Duo DPS kills, with the aim of sub 6:00 non storm-tank and 5:45 storm-tank kills. Basing Solak with Ranged camp is not recommended, due to Solak's innate ability to not splash on the base tank, and the Split Soul special attack disabling healing from
⬥ Effectively using Ranged  as a combat style requires a large degree of improvisational skills. This is to make the best use of the excess adrenaline gained from Hydrix Bakriminel bolts
  . As such, rotations are not set in stone and the player's intuition is required to achieve optimal kills, as no two kills will ever be the same. Excess adrenaline can be used through more ECB specs, more EoF Dark Bow specs, or better use of thresholds.
⬥ The use of an ECB EoF  is required for some of the rotations outlined below. A physical ECB can execute similar rotations, however, making use of SGB EoF
 special attacks and 4-tick auto attacks with the
  is required, alongside good improvisation skills.
General Notes
⬥ The guide contains rotations for Root skips, the timings of which can be found in #deleted-channel.
⬥ In duo, it is advised that the DPS pre-places their dominion mines  on the SE roots
  , and the Base on the NW roots .
⬥ It is easier to apply the Smoke Cloud  debuff with Ranged, at the start of Death's Swiftness
  with the use of Ingenuity of the Humans
  . Solak, Core, and Erethdor should all be debuffed, and co-ordinate between team members as to who is applying it.
⬥ It is assumed Borrowed Power  is set to Smoke Cloud
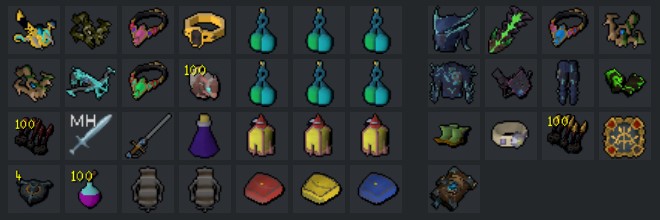
Presets
General
⬥ It is assumed that the Spirit Weed  , Kwuarm
  , and Lantadyme incense sticks
  are used, and an Overload
  and Weapon Poison +++
  is drank at the bank, to save an inventory space.
⬥ These presets are completely filled, requiring the player to drop a Spiritual  at the start of the fight to pick up later when the spot is free, after the P1 dummy is
  placed or another is drank. If not comfortable with this, the player can opt to bring a with them, to free up a space.
Advanced Preset
⬥ The two dummies are for chinning the Legs in P1, and for building out of the realm at the start of P4.
⬥ with Seren Godbow
⬥  with Dark Bow
⬥ with Eldritch Crossbow
⬥  Rune Pouch


⬥  Rune Pouch


⬥  Rune Pouch


(Runes for ,  ,
,  )
)
Phase 1
P1 Start
→ →  →
→ 
 (or +
(or +  ) →
) →  → → →
→ → →  to pad → back → → → → →
  → → → (last tick of DS) → → Improvise
Note 1: Depending on procs from the first , you can replace the first with an ECB spec and use to
Note 2: Depending on HP at the end of , you can use a mixture of good thresholds and basics to build up to 100% for the next at ~57s, whilst placing the dummy . Video examples of how to place the dummy can be found in #deleted-channel This uses  . When clearing roots you can use those to build to 100%, kill at least 1 with mines and 1 (2 if you have time with a good P1) with abilities, before moving on to arms.
Solak's Arms
Pre-ECB +  → → → if needed, finish with /
Note: The DPS uses Rubies  for and . If you get a Ruby proc early into , immediately switch to
Solak's Legs (with dummy )
⬥ Option 1:
→ 
 →
→
⬥ Option 2:
→ → → 
Core
ECB + → → + → (last tick of DS) → Improvise
Note: Depending on the player's adren after ends, you can use or good thresholds like 
Phase 2
Overview
This phase is split into two sections, the first is dealing with Eruptions and the blight storm in the centre of the arena, and the second is lowering the secondary blight bar underneath Solak's HP bar.
⬥ Eruptions can be killed in a combination of 4 different ways, duo or solo, and 3-hit or 2-hit.
• Eruptions can be killed together or seperately, requiring slightly different rotations and less co-ordination if done solo.
⬥ Once eruptions are killed, it is assumed that cleansing with Merethiel is done once, before going up to clear the blight storm for the first time.
⬥ Solak does not have enough HP to deplete the blight bar naturally before he reaches his HP cap, however, the blight damage from the ECB special attack drains the secondary blight bar directly. With 1 good use of the ECB spec, the boss can phase during the arm climb attack.
Eruptions
The DPS on Eruptions goes up twice if not storm tanking, use defensives like  to build adrenaline whilst damaging the Blight Storm. After eruptions are dead, target Solak and build adrenaline with abilities like
  and
and  , co-ordinated with the base.
⬥ South
pre-ECB + (tc) + →  → → (if needed)
⬥ North
→
Post-Eruptions
Due to the aforementioned improvisational skills, the rotations for P2 post-eruptions are not set in stone, and achieving good damage requires strong ability management. As such, only general outlines will be detailed below, and improvisation rotations continue into P3.
⬥ North Eruption - As you go up for the second time, build on Solak with good basics and continue building with defensives as you damage the Blight Storm, aiming to build to 100% adrenaline as soon as possible
⬥ P2 Death's Swiftness
• The aim of this is to deal good damage, whilst dodging the minefield. The general outline for the is as follows:
1x ECB , 2x SGB (1 last tick of DS), 1-2x Snap , 2x Rapid , 1-2x Dbow
• This is similar to the one in P1, however will still be on cooldown from the Core and cannot be used. If adrenaline permits, ECB spec is vital here.
⬥ P2 Post-DS
The aim here is to get good ECB damage, immediately after ends trying to end at 100% as the arm slam mechanic happens. As DPS, you will be climbing. The general outline is as follows:
1-2x ECB , 1x Rapid , 1x Snap , strong basics
• If you deal good damage and Solak is close to HP cap by the climb, build to 100% early and use  → → strong basics → to 100% (Or another strong basic if damage is needed)
⬥ P2 Arm Climb
As the DPS is the player who climbs, this is a good time to build adrenaline-boosting rotations in preparation for P3.
• Use Incendiary Shot  as the player jumps off the arm, the 2nd ability after climbing. This allows the buff to be stalled into the start of P3
• If using at the end of P2, you can build back to 100% with defensives after the . Use  →
→  →
→  . The Divert will ensure you reach 100% with Solak's large melee hit.
Phase 3
This phase is also split into two parts, the P3 damage phase, and killing Erethdor in the mind realm. If following the rotations, Solak should be around ~600k HP as he moves towards the second pad.
P3 Rotation
⬥ Depending on whether a damaging ability or were used at the end of P2, use the opposite to hit 100% for Death's Swiftness .
⬥ The P3 is similar to P1 and P2, with much greater use of thresholds and due to the greatly increased adrenaline gain from the buff. The general outlines are as follows:
• 1x ECB , 2x SGB (1 last tick of DS), 1-2x Snap , 2x Rapid , 1-3x Dbow
• Save 1 stun ( / ) for the 2nd pad.
⬥ After DS ends, 1-2 ECB specs will be required to finish the remaining HP.
• Co-ordinate with the base as to who uses Fragmentation Shot as he moves.
• Aim to enter the mind realm with above ~30% adrenaline, if necessary, use to get off thresholds.
Erethdor
Ecb EoF Rotation
→ → → → →
Note: can replace if co-ordinated with base. Try to use as early as possible to build adrenaline.
Phase 4
Overview
Phase 4 rotations assume that the player is intending to kill Solak without entering the realm, known as "no realm". Depending on what HP Solak ends P3 on, the rotations vary slightly.
⬥ To potentially save kills that are extremely close, use the  prayer for a last-ditch attempt.
⬥ If teammates are missing, a realming guide can be found in #deleted-channel, as an attempt to salvage the kills.
⬥ With or without the use of a dummy as you exit the mind, build to 100% adrenaline and immediately use Death's Swiftness
P4 Rotation
+ → Build ( → → → ) → → → → → (cancel Rapid early if good adren) → →
Video Examples
https://youtu.be/c0-Lz2Vzgv4 - Storm tank
https://youtu.be/q7RcxcQEhUE - Non storm tank