Melee Araxxor
Araxxor: Melee
Introduction
Note: a Table of Contents can be found in the pinned messages for this channel.
This is an advanced guide which assumes a strong underlying knowledge of all mechanics and information presented in #araxxor-basic.
Preset and Relics
Preset Notes
⬥ It is recommended to have the NopeNopeNope perk from Player Owned Farms active.
⬥ Upkeep the  buff from your familiar.
⬥ Araxxor takes a few seconds to clear vulns on phase 1-3, making vuln bombs  usable on all phases.
⬥ If you require more food, the following changes may help:
• Pre-overload  before the fight to save an inventory space.
• Remove the Fleeting Boots  switch to save an inventory space.
• Powerburst of Acceleration  is only required for top path strategy.
• Use Saradomin Brews  instead of Super Guthix Rests
  (but this is not recommended due to the stat drain).
Advanced Guide
Top Path
⬥ Phase 1
• This phase is timegated so it can be used to set yourself up for phase 2 while you deal damage.
Burn web → ~0:20 
 → ~0:25
  → ~0:40
 or
or  + → ~0:48
  →
→  →
→  → build
⬥ Phase 2 & 3
• The ideal method is to bring Araxxor directly into phase 3, through the usage of a Powerburst of Acceleration . It can be used any time after 0:57.

 → → → → →
  stall
stall  → + release →
  →
→ 
 →
→  →
→  if needed
⬥ Notes:
• The first should be executed when web burn reads 99%.
• Ensure to trigger player movement on every tick along with your mobility abilities.
⬩ Clicking on an enlarged minimap may be helpful in facilitating movement and placements across the path.
Non Vestments of Havoc Rotation:
• Omit during phase 1, once you start phase 3, follow the rotation below:
 → (tc)
  +
+  →
→  → → to + → (tc) +
  →
→  →
→  →
→  if needed
Middle Path
⬥ Phase 1
• Remember to Storm Shard  at the very start, and every time it comes off cooldown.
• Walk Araxxor so he is right against the web (see below about how to walk phase 1).
• Below is a diagram to help with positioning Araxxor on P1 (Camera facing east):
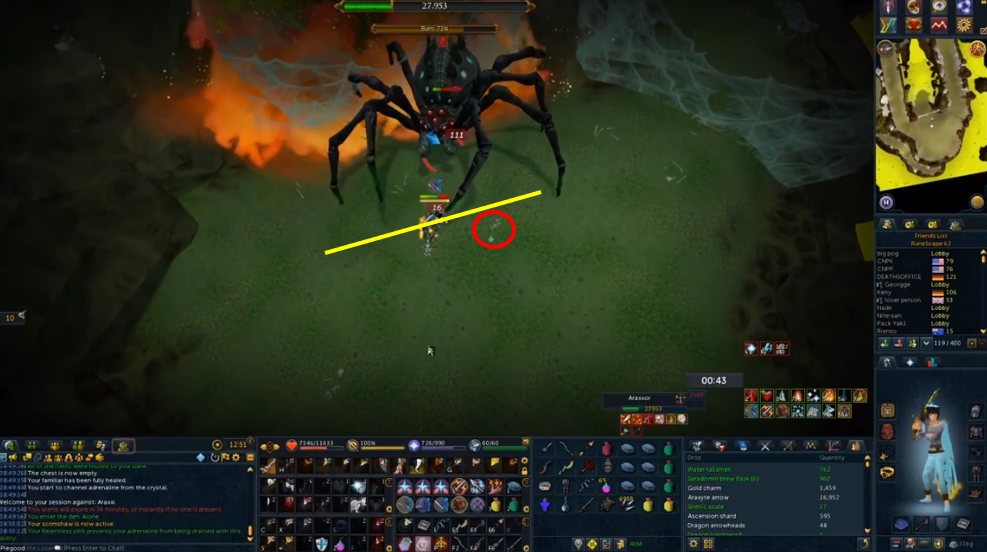
⬩ The yellow line is the line to stand on after walking Araxxor, if you move 1 more square east, Araxxor will run into the web and start going west again which could ruin the setup. If you have trouble finding this spot just keep in mind you must stand 1 east of the line where the skulls are (circled in red).
• At 99% web burn you can Bladed Dive + Surge into phase 2.
⬩ You'll know if you did it correctly if Araxxor starts absorbing the acid at 1:06 rather than the standard 1:12. This can be delayed if Araxxor does a special attack right before the web finishes burning.
• Here is a video example on walking Araxxor in phase 1:
⬥ Phase 2
• Run across the acid pool and stall a Shard . Run up 3 tiles onto the platform. This puts rax as far up the path as he can be while still absorbing acid.
⬩ Below is a picture of how far up the ramp to stand for this lure:
• Deal damage and remember to keep applying
• When Araxxor has absorbed 53% acid, you can up the platform, then walk 1 tile west so you have room behind you to dodge Cleave special attacks.
⬩ You'll know you timed this correctly if Araxxor's acid absorption goes up to 55% then starts dropping, and you'll get the popup message that the bridge is burning when there is 49% acid left. This is the perfect amount needed.
• Set up for phase 3.
⬩ Natural instinct timing is calculated based on how much acid Araxxor has poured onto the bridge. The timing is roughly when the bridge has absorbed 25-30% acid. Under normal circumstances, this means the popup would appear at 49%, so you would when the bar says 24-19%.
• build to 100% and prepare for phase 3.
⬥ Phase 3
as you are jumping down the ramp → →  → → →
→ → →  →
→
Applying 5 Storm Shards before Phase 3
⬥ Phase 1: 2 shards
• Use Storm Shard on Araxxor as your first ability on phase 1 when he becomes attackable, and use another as soon as it is off cooldown about halfway through phase 1.
⬥ Phase 2: 3 shards
• Use Bladed Dive to get across the pool in phase 2 and stall a 3rd Storm Shard on Araxxor by using the ability out of range and clicking under you. Don't use any other abilities or you will lose the stalled shard. Once Araxxor starts absorbing acid you can click on him to release the stalled Storm Shard
⬩ Stalling the storm shard like this gets the cooldown timer ticking sooner so you can use another 2 shards losslessly.
• Apply the 4th Storm Shard just before you run up the platform when Araxxor has absorbed enough acid to burn the bridge (~53%).
• Use the 5th Storm Shard while waiting for the bridge to burn.
Bottom Path
⬥ Phase 1
• No special setup. Just dps araxxor down to <5k hp.
⬥ Phase 2
• No special setup. Follow the light and wait for the charge. stay at 100% adrenaline.
• During the charge you can do a defensive ability to stay in combat, then while running towards phase 3.
⬩ You can start running towards phase 3 during the cutscene after you dodge the charge.
⬥ Phase 3
+ → → →  →
→
Phase 4
⬥ Ranged Rotation
• This method is fastest, and is preferred for skips.
• Make sure you auto the dummy so you have 7 stacks before  .
.
+  + + (auto) + →
  →
→  → →
→ → 
 →
→  →
→  → target + + → →
*Notes:
If is on cooldown from phases 1-3 then you will have to depend on alone for adrenaline.
You should aim to proc passive with your and *
⬥ Melee Rotation
• This is the same for bottom path, mid path and top path if you do not wish to range p4.
• Spam a defensive or non-Mobile surge to gain adren when the cutscene ends and drop a dummy.
• Build adrenaline until Araxxi jumps onto araxxor, then stop attacking the dummy and build with defensives so you can charge Greater Barge
• Right after Araxxi raises and drops her front legs, the dummy with dual wield and to Araxxi and equip 
2H auto → 
 → → →
→ → →  →
→  → → →
→ → →
Note: Cancel after 2 or 3 hits depending on Araxxi's hp. Use whenever rax has less than 30k hp
Phase 4 Tips and Tricks
Gaining Adrenaline and Lossless Eating/Devotion
⬥ At the start of phase 4, you can use 2 defensive abilites in order to gain adrenaline.
• You can then wait 10 seconds to drop combat stance.
⬩ This allows you to  and eat solid food without losing adrenaline.
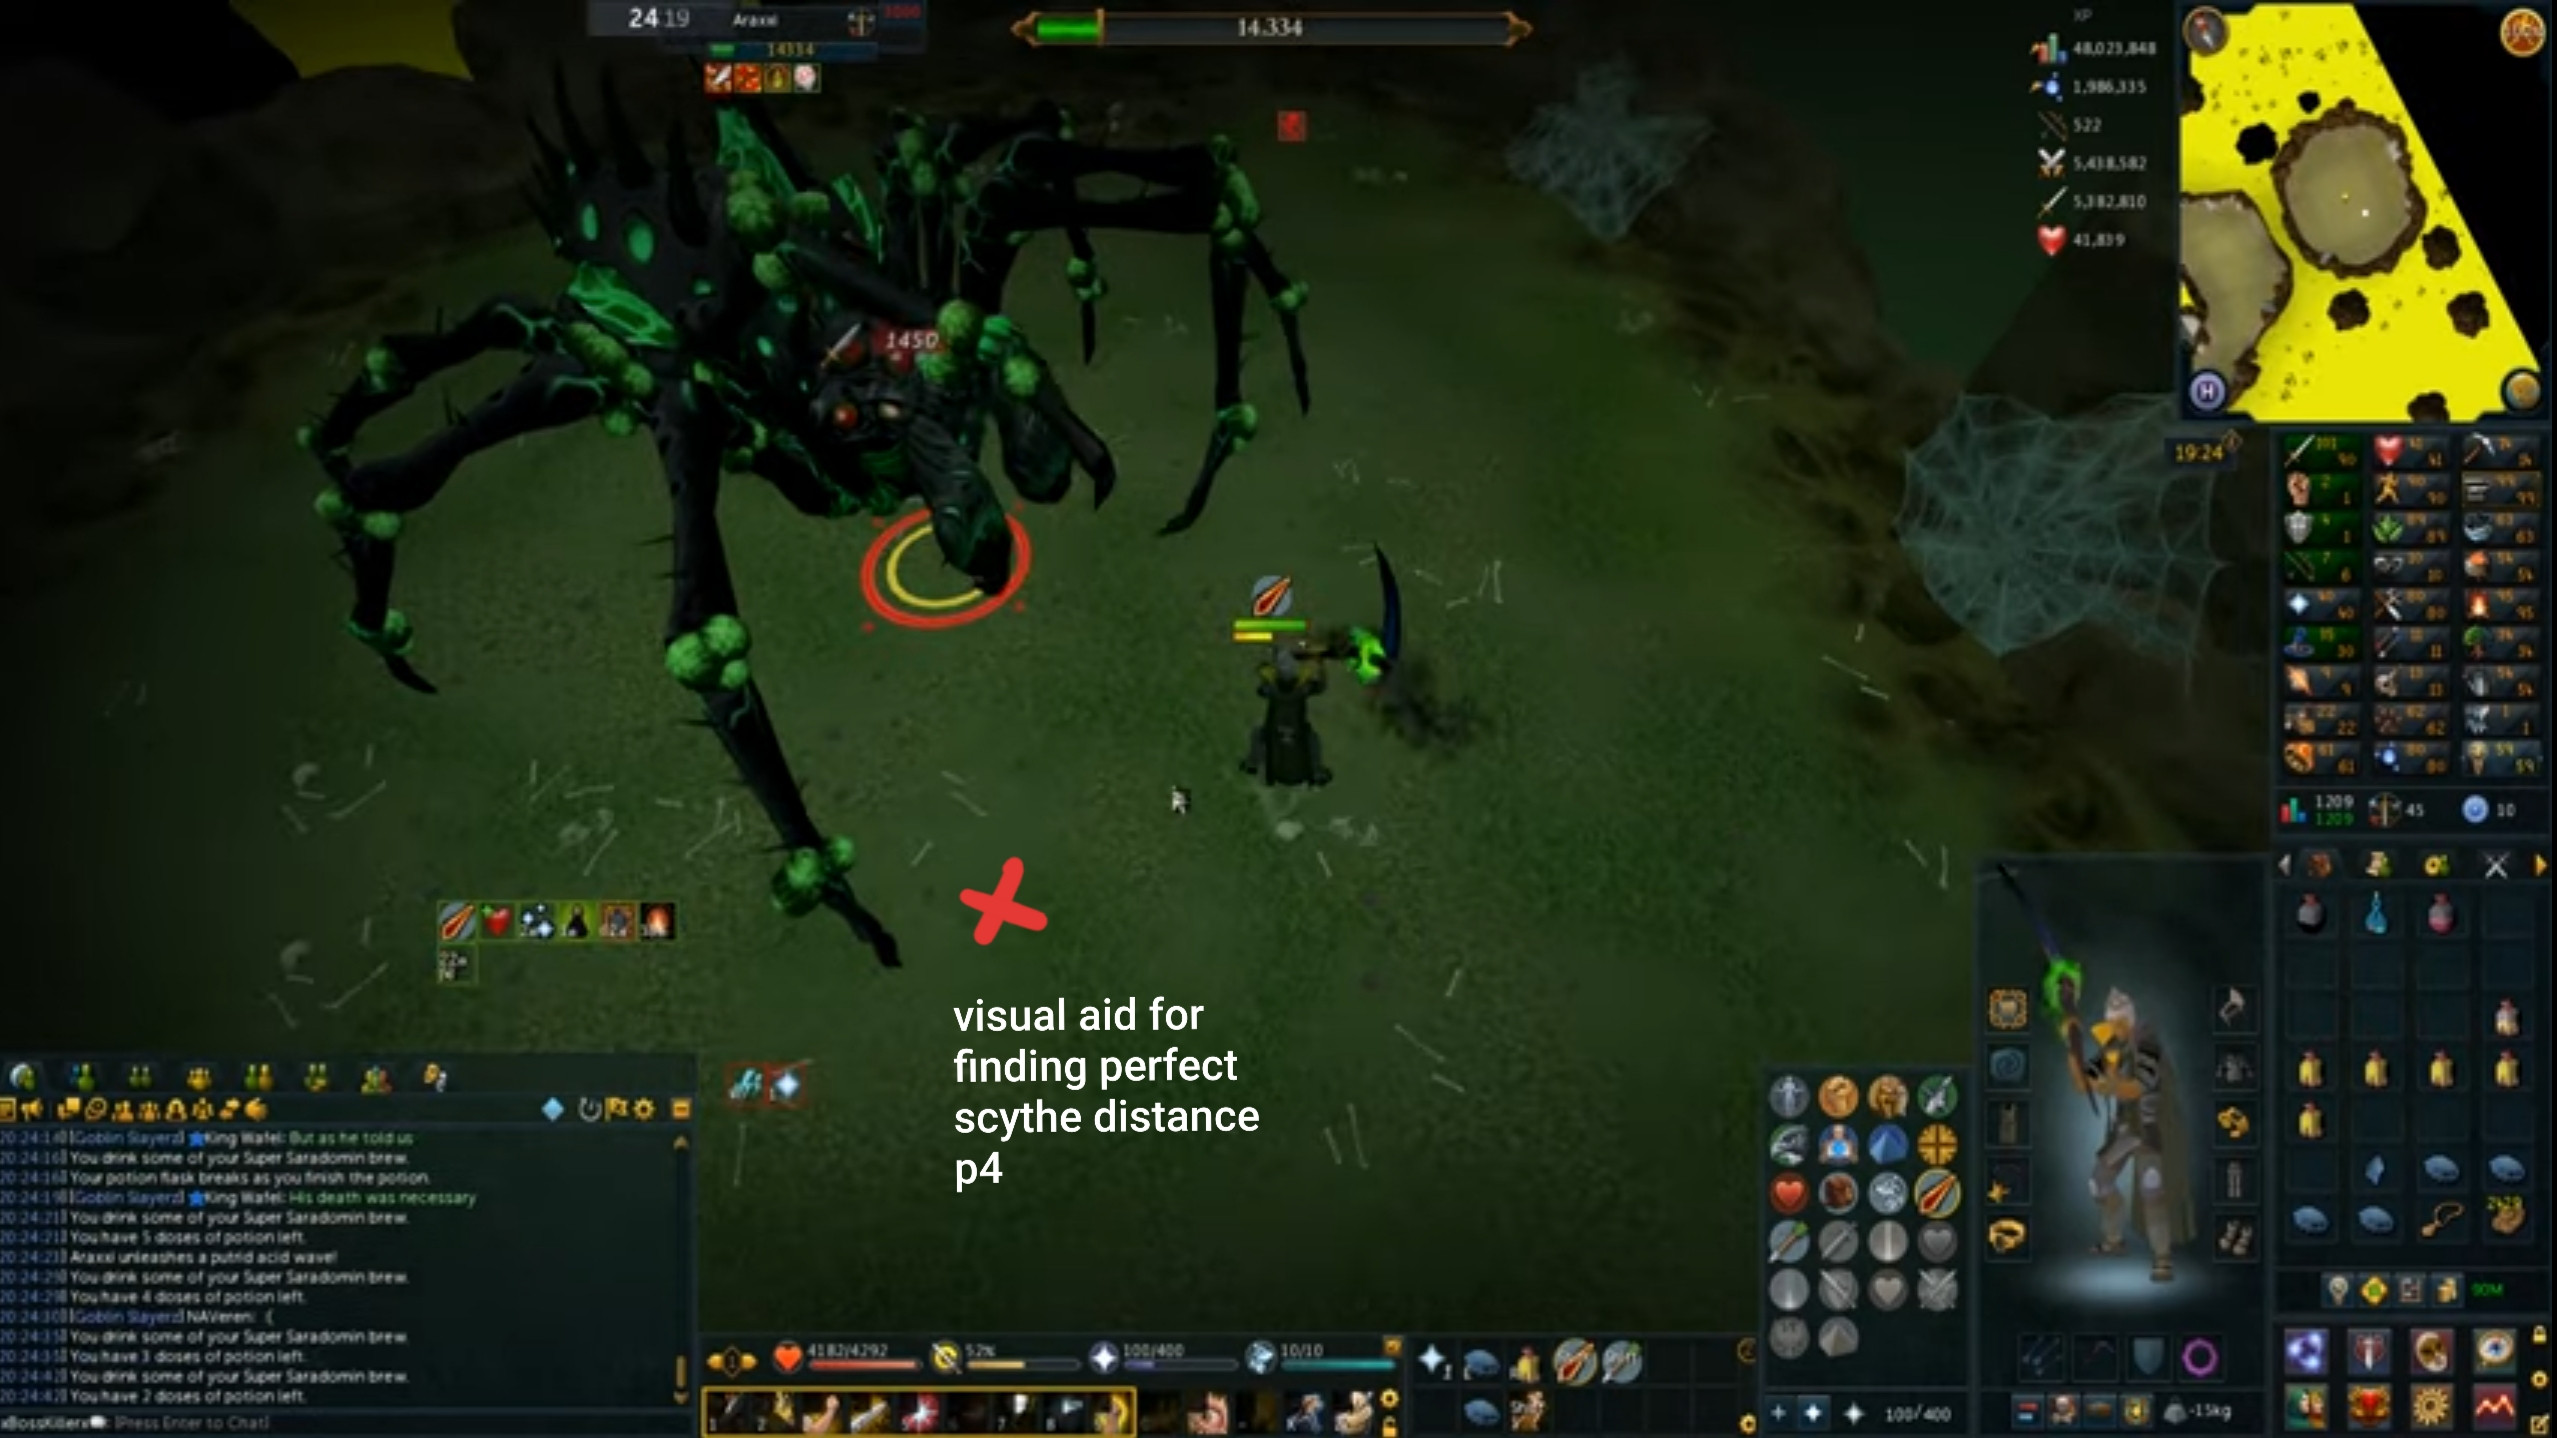
Standing in Scythe Distance
⬥ In order to take advantage of the 2 tile range of halberds, you must stand out of melee distance.
• Reference the following clip for a visual representation: https://youtu.be/daiPvzj7J40
• The below image demonstrates proper positioning for "scythe distance" on phase 4: