Github Tips And Troubleshooting
Introduction
This guide will go over an assortment of common issues you may encounter while working with Github, as well as a few helpful things you can do to streamline your workflow.
Note: You can always ask any editor or staff for help with GitHub at any time.
Frequently Used Terminology
⬥ Repository
• A collection of all the files and folders for a single project, that is tracked and version controlled.
⬥ Fork
• A copy of an entire repository. A user can fork a repository to get a personal copy.
⬥ Commit
• Essentially a 'snapshot' of your repository. Think of it like a checkpoint in a video game. Going back to a particular commit shows the entire repository as it was at that point in time. You commit after making your changes, to prepare for a pull request.
⬥ Pull Request
• A request to merge your changes into the main repository, to be accepted by someone with appropriate permissions.
Common Problems
Failed Checks
⬥ PvME GitHub is set up to automatically check for valid formatting and styling. There are a number of checks, such as:
• Trailing whitespace - extra space at the end of a line
• Improper spacing around emojis - emojis must be surrounded by a space on either side
• Message length exceeded (too many characters) - messages cannot exceed 2000 characters
• Invalid embed formatting - creates an invalid embed object.
• Invalid commands - any .command: used must be a valid command.
⬥ Checks failing can be avoided by using the web editor (https://pvme.github.io/guide-editor/) to edit your content before adding it to GitHub, as it runs the same style checks that pull requests use. For more information, check out #unknown-channel.
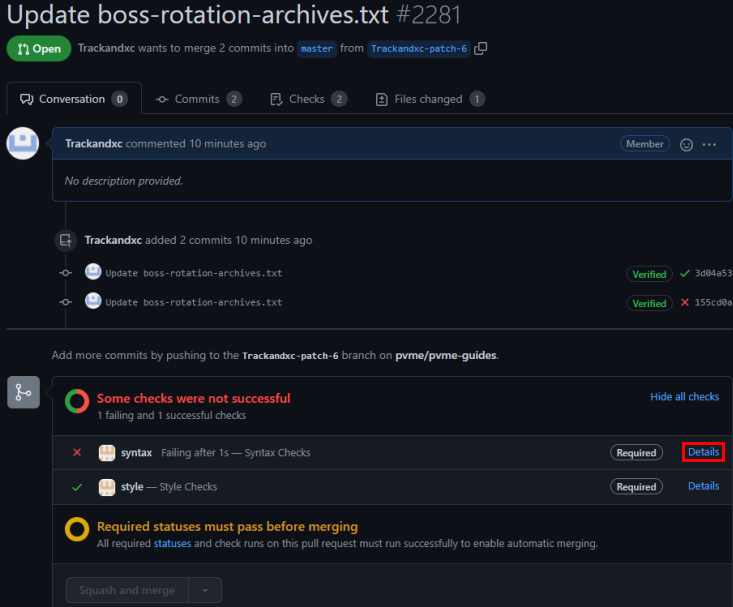
⬥ If your pull request fails due to a check, it will inform you. Click on Details on the check to see why it has failed, and what you can do to fix it.
⬥ Consider the following example:
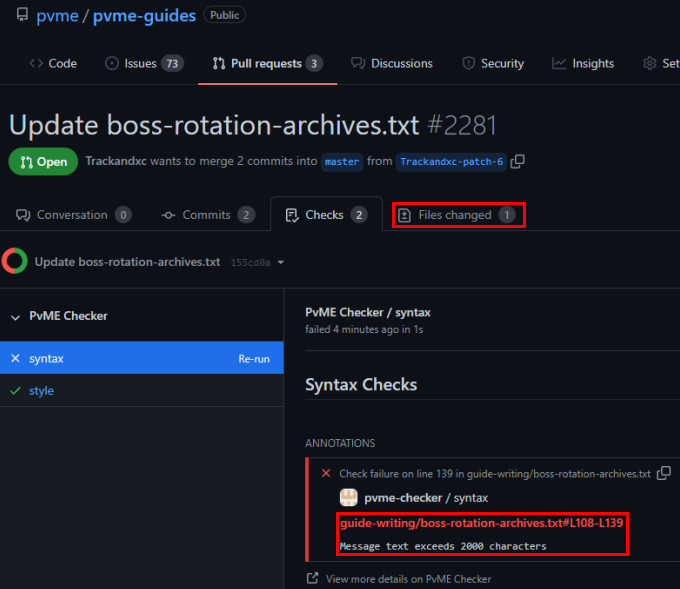 ⬥ The bottom red square tells you what the error is. In this case, the message starting at line 108 and ending at line 139 has too many characters.
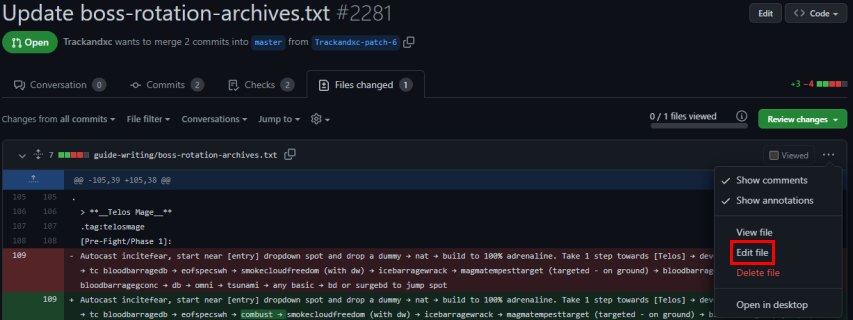
⬥ To fix this, click the Edit File option in the following image, to open up editing again to make appropriate changes.
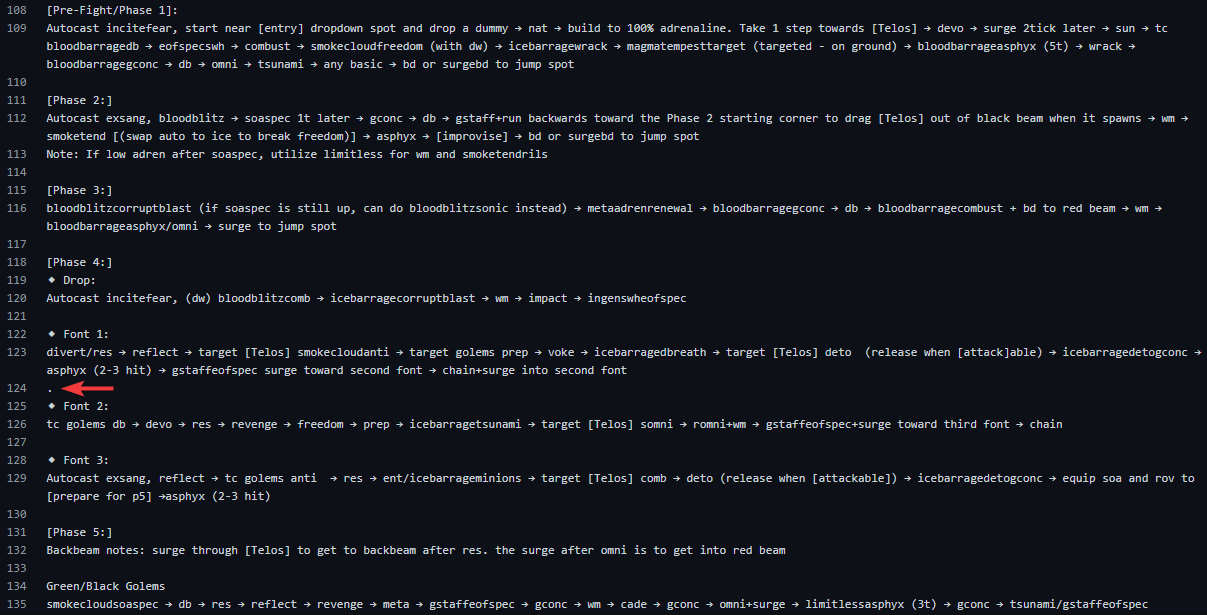
 ⬥ In this case, we break the single large message into 2 separate messages by hitting
 Enter, entering a single period . and hitting Enter again. Then commit these changes, and it will update the pull request.
 ⬥ Your Pull Request should now be error-free once the checks complete again.
Checks Are Stuck
⬥ Rarely, the style and syntax checks may get stuck, neither succeeding nor failing. In such an event, usually merging a different minor pull request tends to resolve the issue.
⬥ Checks can take some time to complete at times, so wait for at least 20-30 minutes before it is considered an issue.
⬥ In case this occurs, you can contact an editor or staff for assistance.
Your Branch Is 'X' Commits Behind Master
⬥ When you make a new fork, your fork will look like this:
 ⬥ However, after some time it may look something like this:
 ⬥ This is because changes might have happened to the main repository (
'X' commits behind) and it is no longer longer in-sync with your copy. This may cause issues when making a pull request.
⬥ To resolved this, the simplest solution is to delete your fork, and make a new fork of the PvME repository.
⬥ This will give you a fresh, up-to-date copy, and get rid of any lingering issues.
For more experienced users: PvME squashes and merges all pull requests. This causes a difference in commit hashes, which is why your branch will be both ahead AND behind in commits after a pull request is accepted. You can clean this up by discarding commits from accepted PRs and syncing your branch to pvme:master. Or by resetting your branch to pvme:master. Or just delete and start over.|
Pull Requests
Multiple Changes & Updating an Existing Pull Request
⬥ It is possible to include changes to multiple files within the same Pull Request, and to amend files you have already modified as part of that Pull Request.
⬥ This can be helpful to reduce the number of PRs being opened, and remove the need of closing a PR and reopening it if a mistake has been made.
Note: It is assumed you have already forked the repository.
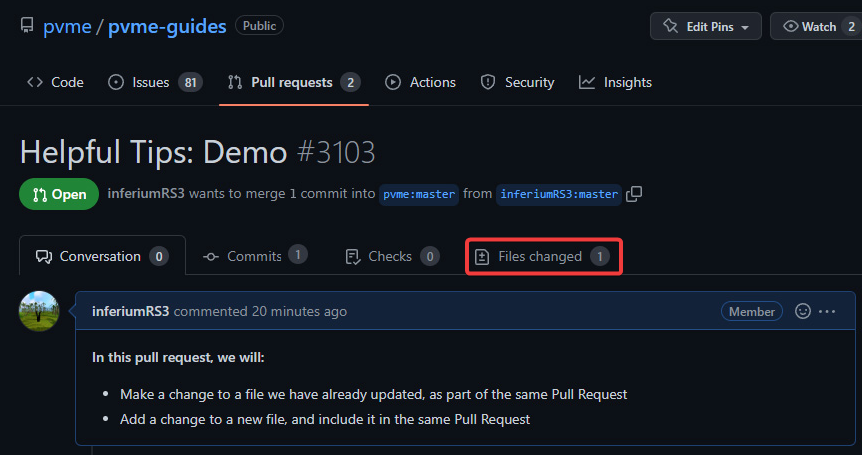
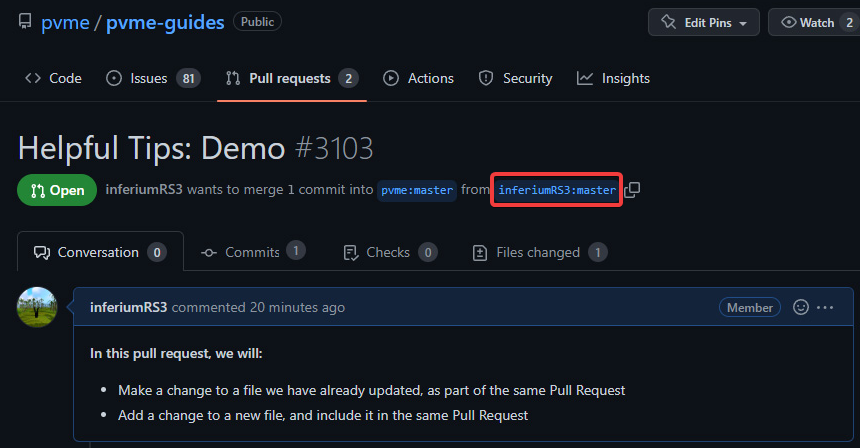
⬥ Consider the scenario: a pull request has been made, with changes to one file, visible in the Files Changed tab.
Modify an Existing File in the Pull Request
To make an a change to a file that already contains a change, in the same pull request, do the following.
⬥ Navigate to your Pull Request, and go to the Files Changed tab.
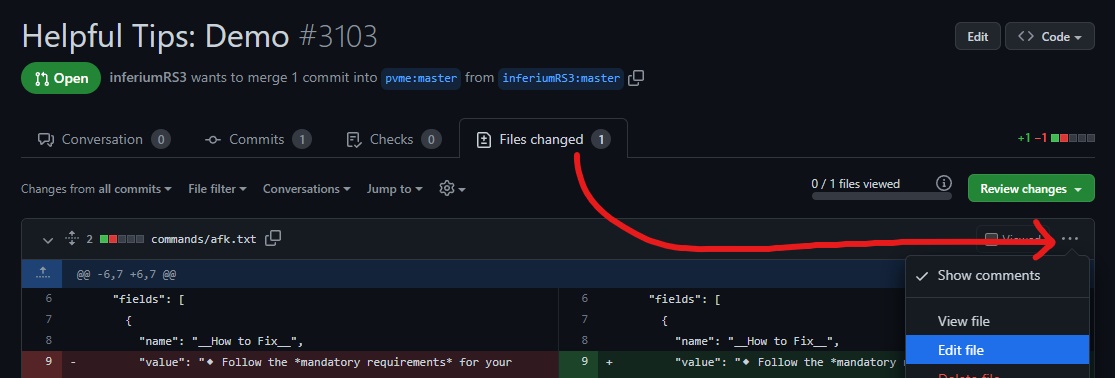
⬥ Go to the top right corner of the file you wish to update, click the three dots, then Edit File.
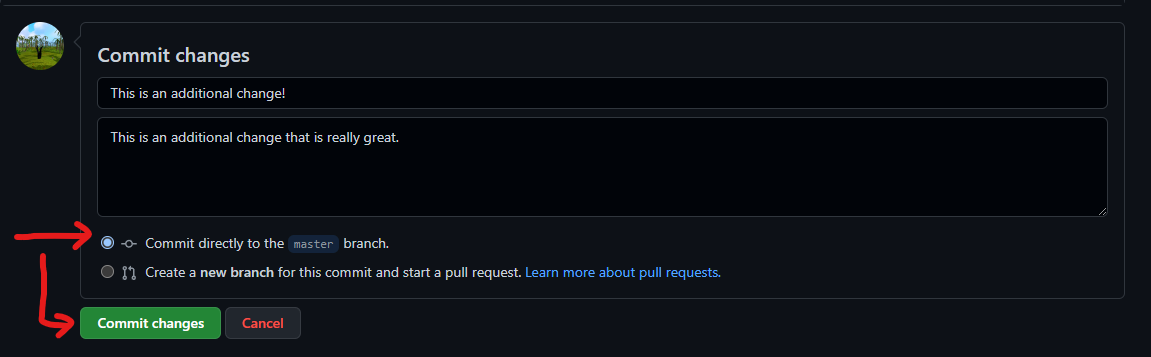
 ⬥ Make whatever additional changes you like, and then Commit directly to the xxx branch.
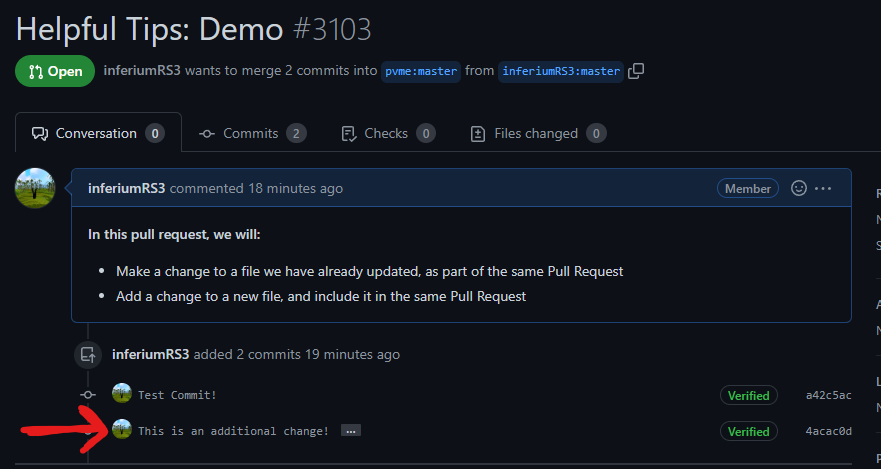
 ⬥ Navigate back to your Pull Request, and the additional change should be included!
Add a New File to the Pull Request
To edit a different file, and include it in the same pull request, do as follows,
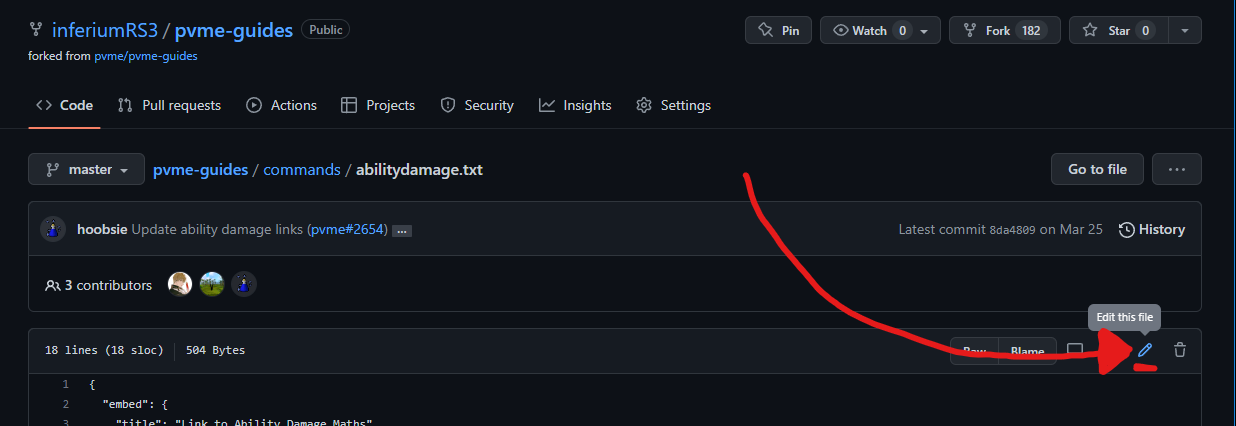
⬥ Navigate to your Pull Request and click on the name of your branch, here:
• You are now looking at the main directory of your own branch, where all files will reside.
 ⬥ Locate the additional file you would like to change, open it, and then click the edit icon.
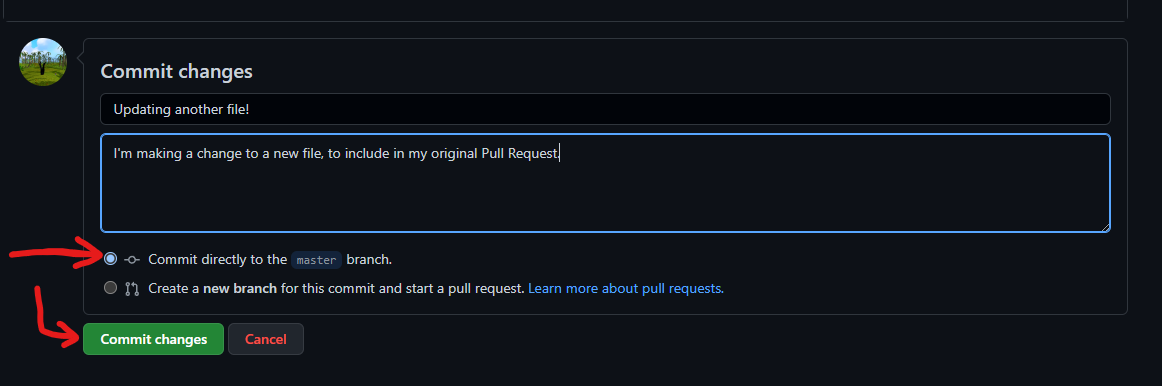
 ⬥ Make whatever changes you like, and then Commit directly to the xxx branch.
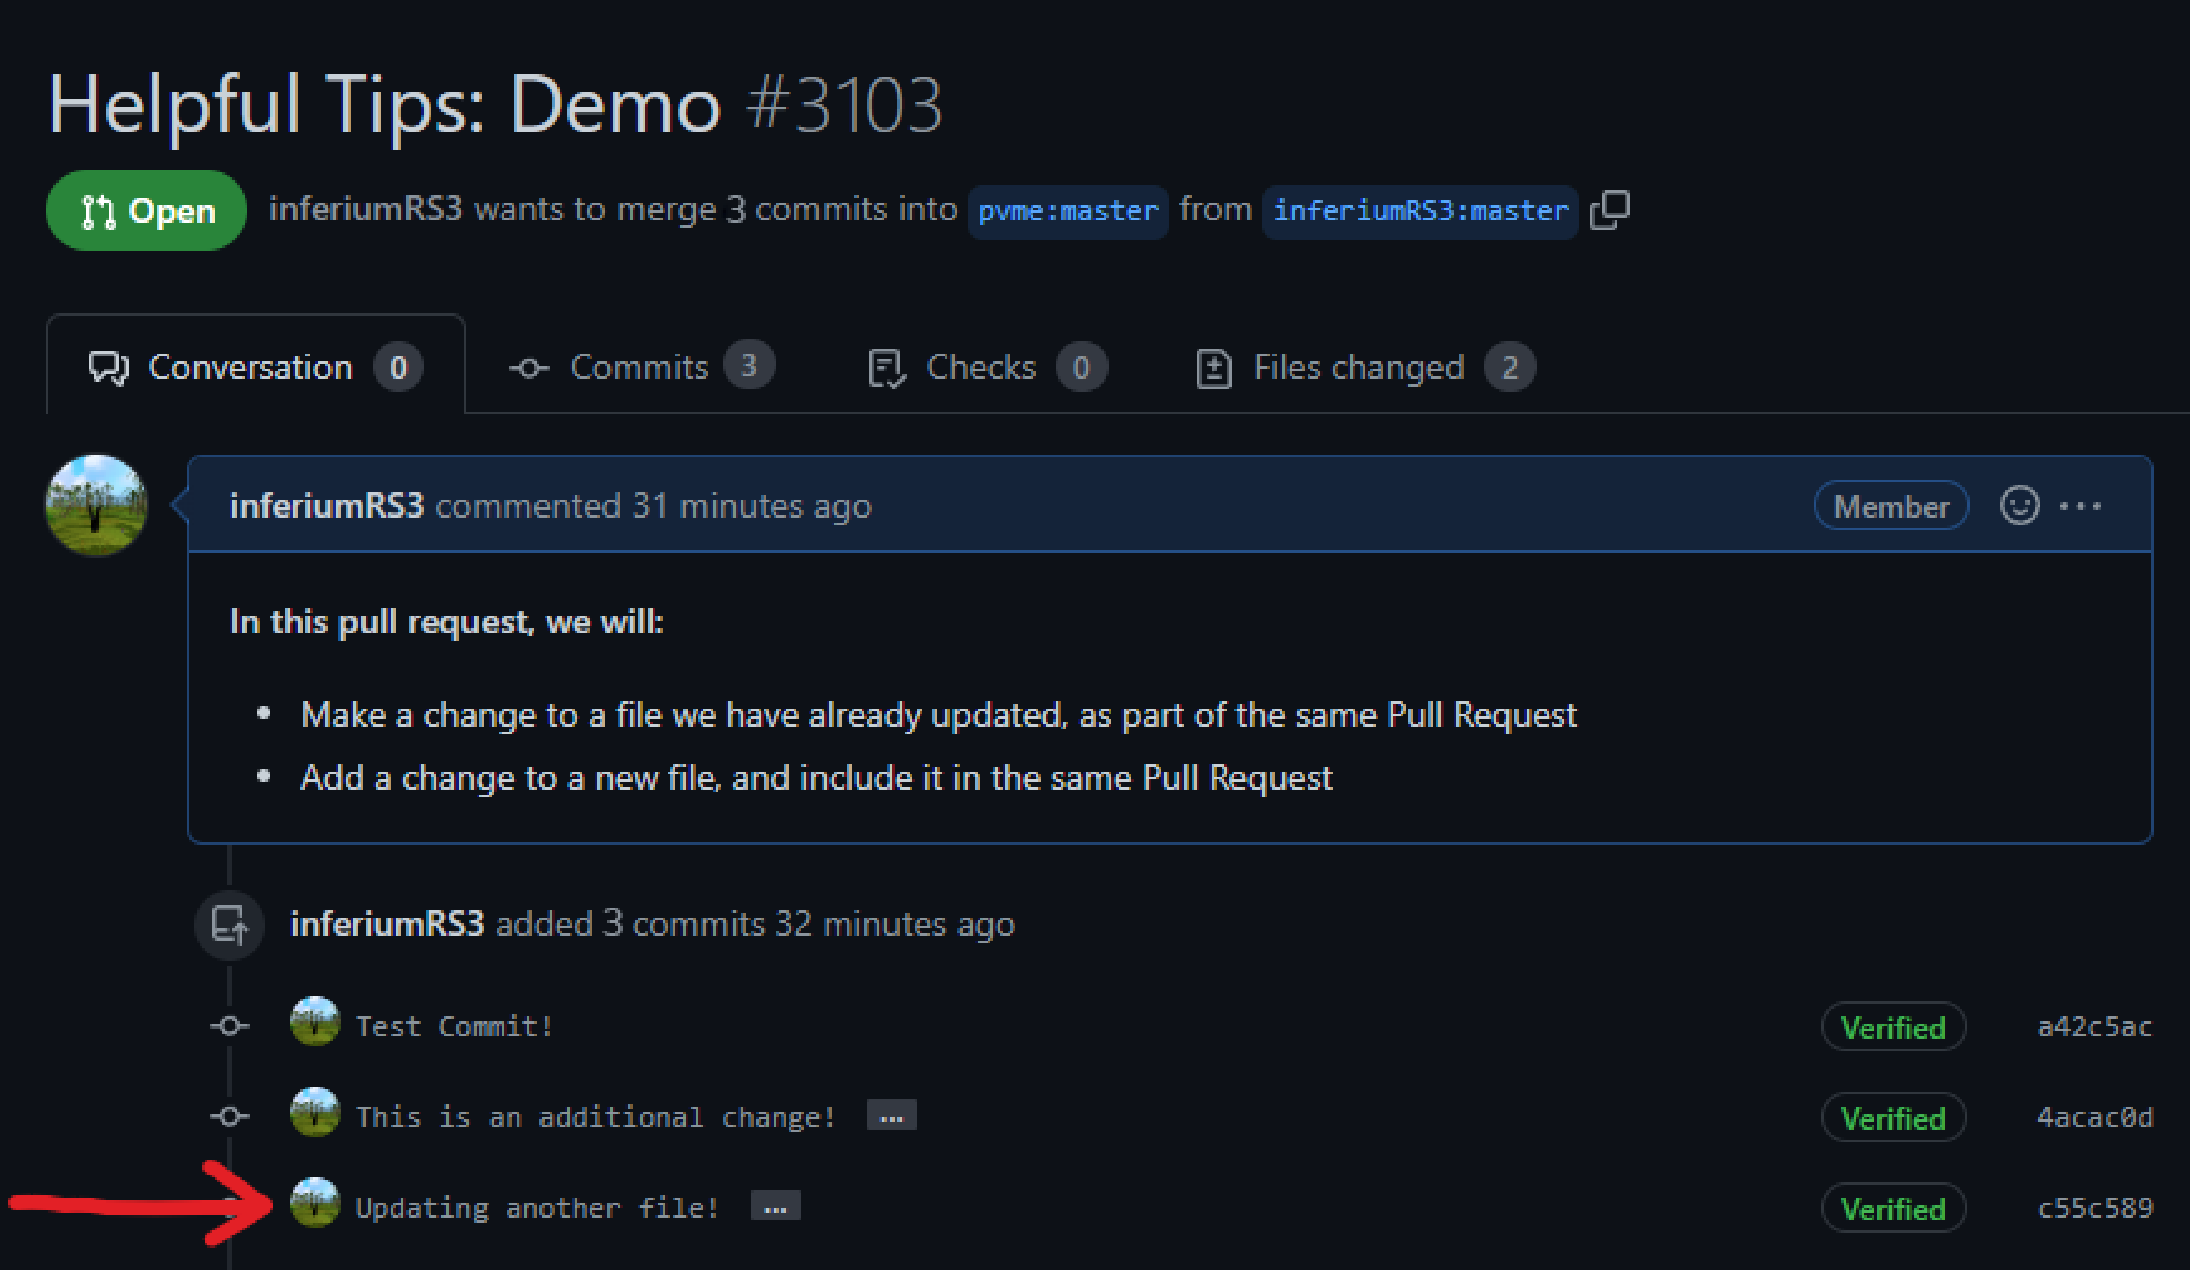
 ⬥ Navigate back to your Pull Request, and the additional file should be included!
Helpful Tips
File Split View
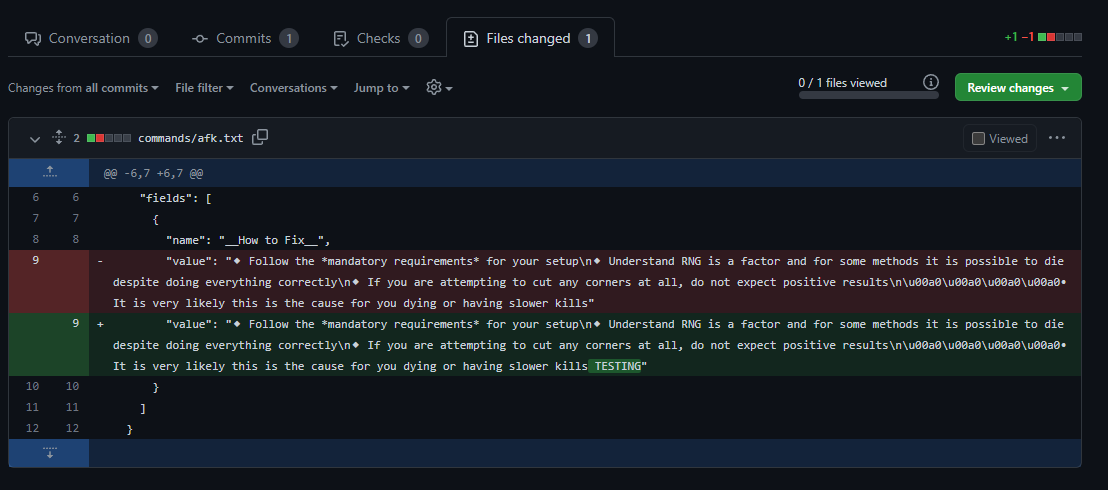
⬥ When opening a Pull Request, it is good practice to look at your changes and see if any mistakes have been made.
⬥ By default, you will see differences between your changes and the original file in Unified View.
⬥ Sometimes, especially for larger changes, it can be helpful to use Split View instead.
⬥ Navigate to your Pull Request, and go to the Files Changed tab.
• By default, you will see unified changes, as shown below:
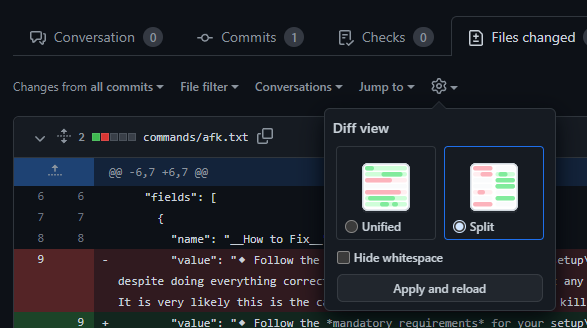
 ⬥ Click the settings icon, select Split, and then Apply and reload.
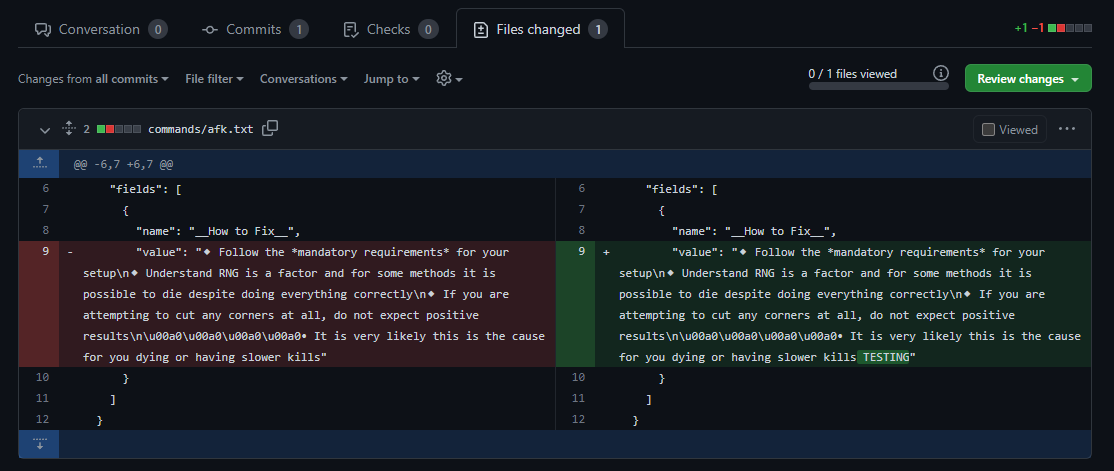
 ⬥ Congratulations! From now on, your changes will be shown in Split View.
• You can reverse the process to go back to a unified view at any time, if you prefer.
Bulk Replacing
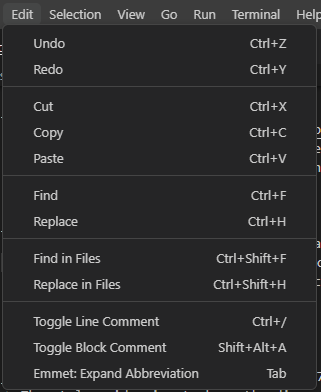
⬥ To bulk replace, either navigate to the Edit menu then select Replace in Files or use the Ctrl+Shift+H keybind to do the same.
 ⬥ Doing this will open the Search/Replace side menu.
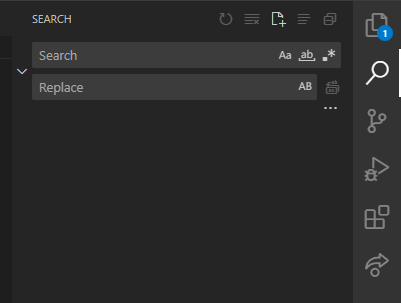 ⬥ The search box is where you enter what you want to replace and the replace box is where you enter what you want to replace it with.
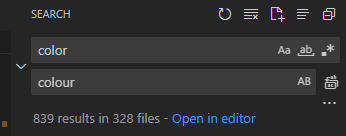 ⬥ However, most of these results aren't what we're looking for so can be dismissed by hovering over the number to the right and clicking the X to dismiss the whole file or the individual Xs below to dismiss individual matches.
 ⬥ When you find something you want to replace. you can either right click and click Replace to do it one at a time or you can click the icon to the left of the X to replace all matches in a file.
