Croesus Overview
Croesus

Introduction
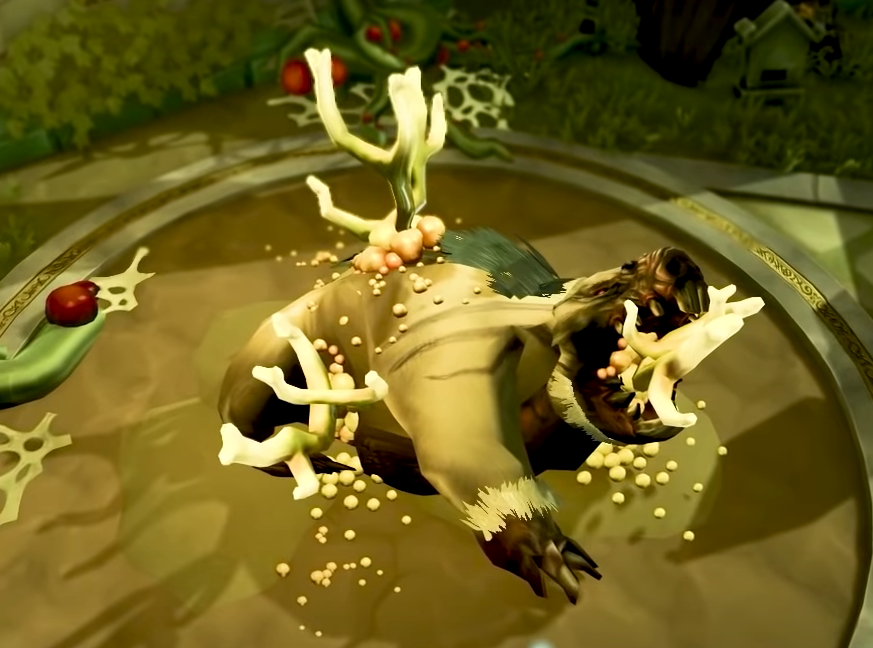
Croesus is the general of the Bik front in the Elder God Wars which is a skilling boss. There is no combat involved in the fight. Instead, the fishing, mining, woodcutting, and hunter skills are used to gather material in order to repair statues that subdue the boss, allowing you to damage its core through skilling. You can fail the encounter, but you will not die, and is safe for Hardcore Ironmen.
The boss is massable, however the recommended group size starts at 8, going down to 4 once you are comfortable with the fight.
Drops
⬥ Croesus Flakes 
⬥ Cryptbloom Armour 
⬥ Scripture of Bik 
⬥ Seed Bag 
⬥ Skilling Offhands 

Preset and Relics
Tips and Tricks
Consumables
⬥ Using Crystal Mask 
• Crystal Mask will fully block one stat drain hit from ANY of Croesus' attacks. This will NOT stop a Fairy Ring from teleporting you, Hard Fungus from stunning you, or Sticky Fungus from rooting you.
• If players are using extreme hunter potions, they should still avoid Slime Molds where convenient as Slime Molds will negate the effects of the potion even with Crystal Mask active.
⬥ Skilling Boosts  /
/ 
• Bringing relevant skilling equipment can greatly improve the speed and overall efficiency of the encounter.
⬩ Skilling outfits/elite skilling outfits increase rate of gathering. If Fishing or Hunting, the elite skilling outfits can help by doubling resources.
⬩ Relevant tools and will also aid in success rate (High tiered Pickaxe and Hatchet, Rod-o-matic with Honed 6, Magic Butterfly Net).
• Perfect Plus or Perfect Juju fishing and woodcutting Potions can be used to increase gathering rates for skills in the encounter for fishing and woodcutting.
• Stat boosting potions can be used when the core opens up to increase damage dealt to Croesus.
• Skillings auras help to increase the rate of gathering.
• Skilling familiars can significantly increase the rate of gathering.
Unlocks
⬥ Bladed Dive/Surge  /
/ 
• Bladed Dive and Surge help move around the arena faster to deal with mechanics sooner.
⬥ Perks 
• Skilling equipment should be augmented and equipped with the highest tier of the Honed perk available if possible. No other skilling perks are relevant to the encounter.
• Perks such as Imp Souled or Furnance will not affect resources in the encounter. Thus, tools with Honed 6 and such perks are viable to use in the encounter with no drawnbacks.
⬥ Shadow's Grace 
• Lets players avoid needing an offhand switch for mobile while using skilling offhands.
Mechanics
Contribution Points
Throughout the encounter, players will gain Contribution Points for performing beneficial actions. Having more points will increase the number of rewards given at the end of a kill, up to a maximum of 12 loot rolls at 419. Getting knocked out by having a stat fully drained will drop contribution points to 0, and no loot will be given.
Actions that increase contribution points:
⬥ Gathering fungi from dead beasts - 2 per resource from normal nodes, 3 from glowing nodes.
⬥ Placing fungi at statues - 2 per resource.
⬥ Restoring statues - 1 per XP drop.
⬥ Freeing other players from sticky fungi - 10.
⬥ Damaging the core of Croesus - 2 per XP drop.
⬥ Interacting with white and green spores on the core - 1 for white, 2 for green.
⬥ Rotting depleted dead beasts - 20.
Actions that decrease contribution points:
⬥ Interacting with red spores on the core - 2.
⬥ Gathering from rotten nodes -2 per resource.
Rot Bar
⬥ The rot bar is an orange bar underneath Croesus's health.
• Anyone getting stats drained by a mechanic will increase the bar by 1% per drain.
• Failing to remove the Energy Fungus will increase the bar by 40%.
• Passively, the bar increases at about 8% per minute.
⬥ If Croesus is alive and its core not exposed when the bar hits 100%, players will fail the encounter.
⬥ If Croesus still has remaining LP after the four statues have been activated, the bar will immediately reach 100% and players will fail the encounter.

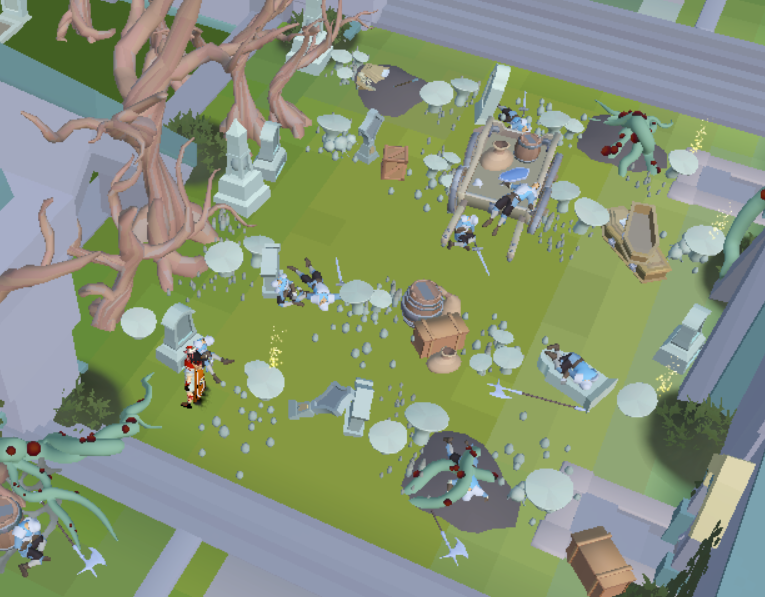
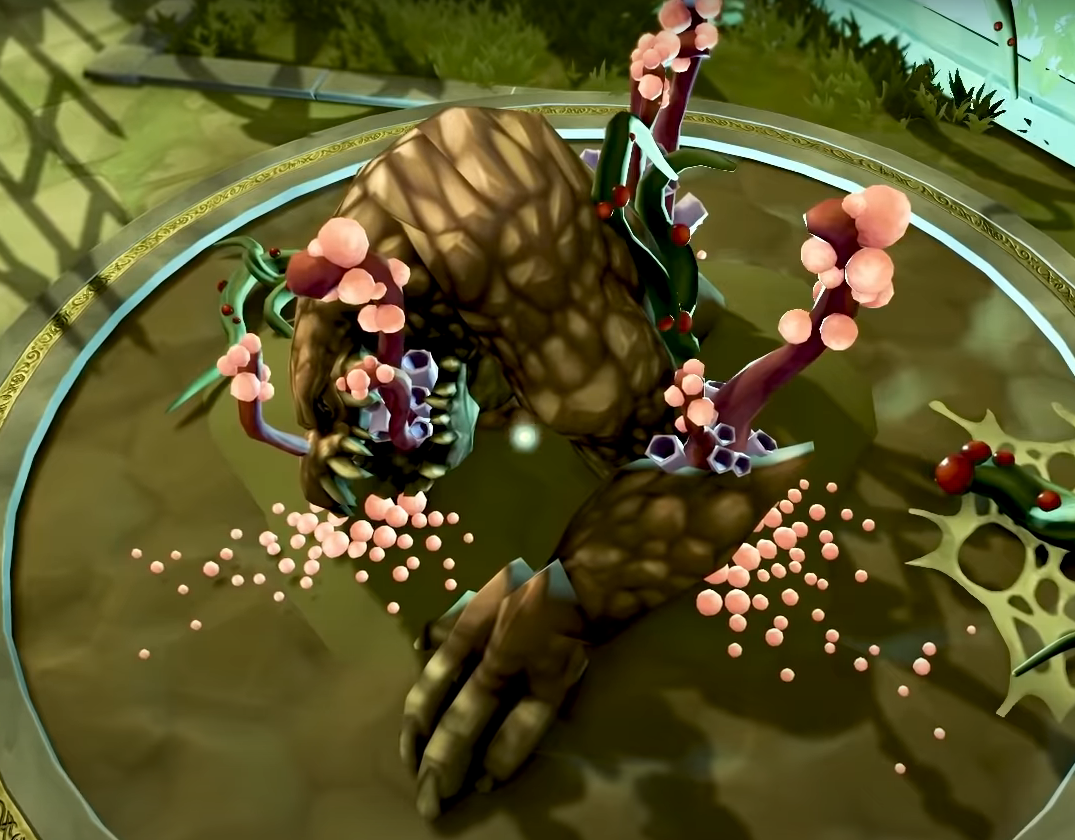
Dead Beasts
⬥ Players must gather resources from the monster corpses around the arena to repair statues and prevent fungus from regenerating on them. The following corpses and colours correspond with the following skills:
• Araxyte | Red | Woodcutting
• Giant Mole | Yellow | Mining
• Crassian Leviathan | Green | Fishing
• Dagganoth Rex | Blue | Hunter
⬥ Gathering a glowing resource node will deplete the corpse faster, while a rotten node will give Rotton Fungus. Guard corpses nearby will provide resources, but award no contribution points.
⬥ Upon fully depleting a corpse of resources, a player may acquire 10 Rotten Fungus and attempt to gather from the corpse again. Doing so will rot the corpse, slowing down its regeneration rate as shown below.
• Depletion of a corpse is indicated by all nodes being dark and a light blue progress bar filling above it.
• Rotten Fungus should be obtained by left clicking any gathered fungus in one's inventory. They are also forcefully rotted by getting stats drained.
• If a corpse is NOT depleted, damage dealt to Croesus's core will be reduced.
<
⬥ Croesus sends out mechanics at roughly these times during the first cycle of the fight (mechanic breakdown below):
• 00:14: Red Spore Bomb
• 00:23: Fairy Ring
• 00:38: Slime Mould
• 00:51: Yellow Spore Bomb
• 01:03: Hard Fungus Fall (Stun)
• 01:12: Sticky Fungus
• 01:26: Green Spore Bomb
• 01:37: Fairy Ring
• 01:51: Slime Mould
• 02:03: Blue Spore Bomb
• 02:14: Hard Fungus Fall (Stun)
• 02:23: Sticky Fungus & Energy Fungus
⬥ The attacks are then repeated in the same order for subsequent cycles.
Spore Bombs
Croesus will fire a Spore Bomb at players, leaving a 3x3 AoE that will drain stats by 15 levels (11 with Pontifex Ring  ). The colour of the AoE corresponds to the stat drained:
⬥ Red: Woodcutting
⬥ Yellow: Mining
⬥ Green: Fishing
⬥ Blue: Hunter
<
Fairy Rings
Croesus will spawn a 1x1 Fairy Ring under players, indicated by dust particles underneath them. Not moving away will teleport the player to a random location within the arena.
⬥ This does not drain your stats but will forcefully rot the first resource in your inventory.
<
Slime Mould
Croesus will fire a Slime Mould in a 7x7 radius of players which chases them which explodes upon touching. The Slime Mould gets stuck behind obstacles easily and explodes after awhile.
⬥ The Slime exploding on you will drain stats by 25% (18.75% with ) and forcefully rots the first resource in your inventory.
<
Hard Fungus Fall
Croesus will fire a 1x1 Hard Fungus at players, stunning them if hit. This can be dodged or mitigated by using Anticipate  or Freedom
  .
.
⬥ Getting stunned and failing to mitigate it will drain stats by 20% (15% with ).
<
Sticky Fungus
Croesus will spawn Sticky Fungus under some players feet, holding them in place until it is burned away or drains stats four times.
⬥ Players can free themselves and others either by bringing logs  in their inventory (Proteans work), or wielding an Orthen Furnace Core
  or Sana's Fyrtorch in their offhand slot which is faster and awards no XP.
⬥ Stats are drained by 10% (7.5% with ) each interval the player is not freed.
Energy Fungus
Croesus will spawn an Energy Fungus next to them in each of the four quadrants. Players can click on this fungus to start removing it.
⬥ If the Energy Fungus is not removed, Croesus will gain 40% Rot.
⬥ Every Energy Fungus mechanic is accompanied by the Sticky Fungus mechanic.
<
Mushroom walls
At the northern and southern sides, 4 walls of mushroom on each side separate the quardrants to their West and East.
⬥ Players need to cross the mushrooms 4 times to cross between East and West.
⬥ If crossing via a mushroom that is not glowing, the player will have their levels drained and the first resources in their inventory rotted.
Mushroom minefield
At the east and western sides, a minefield of mushrooms separate the quardrants to their north and south.
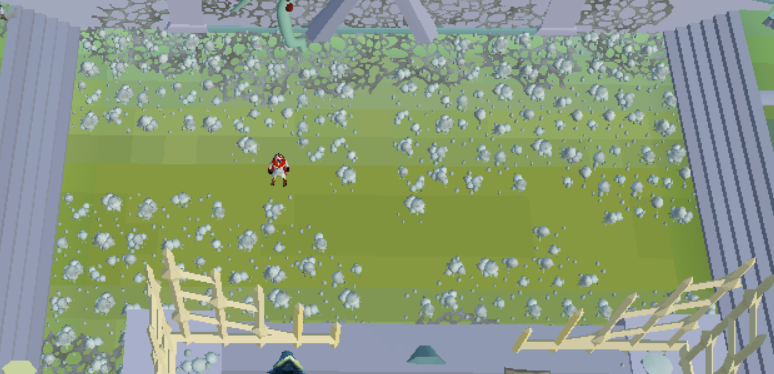
⬥ Players need to cross the minefield only stepping on areas free of mines.
⬥ If a mine is touched, the first resource in the player's inventory will be rotted and the player will have their levels drained.
Statue Restoration
Once 15 materials from nodes diagonally opposite and adjacent clockwise to a statue's quardrant have been deposited at a statue, it can be restored by players. This awards Construction experience.
⬥ Wielding the Artificer's Measure offhand gives a chance to increase progress and speed up the overall restoration with no loss of points.
⬥ The Master Contructor's Outfit provides a similar effect as above.
<
Statue Prayers
⬥ Once a statue is fully restored, it may be prayed to. When the prayer is complete, it will exposes Croesus's core and halts progress on the rot bar.
⬥ If the core is exposed, subsequent statues prayed to will increase the core's exposure time.
<
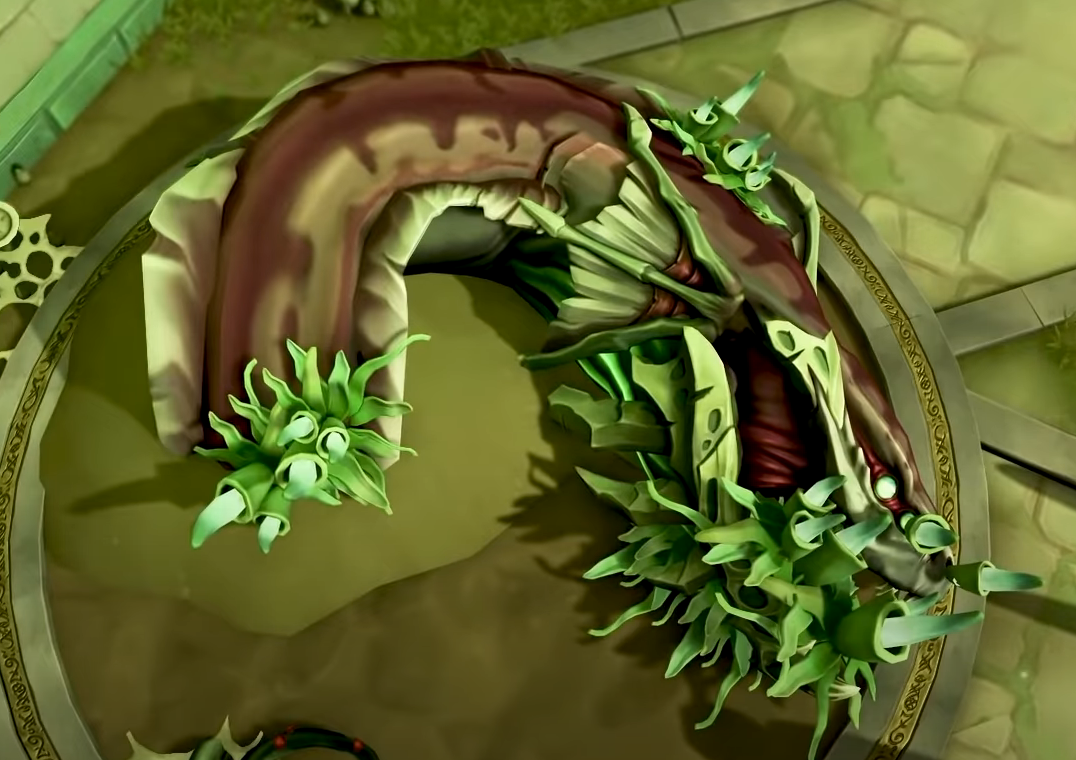
Exposed Core
⬥ Croesus's core will be revealed as one of four skilling nodes. Gathering from the core will damage Croesus per XP drop based on the player's level in the relevant stat.
⬥ Assuming all monster corpses are depleted, damage dealt to the core will be [Current Level] * 15. If no corpses are depleted, damage dealt will simply be equal to the player's current level in the relevant stat. Stat boosts in the relevant skill will increase damage dealt.
• If a fungal stew for the corresponding skill is used, damage dealt will be increased by 50%.
<
Core Particles
While gathering from Croesus's core, spores will occasionally spawn from its base. Clicking the core again while they are present will have the following effects based on their color:
⬥ White: Deals an extra 500 poison damage.
⬥ Green: Deals an extra 1,000 poison damage.
⬥ Red: Heals the boss for 2,500 LP.
<
<
<
The Fight
Woodcutting Node - Araxyte

Mining Node - Giant Mole
Fishing Node - Crassian Leviathan
Hunter Node - Dagganoth Rex
Strategy
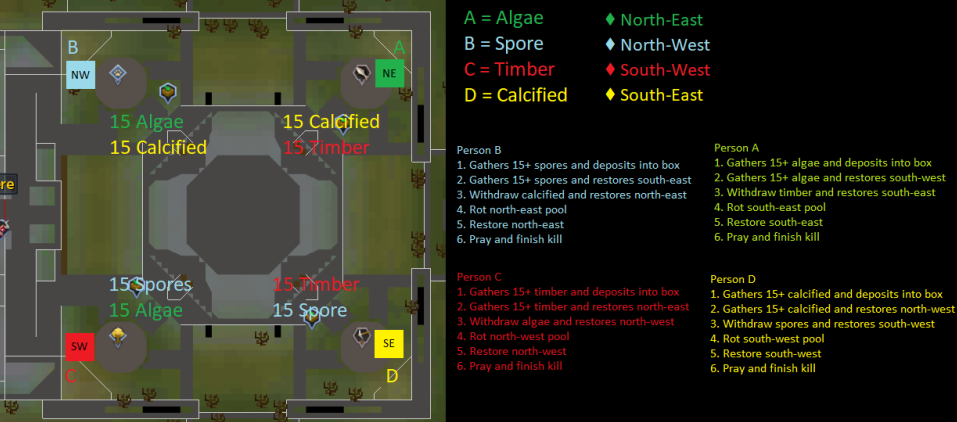
The current 4-man method seeks to maximize contribution points (>419, which gives the maximum loot rolls of 12) while maintaining kill times of around 6:30. All 4 statues are restored and the team waits until Energy Fungus spawns in the middle for a second time. After clearing it, all 4 statues are prayed to simultaneously to expose the core for its maximum duration, letting the team kill it in one cycle.
⬥ If a player is lagging behind, the kill can be completed by restoring 3 statues, at the expense of the contribution points of the lagging player.
Gathering
The Hunter initiates the encounter. Players will first gather all the resources needed to restore the statues.
⬥ At the start of the fight, players can start by using Bladed Dive (with Surge if needed) to arrive at their glowing node as fast as possible.
⬥ When Croesus fires Spore Bomb attacks, it wil check players' positions just before the bomb erupts. Reposition as needed when Croesus bends down. Not placing Spore Bombs at glowing nodes is the most important part of efficient gathering.
⬥ Players can utilise Escape  or Bladed Dive or both to place the bomb with little disruption to their gathering.
⬥ Use Crystal Mask and stand still during Slime Mould to not disrupt your gathering.
⬥ Try to always have Crystal Mask active as a safeguard.
⬥ Players first gathers 16 resources and deposits them at the base of the statue nearby. Ideally this is done as Croesus drops the first Slime Mould.
⬥ Use Anticipate or Freedom before the Hard Fungus lands when gathering. This does not disrupt gathering.
⬥ Players can save ticks by preparing to Bladed Dive between changing glowing nodes. Nodes can change every other attack starting from the first Fairy Ring.
⬥ Equip your Orthen Furnace Core or Sana's Fyrtorch before the Sticky Fungus attack and prepare to click under yourself.
⬥ Once having depleted the corpse and secured the second batch of 16 resources, players should start running.
Running (2-1)
⬥ Players should contribute their first batch of 15 resources to the statue after running anticlockwise twice from their original node.
⬥ Before crossing the Northern and Southern mushroom walls, especially if crossing behind another player, ensure you have Crystal Mask active. Attacks in the mushroom field, particularly Slime Moulds, are hard to avoid.
⬥ When crossing the mushroom walls, click on the next glowing mushroom once when you see your character begin to cross the current mushroom as shown below. Excessive clicking on a mushroom cause your character to cross back.
⬥ When crossing the minefields, use Bladed Dive followed by Surge as shown below.
• Clearing the mushroom field correctly is the most important part of running, as you can easily lose more than 1 resource if not careful, resulting in the need to regather from your original node.
• Precisely aim your Bladed Dive and only click once. Avoid spam clicking to prevent unwanted running.
• You may wait for a second before Surging to ensure your character is facing the correct direction.
• Crystal Mask does NOT prevent your stats being drained or your resources from being rotted if you accidentally touch the muchrooms.
• It is possible to do this in 1 tick once confident enough.
⬥ After your first contribution, withdraw the resources beside the statue, cross anticlockwise once more, and contribute them to the statue in your ending quardrant.
Mid
⬥ Clearing the Energy Fungus is the most important part of having a good contribution score, ensure you do not miss either if you do not want to lose out on drops.
⬥ Pay attention to the timer as you will need to clear the Energy Fungus in the middle at about 2:23.
⬥ It is recommended to make your way to mid shortly after the second Hard Fungus fall.
⬥ If the timer is 2:10 or more, do not cross mushroom walls, proceed to the mid and wait.
⬥ If you have just finished crossing a quardrant and need to rush to the middle, you utilise the Bladed Dive and Surge combo shown below.
⬥ Once at mid, equip your Orthen Furnace Core or Sana's Fyrtorch before the Sticky Fungus attack and prepare to click under yourself.
Rot and restoration
⬥ After mid, proceed to gather from guard corpses in your current quardrant and rot all resources in your inventory until you have 10.
• A quick way to get back to the guard corpses is to utilise the Escape and Bladed Dive combo shown below.
⬥ Have hotkeys to rot the fungus as doing so will not interrupt any action.
• It is not recommended to do this during movement as the rotting animation stalls the running animation, which may make it hard to determine the position of your character.
• Rot losslessly as your gather so that you do not waste time gathering more than 10 fungus.
⬥ After rotting, proceed to equip artificer's measure and start restoring the statue. Dodge attacks by moving around the statue.
• All statues can be Surged through to avoid attacks as shown below.
⬩ The mining and fishing statues can be surged through from both sides
⬩ The hunter and woodcutting statues can only be surged through from one side.
⬥ Be wary of Spore Bombs and keep in mind they are 3x3, as their visual display may be obstructed by the staircase.
⬥ You can losslesssly equip your Luck Ring  during restoration.
⬥ Using defensives will only interrupt restoration for 1 tick, you do not need to click on the statue again after using them.
Prayer and DPS
⬥ After restoration, pray until there's 2-3 prayers left and click off the statue.
• Click off the statue early as your character will pray one more time before leaving the statue.
• Dodge attacks until about 4:55 seconds and proceed to mid for the second Energy Fungus attacks.
⬥ After the second mid, you may Bladed Dive back to the statue to quickly finish prayer, then use Escape and click the core to start DPSing.
⬥ Zoom in on the core and click on the white and green spores to increase your contribution score.
⬥ Check that your stat used to damage the core is not reduced. Use Restores  if they are.