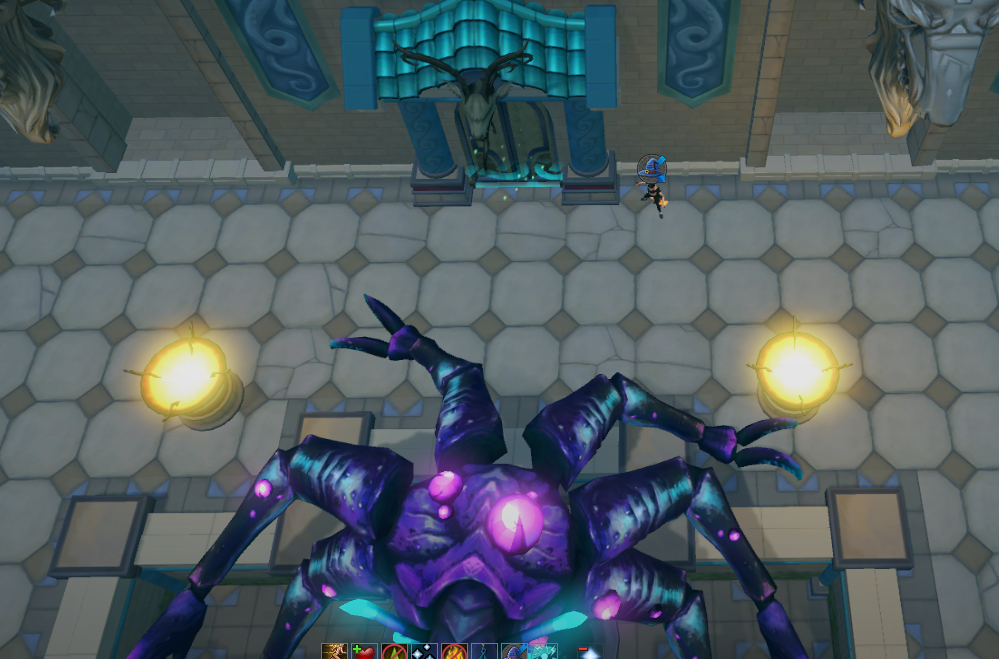
Ranged ED1
Temple of Aminishi (Ranged Advanced)

Introduction
The Temple of Aminishi, is the first Elite Dungeon, a 1-3 player combat/narrative experience that rewards unique loot, such as Ancient Scales  to make the Elite Sirenic
  armour, aswell as Dungeoneering experience and tokens
  .
.
The Temple of Aminishi is located on the island of Aminishi and requires completion of Impressing the Locals to access, additionally, the grouping system is required in order to form a team of 2-3 players.
Each solo run of ED1 is worth  18,839,938 in Ancient Scales. Advanced players can get up to 5 kph with ranged, earning on average 94,199,688 gp/hr.
General Notes
⬥ The rotations listed for the bosses are for an advanced setup, lower tiered set-ups will require improvisation.
⬥ It's recommended to set your anti-spam delay for your Double Surge  to 1 via the Lectern at Anachronia.
⬥ You can Surge or Bladed Dive  a tick before each gate unlocks to save a tick on every entry.
⬥  Luck of the Dwarves will not improve the number of scales dropped.
Presets and Relics
Notes
⬥ You may be required to re-load your preset before Masuta during the dungeon, this is due to Masuta's extremely hard hitting attacks and the intention of camping Soul Split  for your Eldritch Crossbow

⬥ 
Mobile perk is required.
⬥ Use Heightened senses  , Berserkers fury
  and Font of life
• The rotations written down in the guide assume that you're able to use both Heightened senses and Berserkers fury
⬥  with Dark Bow
⬥  with Eldritch Crossbow
⬥  with Seren Godbow
Note: Bring more food if you don't have an Essence of Finality with the Eldritch Crossbow stored
Section 1
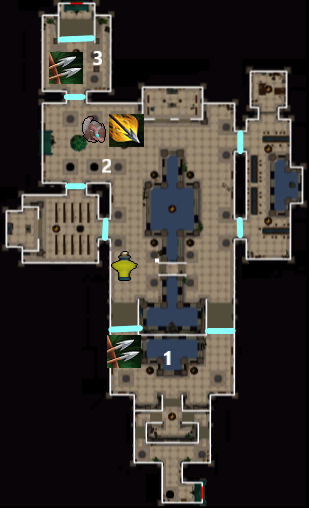
Room 1
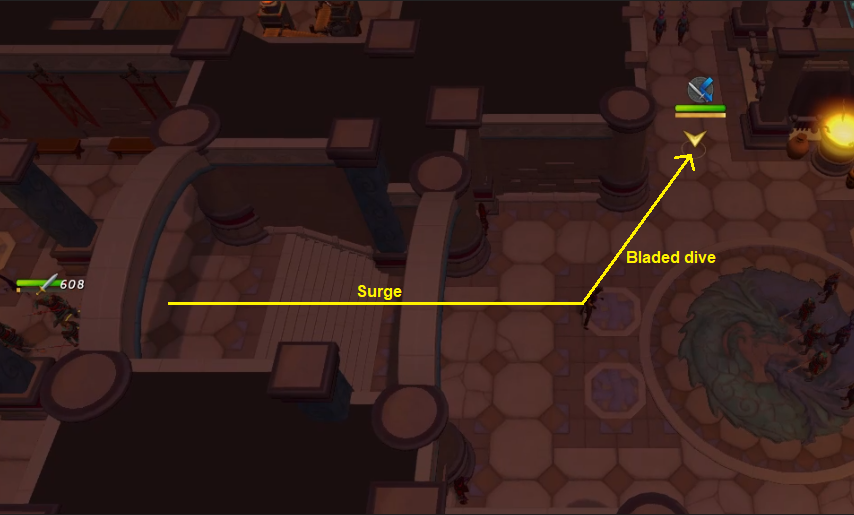
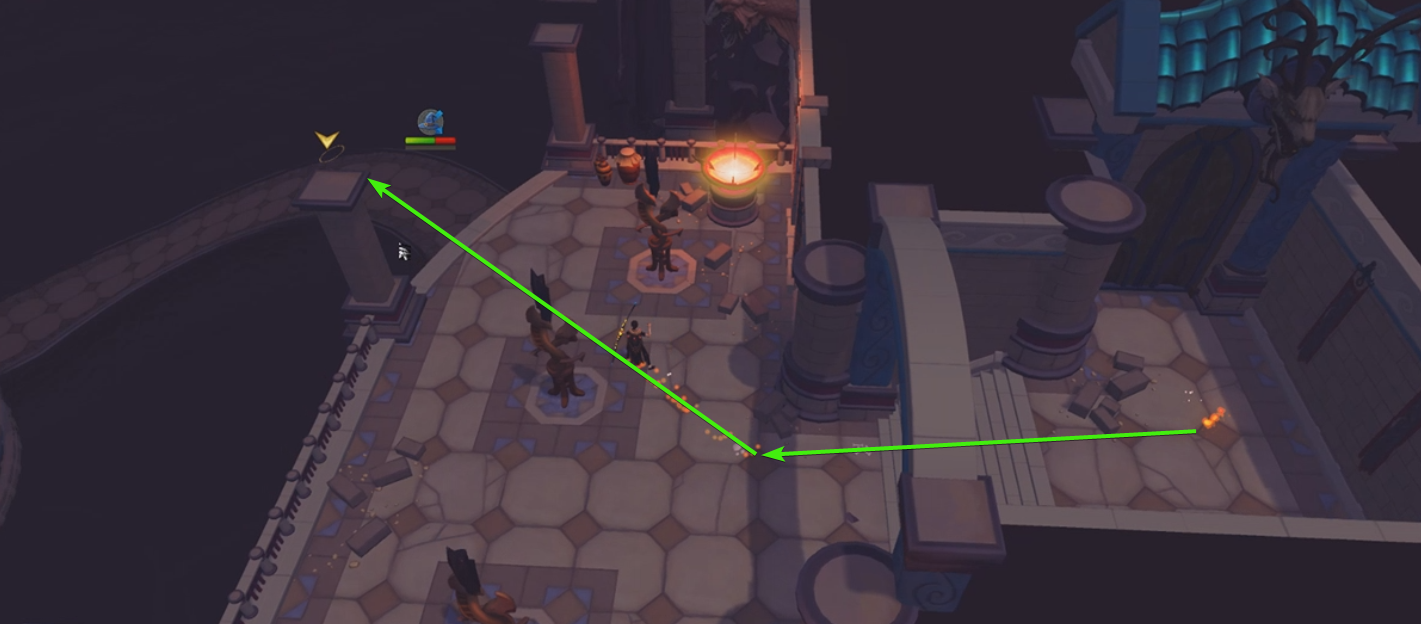
⬥ Surge Bladed Dive as shown in the picture:
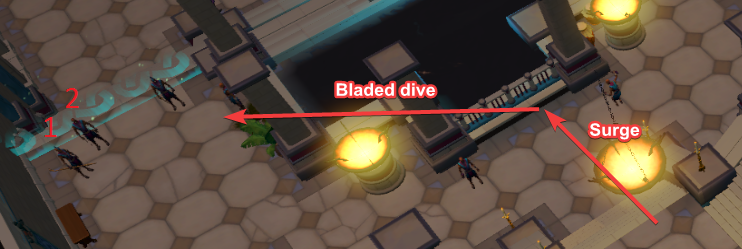
⬥ After Bladed Dive stay in place until Sotapanna #2 moves 1 tile west, then walk 2 tiles east from the Bladed Dive spot.
• If done just in time then Sotapanna #1 will be middle target for Chinning  , #2 if late.
• If lured correctly, they should stand as shown in the picture:
• While waiting, use Corruption Shot  on any Sotapanna (ideally with Target Cycle to avoid moving in case of missclick) then
  →
→  on middle sotapanna and (tc)
  to check if any of them survived.
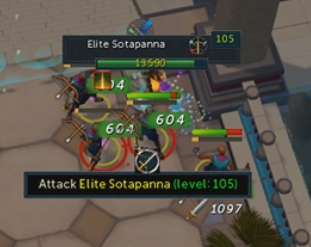
Room 2
⬥ After opening the gate, get a target on any of the 3 Sotapannas behind it and get to 100% adren.
⬥  → to wall with 9 sotapannas and use Incendiary Shot
  and click under yourself to stall it, then equip → release on any mob roughly in the middle of the pack, followed by →
  .
.
• This should kill all of the 9 sotapannas.
Room 3
⬥ Bladed Dive and walk to middle of the next gate and target the middle of the 3 sakadagami, wait to release your non-combat spell with 2H then Greater Ricochet  and run west for 1 tick
⬥ Run back east (this should lure them together) → equip →  →
→  → . Finish with basics if needed and continue to next section.
Note: If you're not using a 2H switch, then you must run 3 tiles west from where you used Greater Ricochet to lure them.
Section 2
Room 1
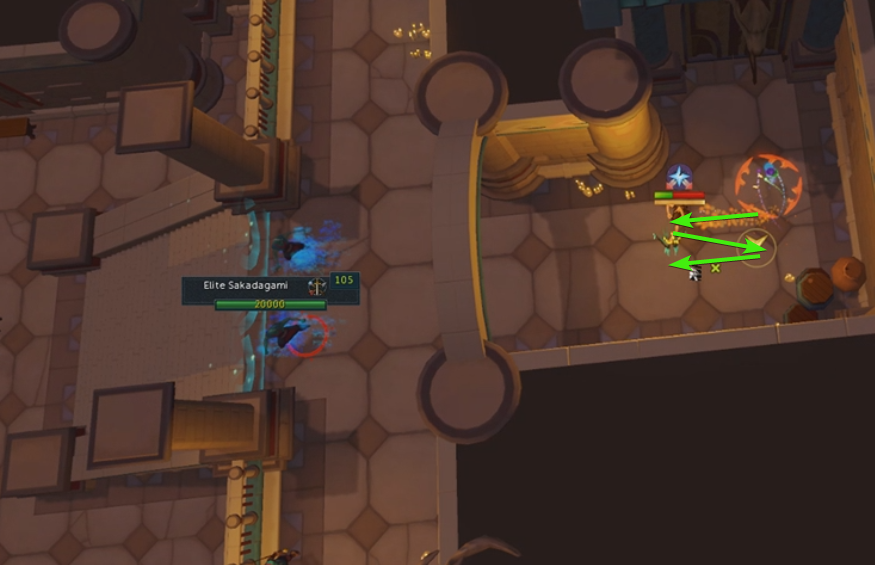
⬥ In the next room use Anticipation  immediately and start running around corner, then Surge during GCD and Greater Ricochet the Sakadagami targeted in picture with a long range weapon:

⬥ After you release Greater Ricochet , run 3 tiles north and use → equip →  → → (tc) → (tc) eastern Sakadagami +
  . Finish off the remaining mobs with good basics.
• Make sure to end on high adrenaline.
Room 2
⬥ Stand in the corner as shown here:
⬥ Target one of the Sakadagamis, equip → → → (tc)  .
.
⬥ Continue to the last gate before Sanctum while building on Anagamis and Arhats.
⬥ As you walk onto the last path with Sakadagamis, → equip → stall on middle Sakadagami. Wait to run into distance and once your character releases Snap Shot , use → → → .
⬥ Finish with good basics if needed.
Room 3
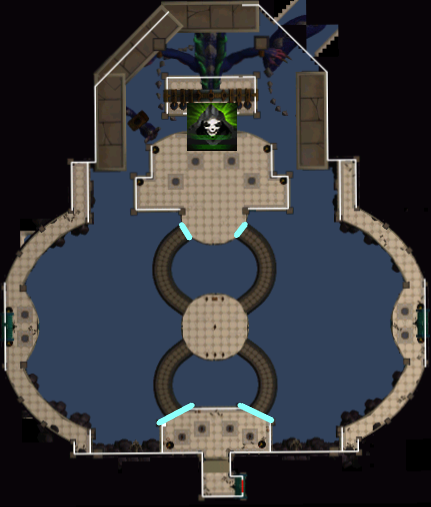
⬥ Build to 100% on Anagamis and Arhats, use Bladed Dive Surge to the south wall of Sanctum's arena, then run to spot shown in picture below (or mirrored if you chose other side):
⬥ This should block all Arhats and Anagamis behind Sanctum.
• You should wait here until they have all stopped moving before dodging Sanctum's attacks.
Sanctum Guardian

The first boss of the Temple of Aminishi follows a straightforward attack pattern containing highly damaging attacks which are capable of KOing someone unprepared.
Once learned, this boss will essentially become a DPS dummy in where your killtime is reflective of your capability to deal raw damage. Stand south of the boss, otherwise Arhats/Anagami will aggro you and AoEs will not work ( ,
,  ,
,  ).
).
Drops
⬥  Fishy treat
• Rare drop
⬥  Onyx dust
• Common drop, 1-34 dropped per kill
 damage.
  as soon as you see this mechanic as it is very fast. You can also
  or
or  to reduce the damage if need be, although these are less efficient.
Strategy
Crossbows 
on south edge of Sanctum's "pool" 
 → auto → → → → → → → → → → → → → → → → → → → improvise until dead
Bows 
on south edge of Sanctum's "pool" → → → → → → → → → → → → → → → →  → → → → improvise until dead
⬥ Skip the first if unlucky on adrenaline.
⬥  the first water special and tank /
  second. Use
  whenever off cooldown.
⬥ Camp  /
/ .
.
⬥ Make sure to equip Ruby bolts  or for your .
Section 3
Room 1
⬥ Run South → East, then South again and Surge after you go around corner.
⬥ Keep running south and Surge Bladed Dive around corner as soon as you can Surge again.
⬥ Run towards the bridge with 2 Zealots, throw a Sticky Bomb  under them, equip → → → → finish off with basics.
Room 2
⬥ After killing the 2 zealots, continue South over the bridge, then East and Surge as soon as you go around corner, keep running and Bladed Dive Surge south after going around next corner.
⬥ Equip Mechanised Chinchompas and use → → to kill the 3 Zealots.
Room 3
⬥ Acceleration Powerburst to get around the lake area (take North route).
• Face north → → → → →
⬥ Use auto + → to kill the Zealot guarding the gate.
Room 4
⬥ Surge east and run towards the next gate with 3 zealots.
⬥ Bladed Dive diagonally across the bridge:
⬥ Using Mechanised Chinchompas kill the 3 Zealots with → while targetting the middle one
• Try to stand South, next to Northern most Zealot to be able to Surge instantly onto stairs after killing them.
Note: If you attack one of them before the others can see you, they will walk away from each other and you won't be able to them.
Room 5
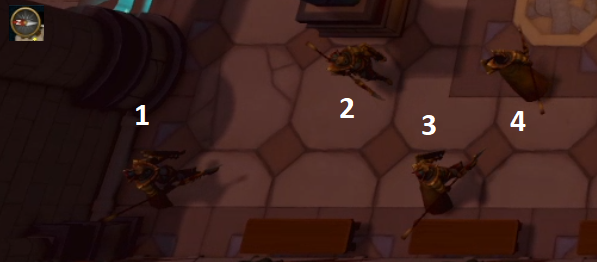
⬥ Use a defensive ability, then bladed Dive on the spot shown in the picture and target the underlined Zealot:
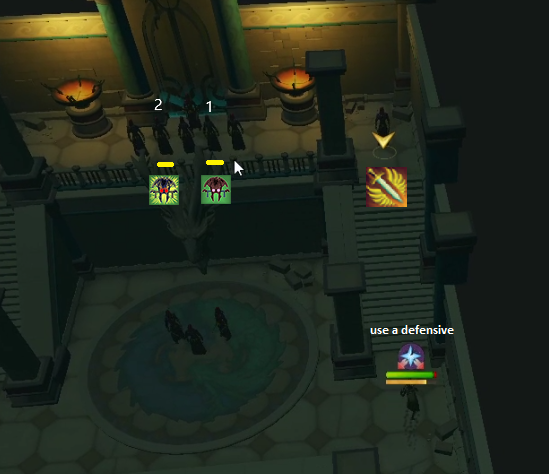
⬥ Equip , tag Zealot 1 and use  → .
→ .
⬥ Tag Zealot 2 and use  → →
→ →
Example:
Section 4
Room 1
⬥ Use Greater Ricochet with a long range weapon (2H) on one of the 2 Sakadagamis, then step 2 tiles south, 1 tile west and manually run 2 tiles back towards them.
• Don't get pulled in by using an ability, otherwise the 2 Sotapannas to west will start attacking you.
⬥ Equip Mechanised Chinchompas and kill them with → → →
• Using stuns on them will delay their stuns.
Note: You can choose to instead (if you have enough adrenaline).
Room 2
⬥ Sticky Bomb the 2 Eastern Mercenaries, equip Mechanised Chinchompas , then → → → → finish with basics. Surge Bladed Dive north and stand on any of the tiles shown on picture:
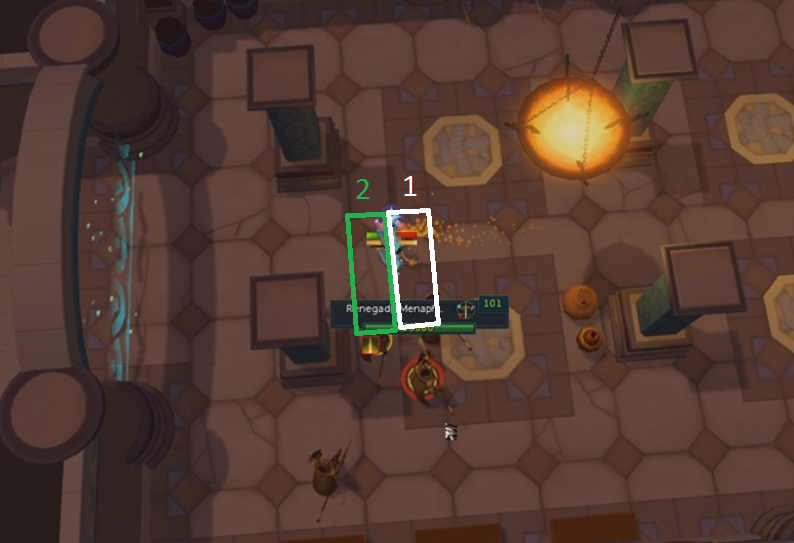
⬥ If standing in white outline(1), target Menaphite Soldier #3.
⬥ If in green outline(2), target Menaphite Soldier #2 or #3.
• Make sure to not walk into them because this can mess up the lure. You can always walk East, as long as none of them are bound or stunned.
⬥ Use → → → finish with basics if needed.
Room 3
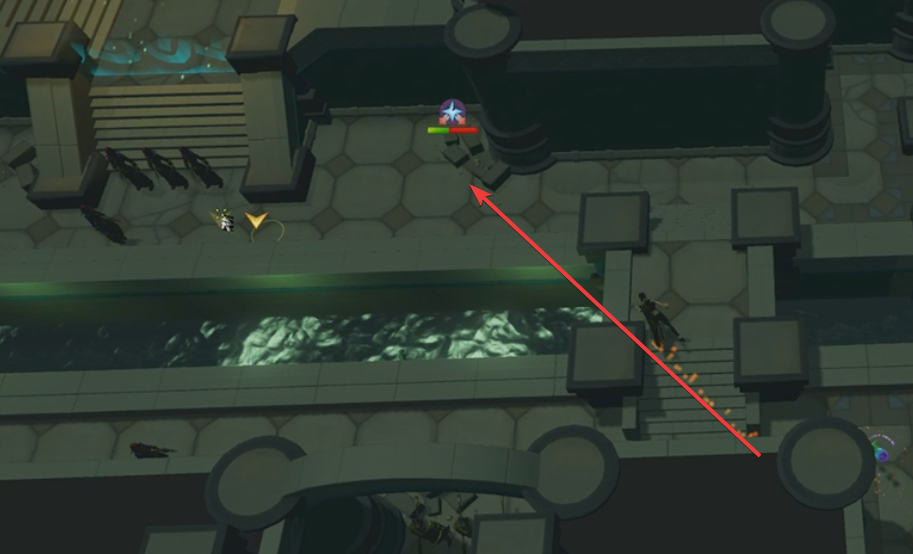
⬥ Surge Bladed Dive towards the west gate as shown in the picture:
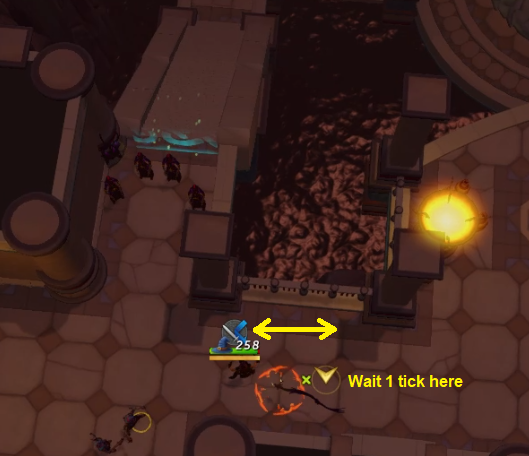
⬥ Stand on the spot shown in the picture, run 2 tiles west, wait 1 tick and go back:
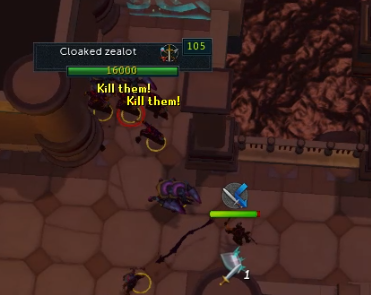
⬥ Target the zealot shown in this picture:
⬥ Equip → → → → → finish with basics
• Build to 100% if not already, Surge towards the chest and bank.
⬥ After banking step east so you are looking into Masuta's arena, use any defensive and onto stairs to Masuta.
Masuta, the Ascended
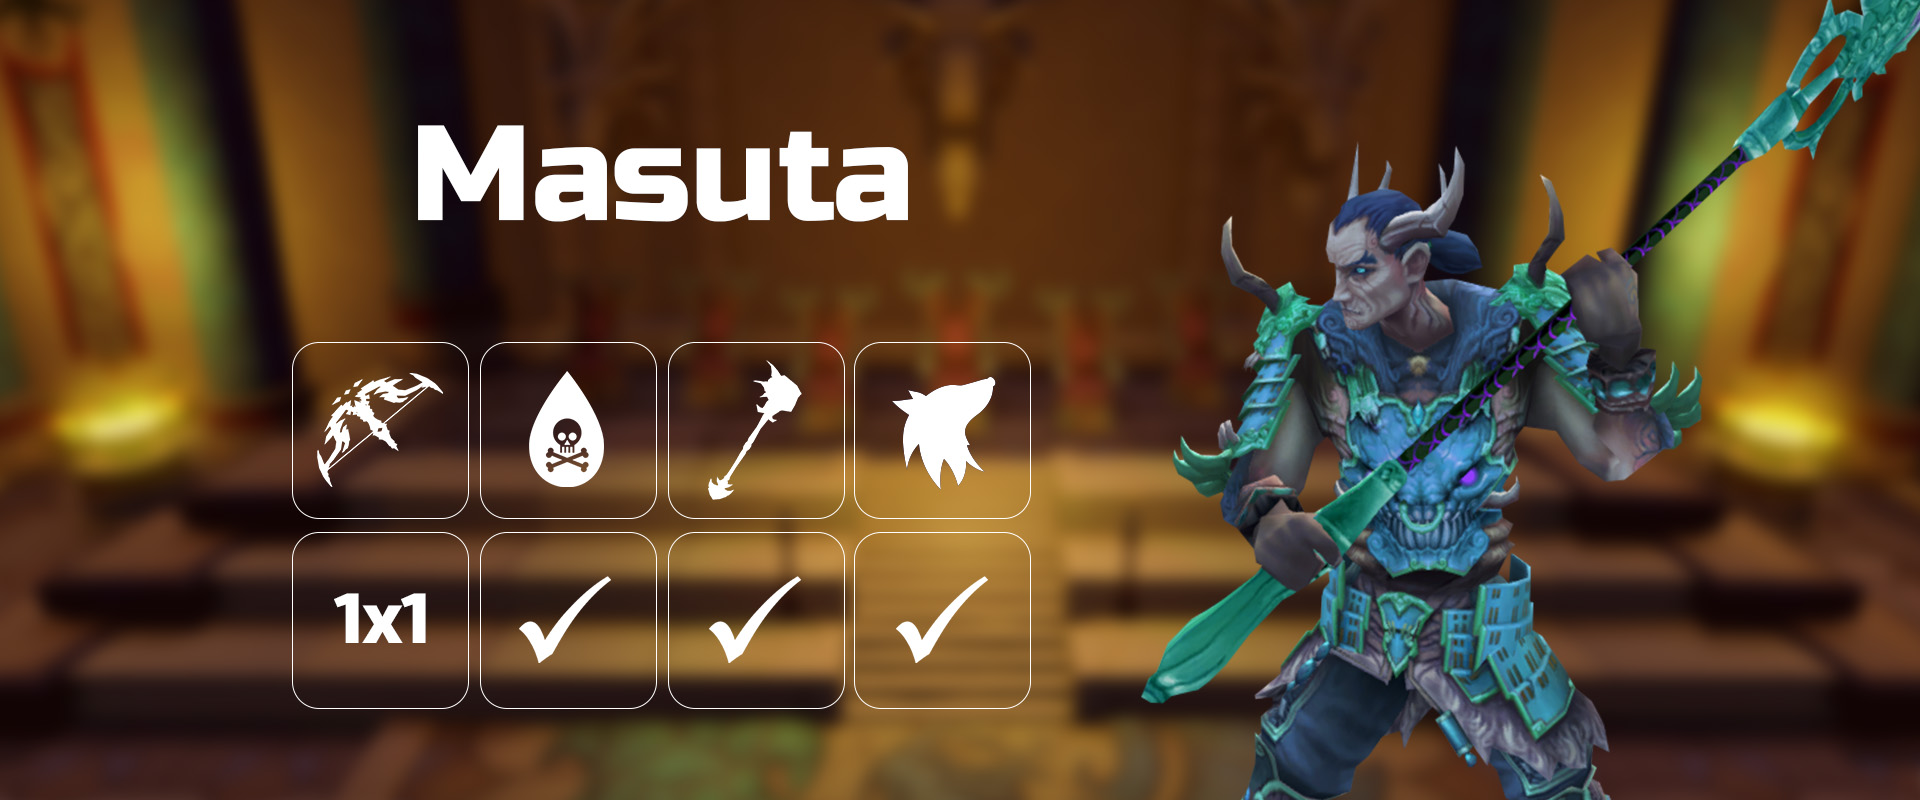
Masuta, the second boss of the dungeon, keeps true to the dungeon's theme of heavy damage dealt and high KO potential. Using a variety of hard-hitting mechanics and boasting attacks from all three combat styles, Masuta is a noticeable difficulty spike up from the first boss.
Drops
⬥ Onyx dust
• Common drop, 1-29 dropped per kill
⬥  Masuta's warspear
• Rare drop
Phase 1
⬥ Attack Rotation
Autoattacks → Hurricane → Autoattacks → Tsunami → repeat

 1 GCD after the attack starts, allowing you to deal damage in MD and nullifies most of the damage you take.
• If using ranged, you may kite Masuta and use
1 GCD after the attack starts, allowing you to deal damage in MD and nullifies most of the damage you take.
• If using ranged, you may kite Masuta and use  once he finishes spinning.
• It's possible to
once he finishes spinning.
• It's possible to  Masuta from the north side during this attack.
 hits.
⬩ This can be dealt with by using both
hits.
⬩ This can be dealt with by using both  hits.
hits.  • When a water is killed, players within a 2 tiles eceive a 5% Calm Waters buff.
  to sustain HP during this phase and
  → repeat, you will always be praying correctly.
Strategy
⬥ Start
Notes: This rotation requires the Heightened senses relic.
Crossbows
(tc) → → → → → → → → → → auto → → → → (walk under) → → → → → dump until Masuta phases.
Bows
(tc) → → → → → → → → → → auto → → → → (walk under) → → → → → dump until Masuta phases.
⬥ Start Notes
• At the start camp and swap to for 2 abilities after Ruby proc. If using arrows, camp .
• After camp and swap to once you have high adrenaline (around 70%+).
• If Masuta does late spin, use Surge to get far enough away to not have to leave your .
⬥ Thrashing Waters
• Note the time you phased on P1 and add 1min 08s to it, this will be when you use 
• Stand on the bottom edge of the south platform.
• Pray and heal off of Masuta with 
• Kill any geysers that can hit you.
• Push Masuta south using and
⬥ Final Phase
• 68s after phasing P1, camp /  (until used then switch to ) and use → → → build to → spam while improvising.
Kill Example
https://www.youtube.com/watch?v=agjfrQ5JfBo
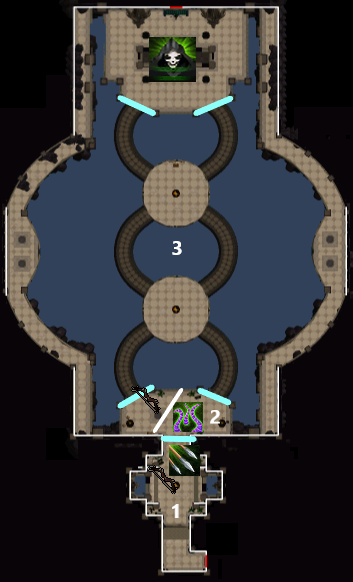
Section 5
Room 1
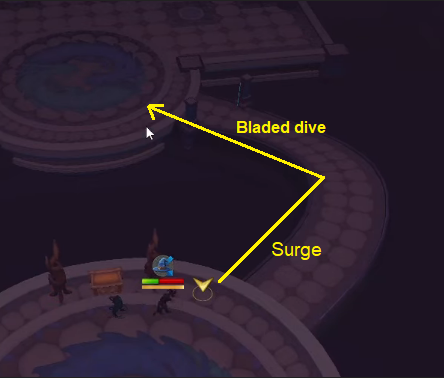
⬥ Use Surge Bladed Dive on minimap onto west stairs, (tc) middle Pylon + → after releasing → on either of the 2 south Pylons:
⬥ → the last Pylon (basics if not 100% adren), get to 88%+ with defensives on the remaining Pylons without attacking them.
⬥ Use and → to get behind Seiryu's head.
Seiryu, the Azure Serpent
To finish the dungeon, you need to free Seiryu by destroying the three black crystals on his shackles. This fight will challenge a player's ability to utilise the space they have in the arena to avoid a series of area-based mechanics.
Drops
⬥ Ancient scale
• Common drop, 4-110 dropped per kill
⬥  Chipped black stone crystal
• 1/300 base, 60 threshold
Note: The above is strictly for solo encounters.
Strategy
Note: Camp Hydrix bolts
Crossbows
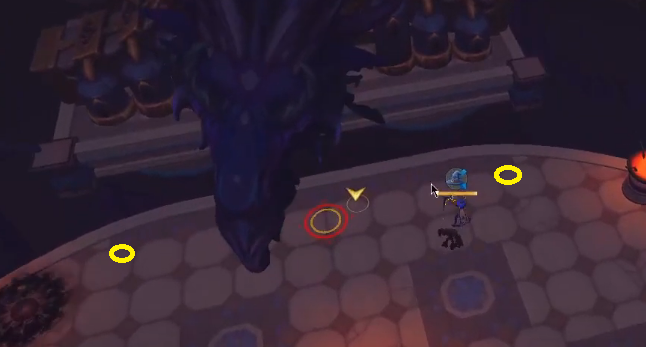
(tc) → → → → → → →  → → → → → → → → → → → improvise until phased → onto 1 of the yellow climb spots
Bows
(tc) + → → → → → → → → → → → → → → → → → → improvise until phased → onto 1 of the yellow climb spots
Phase 1 Notes
⬥ If using , place it further away from head (East / West) so you can dodge Seiryu's tendril attack without leaving Flank  range.
⬥ Lower HP to ~5k before Shadow Tendrils, only heal up to ~3k before each mage hit after Shadow Tendrils , camp mage prayer after to lower your HP even more (~1.5k).
• This is so that you can benefit from the Berserker's Fury relic power.
⬥ Make sure to end on 90%+ adren so that you don't have to rely on procs.
Crossbows
Crystal 1
Note: (Camp , swap to if you get a ruby proc)
Spam Target Cycle and → →  → → → → → → → auto → improvise if not dead.
Crystal 2
Note: Camp Hydrix bolts , use  for thresholds if needed
→ → → → → → → → improvise
Note: Improvise using → if you don't get procs. Make sure to be 110% adren before third crystal.
Crystal 3
Camp , swap to after you get a ruby proc. Make sure to have Vigour  equipped for every
→ 2 ticks after 2nd heal → (Place when cooldown ends) → → → → (wait 6t) → → ( only if you drank your late) →
1 Cycle Notes
⬥ Never Soul Split unless under to keep HP as low as possible.
⬥ Use to get to thresholds if low adrenaline.
⬥ Vigour for all Dark Bow specs .
⬥ If you are not using Heightened Senses , it is important to time your during properly for the 3rd Crystal, if it's late then you won't get enough adrenaline in time and if it's too early you will overboost.
• Ideally use it on the 6th tick of Rapid Fire .
Bows
Crystal 1
Note: Use to , otherwise use . Use for thresholds if needed.
Spam Target Cycle and → → x2 +  + → → → → → → → → with proc → → → → improvise as required
Crystal 2
→ → → → → → → → improvise
Crystal 3
→ 2 ticks after 2nd heal or immediately if early → (Place when cooldown ends) → → → → → → → Improvise
Example Runs
https://youtu.be/hoX9YddzNN0 - 9:41 example
https://youtu.be/vFYlzcfUnBo - 9:44 example
https://youtu.be/o1Y_R-GW_iE - 10:41 no grico example