Melee Telos
Melee Telos
Introduction
This guide assumes 250%+ and work best at 1000%+, but these rotations still work below 250% with some tweaks. Adjust accordingly from there - below 250%, these rotations can be loosely followed but after that, you definitely want to make sure you follow them.
An average kill at 2449% enrage is worth  9,097,371 in uniques alone. This assumes an estimated orb price of 56,436,529. Advanced players can get up to 14 kph, earning 127,363,189/hr.
Notable Enrage Checkpoints and Changes past 999%
⬥ 1000%: P4 one rock will fall, P5 multiple rocks will fall, immortality no longer works P5, and Telos will freedom stuns and binds with a 16 tick cooldown
⬥ 2000%: "So you think you can guard?" Achievement, aka Silver Warden
⬥ 2700%: Tendrils damage required caps at 30,000
⬥ 3300%: The first prayer drain on P3 will smite you from full unless Telos touches the beam
⬥ 4000%: Hard enrage cap; "The True Warden" Achievement, aka Gold Warden
Preset and Relics
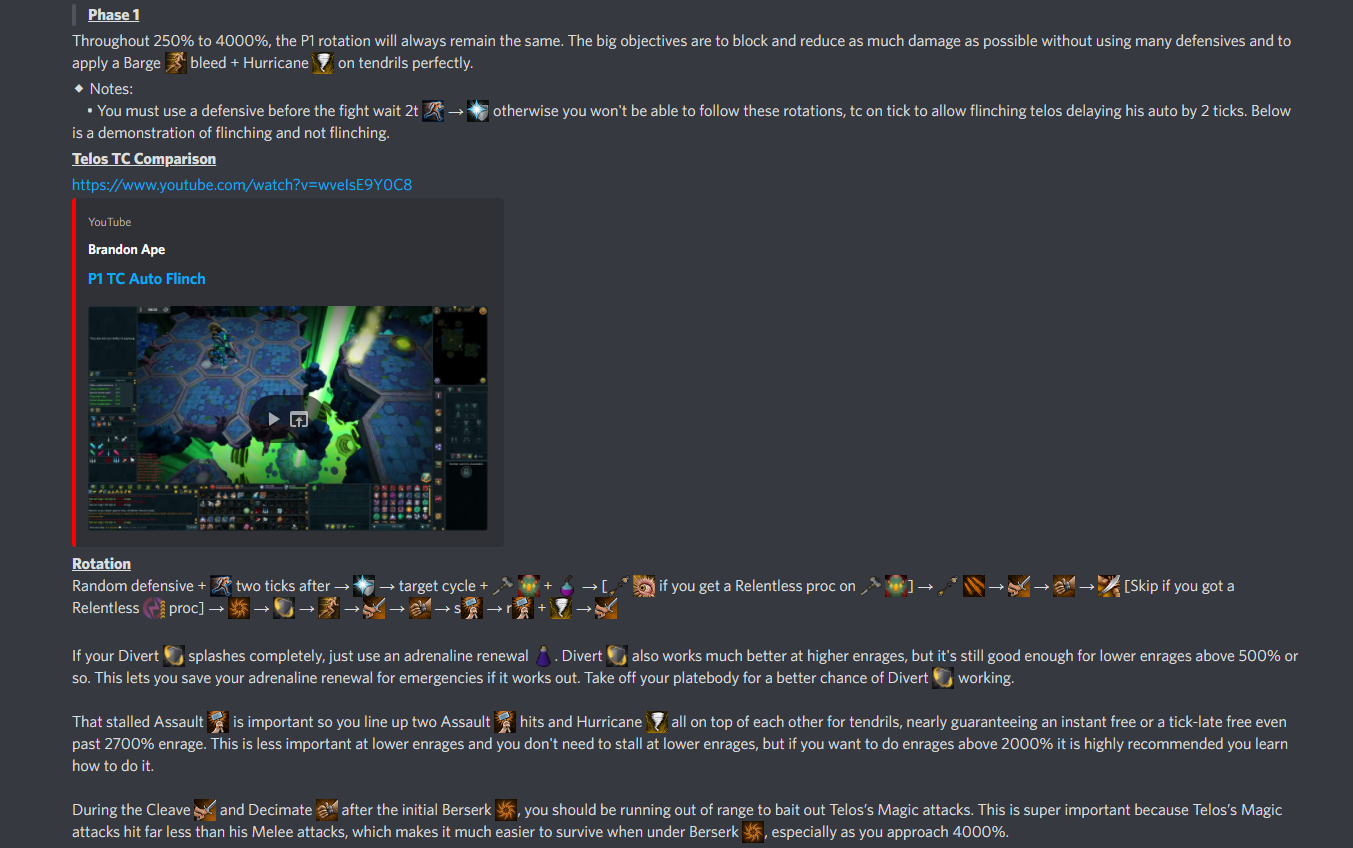
Phase 1
Note: these rotations depend upon proper P1 entry + Target Cycle (tc) timing; e.g. defensive → (wait 2t) → surge → defensive → tc tick. Use sample kills as a reference, or this video: https://youtu.be/wveIsE9Y0C8
⬥  → (wait 2t) →
  →
→  +
+  → (tc) +

 →
→  (
( ) →
) →  (
( ) →
) → 
 → s
→ s 
 →
→  → 3t
→ 3t  →
→  → → s
→ → s  → 1t
→ 1t 
 →
→ 

Phase 2
⬥  →
→  → 5t auto
  → turn and surge →
  → → →
→ → → 
Phase 3
⬥ → → 5t auto  → → → → → → s → click telos
  1t later
Phase 4
The goal here is to phase Telos into each font before he can fire off any special attacks, so rocks are completely skipped. For help using , refer to Sticky Bomb Guide for Phase 4/5 below.
Drop
⬥ → → → to font
Font 1
⬥  →
→ 
 →
→  →
→  → →
→ →  →
→  → wait 2t → stall for 1t in font → →
Font 2
⬥  → → →
→ → →  → →
→ →  → →
→ →  → → /
→ → /  → 3t → →
Font 3
⬥ tc → → → → → s → →
Phase 5
Note: for more information on timing & moving efficiently throughout P5, read: #P5 Movement & Timing
 should be equipped. Ensure
  and
and  are active to start the phase. Since prioritizes Telos's magic attack, this prevents a KO from both Telos & the golems.
(wait 2t) → → +  → + click →
  ( after if volc) →
  →
→  →
→  → →
→ →  → → → → improvise
Note: Kite golems with as needed to finish kill.
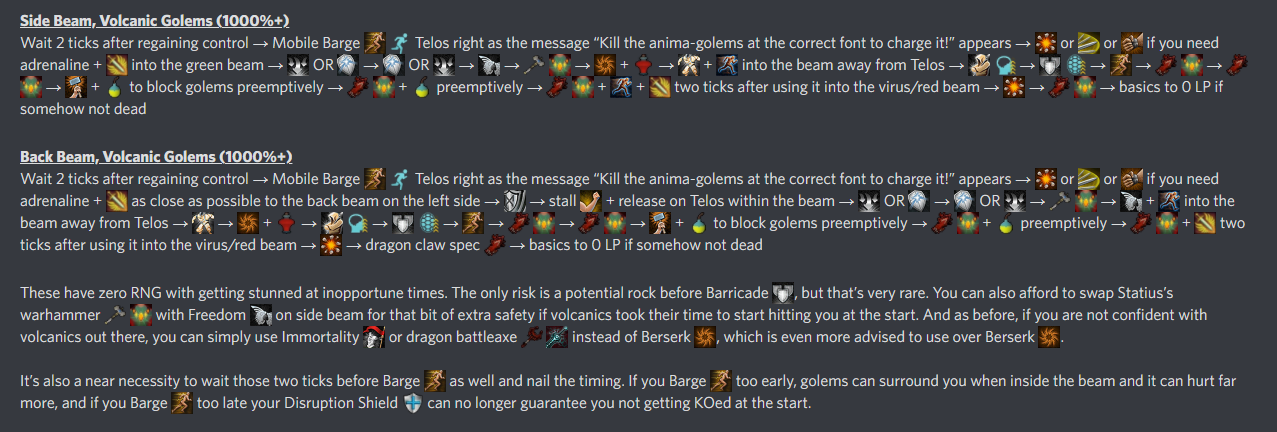
Note: It’s also a near necessity to wait those two ticks before and nail the timing. If you Dive too early, golems can surround you when inside the beam and it can hurt far more, and if you Dive too late your Disruption Shield can no longer guarantee you not getting KOed at the start.
Sticky Bomb Guide for Phase 4/5
Phase 4 General Notes
⬥ Sticky bombs take 3 ticks to land when thrown, and creates a 3x3 area that will make bindable/stunnable enemies get stuck.
⬥ Phase Telos to hp cap then run into the appropriate font.
⬥ Once font is depleted click on sticky bomb and use the right click option on middle golem. Don't drop sticky yet.
• Throw the first sticky bomb when you get the popup message You dare defy me?
• Throw the second sticky bomb directly beyond the first sticky bomb when you get the popup message Telos is preparing to fire an anima bomb!
⬥ When you barge and start damaging Telos, put yourself in a direct line beyond the minions and the sticky bombs so they stay in line and run into the next sticky bomb rather than dispersing and running around the bomb.
Note: there are pre-barge and non pre-barge strategies to damage Telos between fonts. This section will have examples showing pre-barge.
Font 1
⬥ Starting in the font, you will place sticky bombs as shown, then simply barge Telos and do damage until he reaches the next hp cap to trigger the 2nd font.
 ⬥ Font 1 sticky bomb example:
Font 2
⬥ Starting at the red circle drawn in this picture, you will run down to the corner near the font and do a couple defensives while waiting to enter the font. Once minions stack up near you, you can enter the font and they will be nicely stacked 2-3 golems wide. Rushing into the font can cause golems to be 4 units wide which makes it so one of them cannot be trapped by a sticky bomb.
 ⬥ Font 2 sticky bomb example:
Note: The player did a faster font 2 method where they went straight into the font, then ran out to the waiting spot to line up minions, and then back in. The safest way is to go directly to the wait spot and let minions stack there.
Font 3
⬥ The safest strategy for font 3 is to utilize the wrap-around method, so starting at the red circle drawn in this picture, you will follow the pathing of the red arrows and throw a sticky bomb.
⬥ Starting at the red circle in this picture, damage Telos until he reaches 37,500 hp, then throw a sticky bomb and follow the pathing indicated in this picture:
 • The sticky bomb here makes it so the golems get stuck and cannot hit you while you wait for the font 3 golems to line up in front of you.
⬥ Hug the right-hand wall of the giant anima pool in that picture and wait for font 3 golems to get in front of you, then bladed dive behind the last golem in line.
• After you bladed dive, Target Cycle Ingenuity of the Humans  Entangle
  (either via borrowed power or spellbook swap) the last golem in line, then enter the third font. The minions should be stuck there long enough for you to finish Phase 4.
⬥ Font 3 Wrap around method:
Phase 5 General Notes
⬥ The timing for sticky bombs on Phase 5 are as follows:
• Sticky #1: when you bleed assault
• Sticky #2: when you do your 3rd claw special (2nd to last ability before changing beams/clearing virus)
⬥ If Telos still has a good amount of hp left when you clear virus, keep throwing sticky bombs between where you are and where minions will be running to in order to permanently have them stuck while you finish the phase.
Backbeam Green
⬥ You want to throw the sticky bomb to the side of Telos before using the last claws ability.
⬥ You want to bladed dive to the appropriate side beam during the global cooldown after your last claws special attack.
• Bladed diving 2 ticks after activating your last claws special attack lets you fully channel the special attack, and will allow you to immediately use your next ability rather than being stuck waiting for the global cooldown to finish.
⬥ Back beam to side beam example with red virus:
Sidebeam Green With Either Back or Opposite Side Beam Virus
• If you are confident in yourself you can wait to see what virus you got and decide to skip one of the bombs depending on whether you need to go to back beam or side beam, but it is good practice to do both bombs to be safe.
⬥ Side beam to back beam example:
Old Rotations
⬥ Rotations do not include Granite maul EoF  , EZK EoF
  , Jaws of the abyss or Igneous Kal-Ket
Phase 1, Youtube link from screenshot
Example Kills
⬥ https://www.youtube.com/watch?v=8yaUbk4zXBM
Older Examples:
⬥ 3:28** - https://youtu.be/N2eim0LS74M
⬥ 3:33 with EZK P1** - https://youtu.be/RtXeh6V3l4c